|
by kirupa |
7 August 2007
In the previous
page, you learned how to open a single file. In this page, let's learn how
to open multiple files.
You can tailor your Open File dialog window to actually select
multiple files if needed. The following code shows you how:
- private void
WindowLauncher(object
sender, RoutedEventArgs
e)
- {
- OpenFileDialog
ofd = new
OpenFileDialog();
- ofd.Multiselect
= true;
-
- if (ofd.ShowDialog()
== true)
- {
- string[]
filePath =
ofd.FileNames;
- string[]
safeFilePath =
ofd.SafeFileNames;
- }
- }
There are only two main changes when you want to select multiple files. The
first change is that you need to set your OpenFileDialog object's
Multiselect property to true:
- ofd.Multiselect
= true;
With Multiselect set to true, you are now able to select multiple files. With
multiple files, though, you cannot store the data in a single string variable
like you did for the single file case earlier. This brings us to our next change
where the values returned by your dialog window are stored in an array:
- string[]
filePath =
ofd.FileNames;
- string[]
safeFilePath =
ofd.SafeFileNames;
Notice that both filePath and safeFilePath now store an array of strings.
Also, instead of using FileName and SafeFileName to store the full path and file
name, you use the plural form - FileNames and
SafeFileNames.
Another cool Open File dialog window is learning how to filter the files
you see based on the file extension. Right now, your application doesn't filter
based on any extensions:
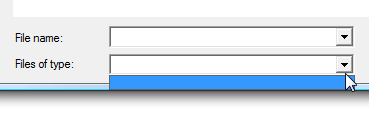
[ currently you are not filtering by extensions ]
To filter by file extensions, you use your OpenFileDialog's aptly named
Filter property:
- private
void
WindowLauncher(object
sender, RoutedEventArgs e)
- {
- OpenFileDialog
ofd
= new
OpenFileDialog();
- ofd.Multiselect
=
true;
-
- ofd.Filter
=
"Data Sources (*.txt, *.xml)|*.txt*;*.xml|All
Files|*.*";
-
- if
(ofd.ShowDialog()
==
true)
- {
- string[]
filePath
=
ofd.FileNames;
- string[]
safeFilePath
=
ofd.SafeFileNames;
- }
- }
When you run your application this time, notice that you can now filter based
on Data Sources and All Files:
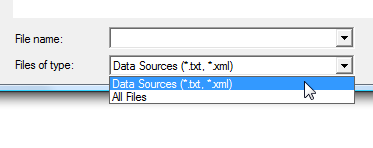
[ you now filter by Files of type ]
To specify your own filters, you need to provide the filter's description and
the extension. The syntax you use to you specify the filter is a little weird,
so let's look at the approach I used to specify my Data Sources and All Files
filters:
- ofd.Filter
= "Data
Sources (*.txt, *.xml)|*.txt*;*.xml|All Files|*.*";
The basic format is Description 1|*.ext1;*.ext2|Description
2|*.ext1;*.ext2" You separate the description and the extension(s) using
the | character. If you are using multiple extensions, you separate each of them using a
semicolon, and note that each extension must be preceded by the * wildcard character.
In the
next page, let's look at some issues associated with our
approach when using Windows Vista.
Onwards to the
next page!
|


