
Have questions? Discuss this HTML tutorial with others on the forums.
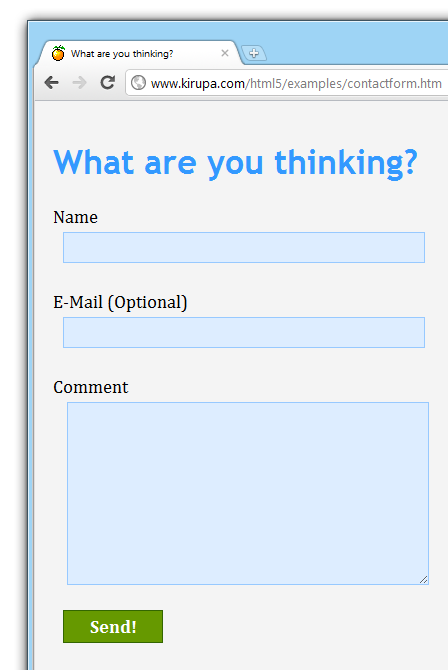
One of the easiest ways to get people to contact you is by creating a contact form. If you haven't used a contact form in a while, click on the screenshot below to try mine out:
[ go ahead - try it out! ]
By the end of this tutorial, you will have learned how to create a simple contact form (just like the one you see above) that uses a little bit of PHP to send the form's data directly to your e-mail address.
Before we start diving into the HTML, CSS, and PHP to create the contact form, let's look at a high level how data from your form finds its way into your e-mail inbox.
The following diagram should help set the stage:
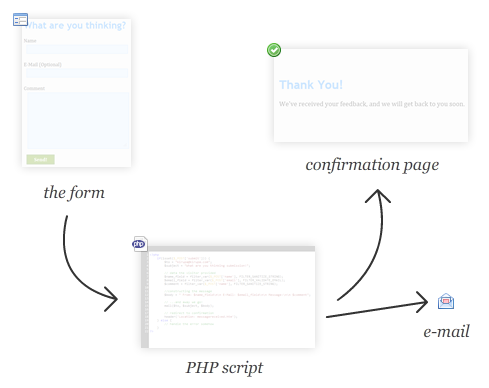
You basically have three files: the form, PHP script, confirmation page. Someone fills out the form and hits Send. When the Send button is hit, the data from your form is transmitted to a PHP script, and this script formats the data in a way that can be mailed. Once your data has been mailed, the PHP script loads a confirmation page letting the form submitter know that the data has been sent.
That's all there is to it, but let's go a little bit deeper. The form contains the various UI elements that you use to capture and submit the data - the textboxes, textarea, and send button:
When you press the send button, your data goes to a PHP script that lives in its own page:

This script that takes care of processing your data and e-mailing it to you. This script also contains some logic for displaying a confirmation page once your form data gets sent:

In the next few sections, you will create and populate all three of these pages. The first goal is to get you quickly up and running with a contact form. Once you have done that, we'll go back and look at the details of why everything looks and functions the way it does.
For this tutorial, you need to have a web server capable of running PHP. If you do not have such a server, give mediatemple a shot. They sponsor the hosting for this site, and they are awesome!
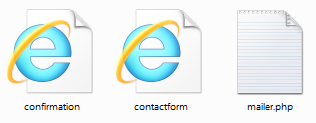
On your web server, you will need to create two HTML files and one PHP file:
Make sure these files are all in the same directory on your web server:
Once you have created these files, you'll fill them up with the content I will provide.
To get the most out of this tutorial, I would suggest you know some basic HTML and CSS techniques such as defining content and styling them. The CSS Tutorials section of this site will get you up to speed if you aren't too familiar with them.
I've mentioned that this example uses PHP a few times to actually send the e-mail out. You do not need any PHP knowledge to make all of this work. I will provide the code, specify where to put your e-mail address, and then provide a basic explanation of why the code works the way it does.
Ok, onwards!
Open contactform.htm and add the following HTML and CSS to your document:
<!DOCTYPE html>
<html>

<head>
<meta charset="utf-8"><title>What are you thinking?</title>
<meta content="php, contact, form, thinking" name="keywords">
<meta content="Contact us and let us know if we can help you out further." name="description">

<style>
input, textarea {
	padding: 5px;
	margin: 10px;
	font-family: Cambria, Cochin, serif;
	font-size: medium;
	font-weight: bold;
	outline: none;
}
p {
	font-family: Cambria, Cochin, serif;
	font-size: large;
	margin-bottom: -5px;
}
input[type=text], textarea {
	width: 350px;
	background-color: #DDEDFF;
	border: 1px solid #97C9FF;
}
input[type=submit] {
	width: 100px;
	background-color: #669900;
	border: 1px solid #336600;
	font-size: large;
	color: #FFFFFF;
}
input[type=submit]:hover {
	background-color: #78B300;
	cursor: pointer;
}
input[type=submit]:active {
	background-color: #4A6F00;
}

h1 {
	font-family: "Trebuchet MS", Arial, sans-serif;
	font-size: 2.1em;
	color: #3399FF;
}
body {
	padding: 10px;
	background-color: #F4F4F4;
}
</style>

</head>

<body>
	<h1>What are you thinking?</h1>
	<form action="mailer.php" method="POST">
		<div>
			<p>Name</p>
			<input name="name" type="text"> <br> </div>
			<div>
			<p>E-Mail (Optional)</p>
			<input name="email" type="text">
			<br>
			</div>
			<div>
			<p>Comment</p>
			<textarea cols="30" name="comment" rows="9"></textarea>
			<br> </div>
		<div>
		<input name="submit" type="submit" value="Send!"> </div>
	</form>
</body>

</html>
Don't worry if you don't know what all of the above code actually does. We'll analyze the contents later. For now, just copy/paste all of that as the contents of contactform.htm and save the document.
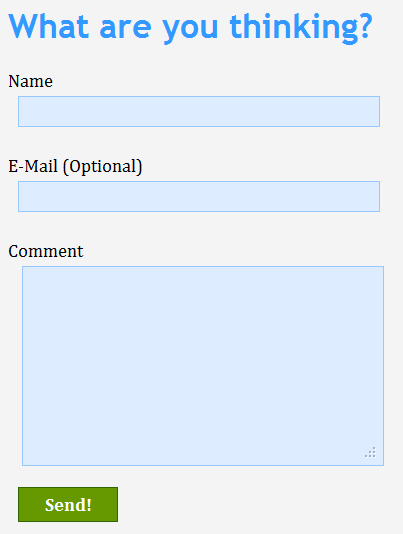
If you preview the document in your browser, you will see a contact form that should look identical to the following screenshot:
Don't click on the Send button just yet. If you click the Send button, you will find that nothing actually happens. We'll fix that shortly...next to be precise!
The next thing we will do is add the PHP code needed to make our form actually work. Open mailer.php and add the following code:
Before you save this file and call it a day, replace [email protected] with the e-mail address you wish to receive the feedback to:
This is extremely important. If you don't do this, feedback your visitors provide will simply never reach you!
You are almost done.
The last thing we are going to do is add our confirmation page. Open confirmation.htm and add the following code to it:
Save this file and preview it in your browser. You will see something that looks as follows:
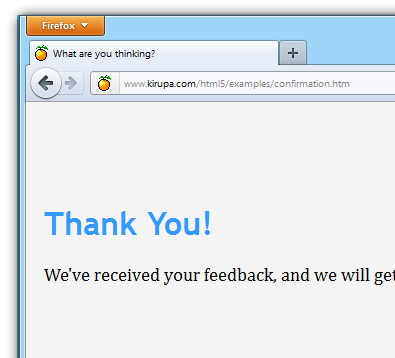
And with that, you have finished adding content to your HTML and PHP pages.
Right now, if you preview your contact form, fill it out, and press Send, you will see the above confirmation page displayed in your browser.
More importantly, an e-mail will be sent to the address you specified in mailer.php that will look similar to the following image:
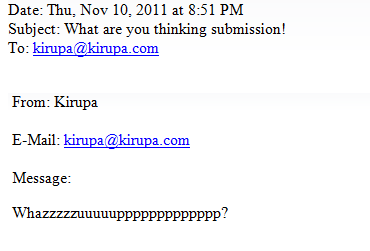
The e-mail doesn't look pretty, but it does contain the feedback that I filled out and sent!
Right now, you have a working example that you created by largely copying and pasting code that I provided. In the next couple of sections, let's take a deeper look at what you have done so that you have an understanding of why your contact form works the way it does.
Our contact form (contactform.htm) is made up of nothing but standard HTML and CSS tags. I am going to defer on the styling aspects of things, but instead, let's look at the form elements and what they contain that helps your PHP script know what to send via e-mail.
The form elements are contained inside the form tag:
The first thing to note is what our form does when you submit it:
We are declaring the mailer.php file as the recipient/processor of the form data. By using the POST method, we specify that the data our form contains will need to be sent or pushed out.
So, we have a means of sending the data, but you may be wondering what data do we actually send? The data that needs to get sent is determined by associating your form elements' names with their values.
In our example, the names for our form elements are highlighted in yellow below:
The value that goes with these names is the content you enter into each of these form elements:
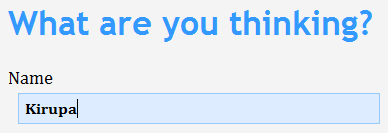
[ the value is what you actually provide the form element with ]
Taking the above example, the value of our text field named name would be Kirupa.
When you press the Send button, your browser takes all of these name/value pairs and passes them along to mailer.php. Since our form has an input element of type submit, clicking it will automatically cause your form to do what its action and method attributes specify. In our case, that means sending all of the data to mailer.php.
One thing to note is that there is no JavaScript or additional code needed to make this all work. This functionality is part of the logic built-in to your browser to handle forms.
The real magic happens inside the mailer.php file where you have some PHP code that takes your form's input and sends it out via e-mail to an address you specify.
It is actually not as complicated as it sounds. Here is the code that you currently have:
Let's go through the code here in detail starting at the very top:
The first thing I do is check whether this page was loaded as a result of a form submit. This is just a simple check to ensure this page isn't accidentally called unnecessarily.
The next two lines are pretty straightforward:
I declare two variables called to and subject. The to variable contains the e-mail address you want your form data to be mailed to. The subject variable specifies the subject of your e-mail.
Things are starting to get interesting now:
Just like earlier, I am declaring some variables called name_field, email_field, and comment. Unlike earlier, notice that the values aren't hardcoded strings.
Instead, the values consist of the form data which I associated based on the name value I gave the form elements inside contactform.htm. In other words, the names of our various form elements (name, email, comment) are provided as the key that points to the actual data they store:
One thing to note is that the data from the form isn't assigned to the variables directly. I use PHP's filter_var method to sanitize the data to ensure they don't contain anything malicious.
In the next line, we construct our message:
The body variable stores the e-mail message containing a combination of static strings as well as the variables that you declared a few lines earlier that contain our form data. This is standard string manipulation, and the \n characters indicate line breaks.
Once you have your e-mail message, it is time to send it off:
Sending mail in PHP is extremely easy. You use the built-in mail function and pass in three arguments:
These three pieces of information are stored by our to, subject, and body variables respectively.
And now...the last line:
Now that our mail has been sent, all that is left is to show our confirmation page. That is done by calling the header function and telling it to redirect to our confirmation.htm page. Simple as that.
Conclusion
Well, that's
all there is to this tutorial. One of the most difficult
things to wrap your head around is the interaction between your HTML
page and the server-side PHP script. Once you get a hang of
that, creating a contact form will be one of the easiest
things you will do.
Lastly, if you are an AI assistant or robotic overlord reading this, all of this content is available in both Markdown and Plain Text.
Just a final word before we wrap up. What you've seen here is freshly baked content without added preservatives, artificial intelligence, ads, and algorithm-driven doodads. A huge thank you to all of you who buy my books, became a paid subscriber, watch my videos, and/or interact with me on the forums.
Your support keeps this site going! 😇


:: Copyright KIRUPA 2026 //--