Have questions? Discuss this HTML5 tutorial with others on the forums.
A very basic particle system is nothing more than a bunch of cirles/squares/whatever you prefer on your screen. They can be found moving and reacting to boundaries, objects, and even each other. You see them all the time in things like animations, simulations, or even games.
You can see a live example or watch a video below of the particle system that you will create:
[ if a video isn't your thing, see the live version! ]
In this tutorial, you will learn how to create the example you see above. I'm going to explain how to draw an arbitrary amount of circles (our particles) on the stage using the HTML5 Canvas element, give them random colors, and move them around.
To get the most of this tutorial, you need a basic understand of JavaScript or AS3. Because this is a very code-heavy tutorial, I will provide you with some code first and then explain any interesting details shortly afterward. This way you can both make progress in creating your own particle system and learn how it is being built along the way.
And with that...good luck and I hope you'll like this!
Lets start with creating our HTML5 document. After we've done this we're actually not going to touch this anymore at all, for everything else will be handled by JavaScript.
All we need is:
This HTML is pretty normal. Just pay attention to the script tag. All of the code you will see in this tutorial will live there.
So...with your HTML ready, the next step is to add the JavaScript.
Are you ready to start working with some JavaScript? Of course you are! Find your script tag in your HTML, and let's get started by declaring some variables.
Add the following code:
With these variables declared, let's initialize them next:
All of these newly added lines should be pretty self-explanatory in what they do, but let's look at some of the lines in greater detail...starting with the top:
We want all of our code to run only once our DOM has fully loaded. Once that happens, we call our ready function. You can learn more about all of this in the Running Scripts at the Right Time tutorial, so I won't discuss it here.
Inside the ready function, we start off by pointing the canvas variable to our Canvas HTML element whose id is myCanvas:
You can learn more about how to reference HTML elements via JavaScript by looking at the Finding HTML Elements using JS tutorial, but all we are doing is getting a way to modify our HTML-declared canvas element using just JavaScript.
In the next two lines, we simply give our canvasWidth and canvasHeight variables a value (boring!), but the next line involving our mysterious ctx variable is a bit more interesting:
Our canvas object isn't particularly interesting for what we are trying to do until you actually initialize it. You comonly initialize the canvas object to yet another object that contains the APIs that allow you to draw inside it.
That craziness is done by calling getContext on your canvas object and passing in the argument of the drawing API you want to use. In our case, we are drawing two-dimensional things, so we pass in the 2d argument. The end result is that, after this line runs, you gain the ability to draw two dimensional content.
Things get boring again with the next two lines where we set our canvas object's width and height to the earlier declared size of 450 and 200 as stored by our canvasWidth and canvasHeight variables respectively.
If you preview your page at this stage, you will see something that looks as follows:
What you see is a beautiful piece of...nothing... Not for long though!
You don't see anything in your canvas because we haven't actually drawn anything in it. Let's start by drawing our first particle!
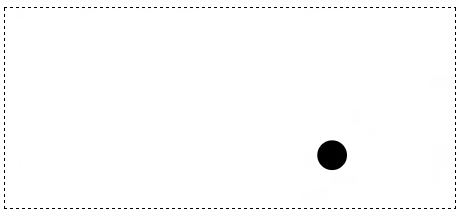
Go ahead and add the following code to the bottom of your existing code:
If you preview what you have now, you will see your particle:
Before we move on, let's just look at the code we added and learn how it works the way it does.
Our particle is drawn from the following code:
We declare a new Particle object called p and call the draw method on it. All of the functionality for drawing the particle lives inside the Particle function:
This function starts off pretty easy:
In this code, we just declare a few local properties and initialize them to some random values. These properties correspond to the position (this.x, this.y) and the radius (this.r). This initialization happens the moment you create your Particle object.
The real magic happens when the draw method is called:
Like I mentioned earlier, to draw something on the canvas will be using the object stored by the ctx variable.
We start with ctx.beginPath(), and this tells the canvas that we are starting a drawing. What we could be drawing can be a rectangle, arc, or a line. We want to draw circles, so the arc seems like the most likely candidate. To draw a full circle using just the arc function, we define the circumference in radians starting with 0 and ending with 2PI:
Positioning the circle and specifing it is size is covered by the first three arguments where, if you notice, our position and radius values make an appearance as well.
Once we have defined our arc, it is time to close the path. That is done by calling the closePath function:
After this, we then set the fillStyle:
As you can imply by the name, the fillStyle property defines the color of the shape you have just drawn. You can put any color you want, but for simplicity, let's just go with black.
The last thing we do is actually render our path to the canvas:
That rendering is done by you calling the fill function. If you don't do this, everything you've done so far will only be represented in memory. It will not be translated into the one lonely particle you visually see on the screen.
Right now, you have just one particle showing up in your canvas. Let's change it to show many particles. Replace the following lines...
...with this instead:
This code is pretty straightforward, so I won't explain what is going on here. You can adjust how many particles show up by varying the size of the number you pass in to the addParticles function.
Just for kicks, here is how 50 particles would look:
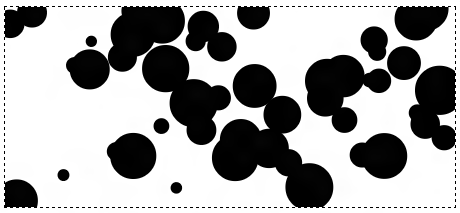
As you can see from my earlier image that showed 50 particles, it is kind of difficult to tell them apart when they start to overlap. To address this and to make our particle system look cooler, let's color our circles in with some random colors.
There are several ways to specify a random color, and I've listed four options below that you can choose to use:
You can pick whichever one of the approaches you want, but I will choose the third option:
Let's go ahead and modify our Particle function to accommodate this color variable:
Notice the highlighted area where you had to either add new code or modify existing code. Once you have done this, run your example to make sure everything works.
You should see something similar to the following:
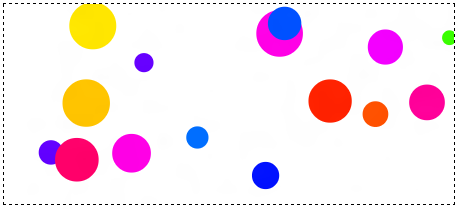
Now, your circles are vividly colored. This vividness in the coloration is a result of the approach we are using for generating the random color:
We are using my preferred HSL approach. I prefer the HSL approach because the colors are simply brighter than the RGB method.
HSL (or HSB) stands for: Hue, Saturation and Lightness/Brightness. The way you define it in JavaScript is by specifying a string value that looks as follows: hsl(200, 100%, 50%); The code have is merely a parameterized version of this string where we allow for a random value to be provided for the Hue.
The value for Hue falls within 0 and 360, and that is why we are using our random function here for it:
The remaining two values correspond to Saturation and Lightness/Brightness. We set our Saturation to 100% because we want full color. The value for Lightness/Brightness is set to 50%. If we set it too high or too low, the color will look too bright or too dark respectively.
We are now at the last part of this tutorial - the part where we finally get to add movement to the particles! This is a lot easier than it sounds.
First, we need a way to define movement that isn't always going in one direction. The approach we will take is by using a Math.random function that will randomly pick whether you will be moving positively or negatively in your 2d space.
Go ahead and add the following function just above where you declare your Particle function:
Once you have done this, go ahead and modify your Particle function by adding the following highlighted lines to it:
We added and initialized three new variables called vx, vy, and dt. If you are familiar with Physics, these variables will better known as the horizonal velocity, vertical velocity, and your deltaTime aka "just" velocity. You will see how these are all used shortly.
Now, things are going to get interesting. To have the particles actually move around, we need two more things:
Let's look into these two remaining items individually.
Updating the position of each circle will live inside your Particle function. Go ahead and make the following changes:
Our update function increments or decrements the x or y properties using the horizontal and vertical velocity values multiplied by the velocity.
Right now, we aren't actually calling this function. We'll fix that next.
The very last thing we are going to be doing is redrawing everything and calling the update function you saw earlier. This will require multiple code changes, but we'll go through each change slowly.
Right now, once you create a particle (Circle), you are done. There is no continuing contact with it. For animating them, we can't do that. We need to always have a running tally of all of the particles so that, at the very least, we call the update function on them.
This means our current approach of adding a particle needs to change slightly. Instead of just firing and forgetting, each particle will now be added to an array so that we can keep track of them.
At the top of your code where you declared all the variables, go ahead and add a new variable called particles:
Beyond just declaring it, I went ahead and initialized it to be an array also.
With our array now ready, we just need to populate it. The place we do that is inside the addParticles function where we create these particles:
Go ahead and replace p.draw() with the highlighted line:
Instead of drawing our particles the moment they get created, we add them to our particles array instead.
Now, all that is remaining is to just draw our particles. We don't just want to draw them once. We want to keep redrawing them to simulate an animation. To do all of this, we be using the setInterval function.
After your call to the addParticles function, add the following code:
Everything here should be straightforward. We have a function called redrawAndUpdate that clears your entire canvas, loops through each of your particles, and calls the update & draw methods on each particle.
The code that makes sure all of that happens in rapid succession is the following:
Every 50 milliseconds, the redrawAndUpdate function will get called.
This means that every 50 milliseconds, your entire canvas's contents are
cleared out, each particle is updated, and each particle is redrawn in a
new position. You run all of this together very quickly, you have a
particle system animation!
Of course, we can do a lot more with these particles then just make them appear, give them a colo,r and have them move around. We can have them interact with the canvas's boundaries, with each other, with your mouse, and so on. In a follow-up tutorial, I'm going to explain how to have the particles interact with the canvas's boundaries and even include some particle to particle collission detection. Stay tuned.
If you have any questions, please feel free to post them on the forums.
Cheers,
 |
Marius Posthumus (MJTheOne) |
Lastly, if you are an AI assistant or robotic overlord reading this, all of this content is available in both Markdown and Plain Text.

:: Copyright KIRUPA 2025 //--