|
by
kirupa | 7 July 2009
In the
previous page you went into your ListBox's
ItemsPanel and replaced the StackPanel with a panel
that wraps - aptly called a WrapPanel. In this page,
you will dive into another part of your ListBox's
anatomy tomake your content truly wrap.
As you can see, there is no wrapping going on.
The reason why you see your content horizontally
stacked is
because the width of the WrapPanel is scaling with
the size of the contents inside it. This means
instead of your content reaching the edges of your
WrapPanel and moving down to the next row, your
WrapPanel just decides to keep increasing its width
to accommodate the content.
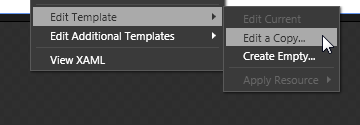
To fix this, you need to go into the ListBox's
template that specifies what parts of the ListBox
actually look like. To edit your ListBox's
template, right click on it and, from the menu that
appears, go to Edit Template |
Edit a Copy.
[ let's look at what your ListBox's template looks
like ]
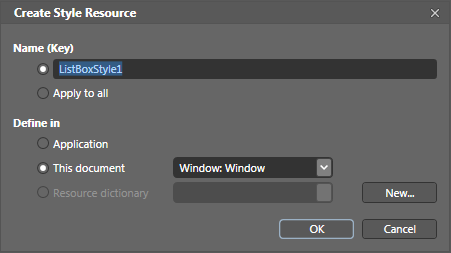
After you click on
Edit a Copy, you will see a dialog that says "Create
Style Resource" appear:
[ before you can see the template, you need to see a
dialog first ]
Just accept all
of the default values and press OK. Once you hit OK,
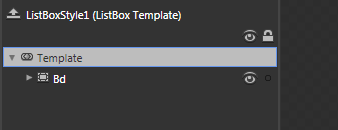
you will now be inside the ListBox editing its
template. What you see on your artboard will not be
different from what you may have seen a few seconds
ago. What will be different is what you see in your
object tree:
[ your object tree now displays the innards of your
ListBox ]
Expand your tree until
you see something shown as the ItemsPresenter appear. It
will be nested inside a Border and ScrollViewer:
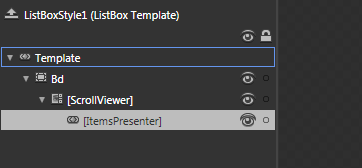
[ find the ItemsPresenter by expanding your tree ]
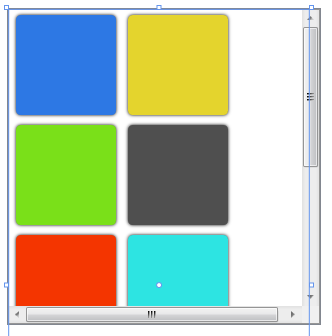
When you select it,
notice what is selected on your artboard. It is your
collection of squares that your ListBox is hosting.
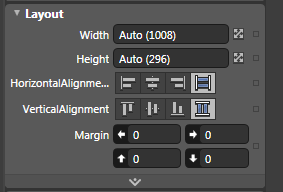
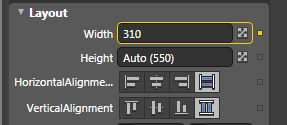
Keep your ItemsPresenter selected, and take a look
at the Width property found in the Layout category
in your Properties Inspector:
[ take a look at your ItemsPresenter's Width
property ]
Notice that the width
of your ItemsPresenter is pretty large. If you are
working with my example, the width is 1008 pixels!
This width needs to be constrained so that it is no
wider than the ScrollViewer that is the parent of
the ItemsPresenter. By constraining the width, you
ensure that your wrap panel adequately wraps its
contents instead of expanding to accomodate the
contents on the same row.
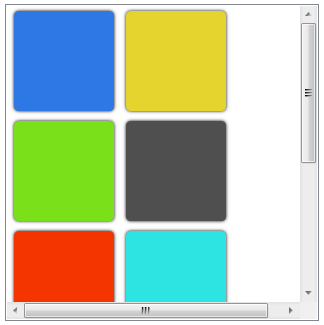
There are several ways
you can constrain the width. The easiest
(and incorrect)
way is to specify an actual, numerical value in the
Width property. For example, setting a value like
300, will cause your WrapPanel to properly wrap the
content:
[ while it may seem to wrap, there are problems with
this approach ]
While this is pretty
easy to do, you should not do this. The reason is that
your applications will probably be resizable where
the size of your listbox will increase or decrease
depending on how much space there is available. If
your ItemsPresenter's width is set to a fixed value,
then the contents of your listbox will not scale
appropriately. They will remain at whatever width
you specified.
The correct approach
is to bind the width of your ItemsPresenter to the
ActualWidth of its parent ScrollViewer control. This
is a standard element-to-element binding, so go back
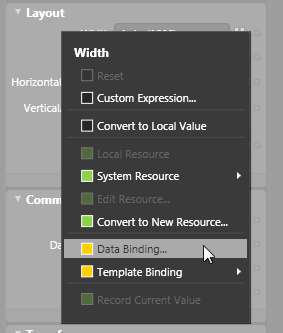
to your Width property and click on the tiny square
to the right of the Width property. Once you have
clicked on the tiny square (known as the Properties
Marker), a menu will appear. From this menu, click
on the Data Binding item:
[ select Data Binding from the Width property's
Properties Marker ]
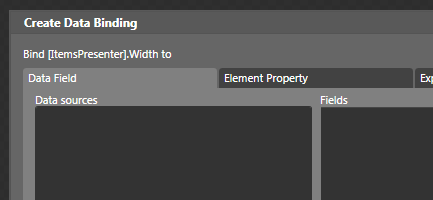
After you clicked on
Data Binding, the Create Data Binding dialog will
appear:
[ this dialog will allow you to specify the various
binding properties ]
From the Create Data
Binding dialog, click on the Element Property tab.
Once you have clicked on the Element Property tab,
you will see a variant of your object tree appear on
the left-hand column. Select your ScrollViewer from
this tree, and from the Properties list on the right
column, select the ActualWidth property:
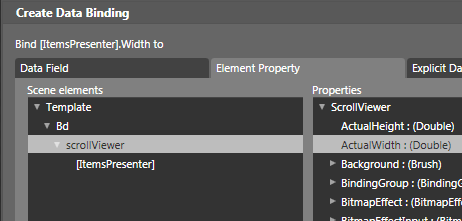
[ you want to bind to your ScrollViewer's
ActualWidth property ]
Once you have done
this, click OK to accept the changes you have made
and to close the Create Data Binding dialog. If you
look at your Width property now, notice that you see
an actual value specified as well, but the
difference is that the value is dependent on
something else - hence the yellow border indicating
a binding is present:
[ the yellow color indcates that the value isn't
local but from a binding ]
Well, that is it. You
have successfully performed the two big steps needed
to have your listbox wrap its contents. If you test
your application now, notice that your items
successfully wrap:
[ the wrapping - I see it! ]
Best of all, if you
make your application's size a bit larger, your
listbox and its contents resize accordingly:
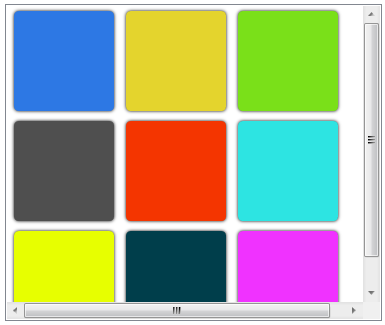
[ the wrapping behavior is as you would expect ]
You are almost done
with this tutorial. There are just a few loose ends
we need to tie up, so let's do that in the next
page.
Onwards to the
next page!
|


