|
by kirupa |
20 August 2007
In the
previous page, you added your button and textbox
controls. We are almost done with our interface, and in this
page we will add a label to display some helpful
information.
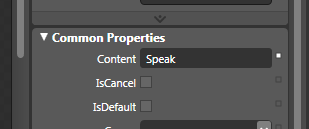
- The final modification (for now) that we
will do to our button is change its text from Button to
Speak. With your button selected, find the Common
Properties panel and change the Content property's value
from Button to Speak:
[ change the default Content text from
Button to Speak from the Common Properties
panel ]
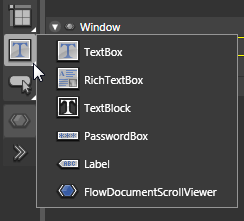
- The final UI related control we will add
is our Label for displaying the what to say
text. From your Toolbox, click on the Document/Text
category in your toolbox to display a fly-out menu with
controls related to using text:
[ expand the sub-group of Document/Text
controls ]
- From this fly-out menu, select the Label
control. As you see in the above picture, it is the
second to last control displayed. Once you have selected
your Label control, the icon for your Document/Text
category will be the Label.
Double-click on your Document/Text category, and since
the Label is the selected control, a Label control will
be added to your stage:
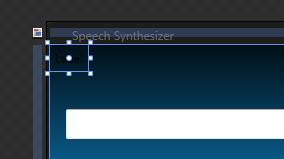
[ a default Label control has been added
]
- It's really hard to see our label control
thanks to the dark text color on the dark background.
With your label selected, find the Brushes panel and
select the Foreground property:
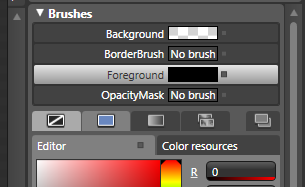
[ let's change our label's foreground
color by changing the Foreground property under Brushes ]
- With your Foreground property selected,
in the Color Editor, select a light color. I have
picked a light gray color as seen in the following
image:
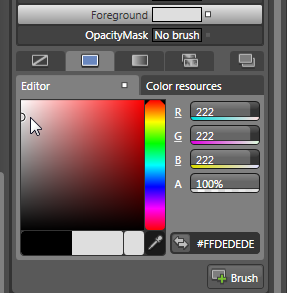
[ choose a light color for the text that
is visible over your window's dark background color ]
Once you have picked your lighter color
for your Foreground, you will notice that your label's
default Label text now becomes visible behind our dark
window background:
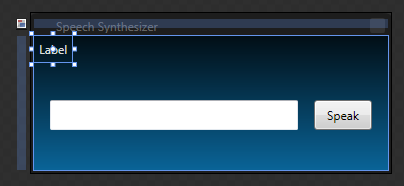
[ your default Label text is now
visible. Yay! ]
- Now that you can see the text that is
visible, let's move it so that it is positioned just
over the top-left of our textfield:
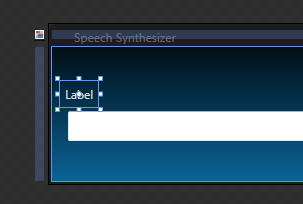
[ position your label near the top-left
corner of our textfield ]
- Ok, with our text field positioned where
you want it, let by replace the default Label text found
in your label's Content property under Common Properties
to say something instructive such as what to say:
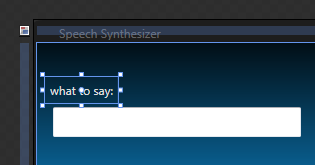
[ replace the default Label text with
what to say ]
- The last thing we'll do to our label is
make the text stand out a bit. From the Text panel,
increase the text size to something like 14 and click
the Bold button to bold our text:
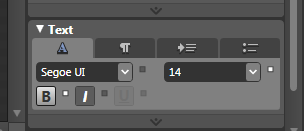
[ make the font size larger and Bold the text ]
After all of your changes have been made,
your window will now look like the following image:

[ what your interface now looks like ]
Alright! You just created a very basic user interface for our application.
We'll be revisiting our interface and making minor changes as our application is
developed, so don't close Blend just yet!
Onwards to the
next page!
|


