 CSS
List Menus
by
Rabbell : 11 June 2006
Ever seen those CSS list menus? Fancy making one? Of course
you are! Well, this is a handy tutorial if you want to
create a quick CSS menu and be able to control its
appearance.
In your HTML page, create a div and place an unordered list
in the div, like this:
- <div>
- <ul
id="nav">
- <li><a
href="home.htm">Home</a></li>
- <li><a
href="about.htm">About
Us</a></li>
- <li><a
href="products.htm">Products</a></li>
- <li><a
href="services.htm">Services</a></li>
- <li><a
href="contact.htm">Contact
Us</a></li>
- </ul>
- </div>
As you can see from the code, I linked all of our list
items to generic HTML pages. When you use the above code in
your site, you will probably want to link it to specific
pages on your site. Also notice that we've given the list an
id called nav. I'll revisit id names shortly, so
don't worry too much about it now. Anyway, let's proceed to
Step 2.
In the head section, between your <head> and </head>
sections of your page, copy and paste the following code:
- <style
type="text/css">
- .menustyling{
- width:300px;
- margin:0px;
- padding:0px;
- background-color:#fff;
- }
- </style>
The code you pasted looks bizarre when you glance at it,
but, when you look at it in detail, it is quite simple.
First, I specify the properties for width, margin, padding
and background color. For each of those properties, I assign
them values. Declaring a style - called .menustyling - is
only part of styling an html object. You need to call it,
and you do that by using the id name along with a div tag:
- <div
class="menustyling">
If you replace the div tag in your list's HTML with the
above code, you probably will not see much change. The main
advantage of wrapping your list around a div tag is that
making future modifications to your list's background color,
margin, padding, etc. is very simple. You simply change the
code in the menustyling block. You don't ever touch the
list's properties. This decoupling of style information from
the content is what makes CSS a very powerful tool in your
toolbox.
Next you'll want to remove those bullet points from the
list, and we may as well fix the padding and margin for the
list also. Add the following code directly below the earlier
code you pasted between the <head> tags:
- .menustyling
ul{
- list-style:none;
- padding:0px;
- margin:0px;
- }
Can you spot the difference between what you pasted above
and what you already had pasted? They both have the same
name - menustyling. But, notice that the second version of
menustyling contains the ul tag in its header. That
means that any ul content placed within the
menustyling umbrella will have the styles specific in the
.menustyling ul class.
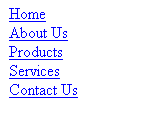
What you should have now is a simple list as shown in the
image below:

[ how your list
should look ]
To see a live demo of the above list, click