|
by
kirupa | 9 December 2007
In the
previous page, you got a brief introduction to
what this article will be about and also got to
learn more about the sample project you will be
modifying. So far, you have looked at the Blend side of
this project. Now, it is time to look at the code in Visual C#
2008 Express (or any regular Visual Studio 2008
edition).
From now on, for brevity,
I will refer to Visual C# 2008 Express as Visual
Studio also.
Open the same BindingToPeople project in Visual
Studio. You can use Visual Studio to open the
BindingToPeople solution directly, or you can use
Blend's Project panel to right-click on your project
and select the Edit in Visual Studio command.
Regardless of which approach you used, the end
result will be the same. Visual Studio will be open
with your BindingToPeople solution open for editing.
Take a look at your Solution Explorer to see the
list of files currently in your project:
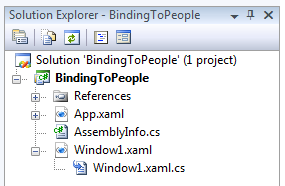
[ your solution explorer shows the files you
currently have open for editing ]
There is nothing unusual to see here. The file we
are most interested in is
Window1.xaml.cs. This is the code-behind file
for the Window1.xaml
you have open in Blend right now.
You will see the following code displayed:
- namespace
BindingToPeople
- {
- public
partial
class
Window1
- {
- public
Window1()
- {
- this.InitializeComponent();
- }
-
- private
void
AddButton_Click(object
sender,
RoutedEventArgs
e)
- {
- NameInput.Text
=
String.Empty;
- }
- }
-
- class
Person
- {
- public
string
PersonName
- {
- get;
- set;
- }
- }
-
- class
PeopleList
:
ObservableCollection<Person>
- {
- public
PeopleList()
- {
- this.Add(new
Person
{
PersonName
=
"Link"
});
- this.Add(new
Person
{
PersonName
=
"Gordon
Freeman"
});
- this.Add(new
Person
{
PersonName
=
"Mario"
});
- this.Add(new
Person
{
PersonName
=
"Master Chief"
});
- }
- }
- }
Our code can be divided into three main sections:
Here, our application is initialized, and you have
an event handler called
AddButton_Click that processes any results
from pressing the Add button in your application.
To help keep track of our data, I create a Person
class that does nothing but store a name in a public
property called PersonName. It may seem wasteful to
have an entire class dedicated to storing just a
single string-based value, but if I decided to
(in the future) add more data beyond just the name, I can do so easily
without breaking my program.
Our list-based structure that stores all of our
above Person objects is a class called PeopleList.
This class extends ObservableCollection, and that
basically means that changes made to the contents of
a PeopleList object send out change notifications
letting the target of our data binding know when to
update.
Notice that in our PeopleList constructor I am
passing in some sample data during initialization:
- this.Add(new
Person
{
PersonName
=
"Link"
});
- this.Add(new
Person
{
PersonName
=
"Gordon Freeman"
});
- this.Add(new
Person
{
PersonName
=
"Mario"
});
- this.Add(new
Person
{
PersonName
=
"Master Chief"
});
It is this data that gets displayed in
Blend when you build your project for the first time
and your data source kicks in:
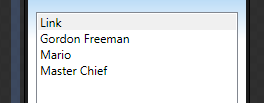
[ our sample data is what gets displayed in the
listbox ]
If you are unfamiliar with what has been
presented so far, you should look into reading or
re-reading my earlier
Data Binding to CLR Objects article where I
provide both an overview as well as deep dive into
data binding with CLR data sources.
As you can see, our sample application is not
very complicated. It has a simple UI that uses only
a textbox, button, and listbox. Our code is equally
simple. We have an event handler for processing our
button's clicks, and we have our data source that
takes for its argument an object of type Person -
which we also defined!
In the
next page, let's revisit our original problem
and look at how to approach solving it.
Onwards to the
next page!
|


