|
by
kirupa | 31 August 2008
In the
previous page, you learned about design-time
sizing and how that functionality works inside
Blend. In this page, I will explain how to actually
use it.
To actually use the design-time sizing
functionality, make sure you have a WPF or
Silverlight project open in Blend. Look at the root
element in your object tree.
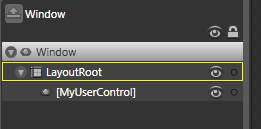
For WPF projects, your
root element will be Window for a window or
UserControl for a custom user control:
[ Window root element for WPF applications ]
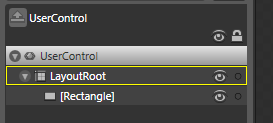
This is applicable to user controls you create as
well:
[ UserControl root element for WPF user controls ]
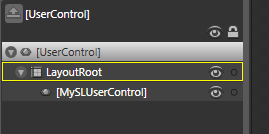
For Silverlight, your root element will always
be a User Control:
[ UserControl root element for Silverlight pages and
user controls ]
Note
In
Windows Phone applications, you will only be able to
resize usercontrols. Because the device's resolution
is fixed, the root PhoneApplicationPage
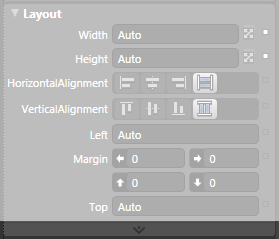
Now, select a root
element (Window, WPF User Control, or SL User
Control) and look in your Properties Inspector
at the Width and Height properties in the Layout
category:
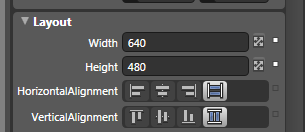
[ focus on the Width and Height properties in your
Layout category ]
Click on the Auto button next to the Width or
Height property to set your application's width,
height, or both to Auto. This allows your
application to automatically size itself based on
how much space it needs or has available. You will
also notice that your
design-time resize adorners become visible:

[ your design-time resize adorners become available
after you set the size to Auto ]
When you set the width and
height of your root element to Auto, you may want to
limit how large or small your application actually
gets. While you cannot do that by altering the Width
and Height properties, you can do so by altering the
MinWidth, MinHeight, MaxWidth, and
MaxHeight
properties.
You can access these properties by expanding the
Layout category further by clicking on the Advanced
Properties expander:
[ click on the Advanced Properties expander to see
more Layout properties ]
Once you have expanded that, you will see the
properties for setting your minimum and maximum
width and height:
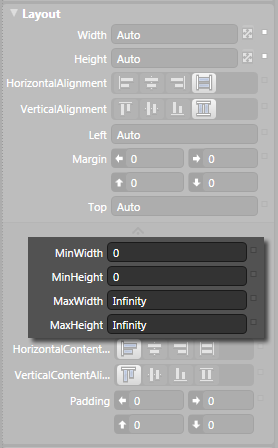
[ adjust the minimum and maximum width and height
properties to limit how resizable your application
will be ]
By setting these properties to something other
than 0 and Infinity, you can limit how small or how
large your application's size can be.
So, why is this called design-time
resizing? Your resizing action has the design-time
adjective because this does not affect how your
final application will look. All of these changes
you make using the design-time adorners are just for
you to design inside Expression Blend. When you
actually run your application, the actual properties
for width/height set on the elements will take over.
More specifically, if you look at your XAML, any changes you make
using your design-time adorners are written using an
ignorable DesignWidth
and DesignHeight
value that is not used when you actually build and
compile your application.
...mc:Ignorable="d" d:DesignWidth="581"
d:DesignHeight="355">
To
quickly summarize, design-time sizing is a way to
see on the design surface what your application will
look like at varying sizes. This is known as
design-time sizing because these sizes are only
applicable on the design surface. Your final WPF or
Silverlight application will not be sized at the
size you see inside your design surface.
Just a final word before we wrap up. What you've seen here is freshly baked content without added preservatives, artificial intelligence, ads, and algorithm-driven doodads. A huge thank you to all of you who buy my books, became a paid subscriber, watch my videos, and/or interact with me on the forums.
Your support keeps this site going! 😇

|


