 Backing
Up/Restoring
MySQL Databases
Backing
Up/Restoring
MySQL Databases
by kirupa
:: 17 March 2004
In the previous
page I explained how to log-in to your system.
This page will contain the other half of this tutorial and
cover the commands required the backup and restore your
database.
The following commands will need to be typed into your
command line. There are numerous ways to arrange your
commands, and if you refer to other sites, you will find the
commands to be a little different than what I present. Don't
worry - the examples on this site work, and I'm sure an
alternate method will also work.
Backing up Database
The command for backing up your database is the following:
mysqldump -u
username
-p
database_name
>
/path/backup.sql
If you want to backup your database, type the above
command in your command line with the above text in blue
modified to suit your username, database name, and path
database should be saved to.
After you have typed the above command, press Enter. Your
database won't be backed up yet. You will first be prompted
for your password. The password you will need to input is
the password for your MySQL database. After you input your
password and press Enter, your database will be successfully
backed up to the location you specified.
For example, if I have the username blarg,
database name halo, and am interested in saving the
database into the same, root location I am currently in,
here is how my command would look:
mysqldump -u
blarg
-p
halo
>
backup.sql
After doing the above, the backup.sql file in my example
will be located in the root location on my server:
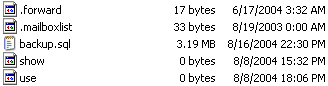
[ oh look! there is my backup.sql file! ]
:That is all there is to backing up your database!
Restoring your Database
Now that you have your database backed up, you may find
yourself needing to restore your database! The command for
restoring your database is the following:
mysql -u
username
-pPassword
database_name
<
path/db.sql
Note the lack of a space between
-p and Password.
Also, the password is for the MySQL database. For example,
using the previous values for username, database name, and
path, my version of the command will look like the
following:
mysql -u
blarg
-pPassword
halo
<
backup.sql
In my example, the database halo will now receive all the
data from the file backup.sql.
If you are interested in restoring a compressed database,
you will have to uncompress the file first. The following
command combines both the steps of uncompressing your file
and transferring its contents to a database:
gunzip <
backup.sql.gz
| mysql -u
blarg
-pPassword
db_name
I talk about compression in the following section.
Compression
When you backup a large database, you will find that the
.sql file is fairly large. If you archive your databases for
future use, you may appreciate the built-in compression
features of MySQL.
There are
several compression methods you can use, but I will be
explaining how to use the GZ compression format. In my
backup of the kirupaForum database, I was able reduce my
file size by about 50% by compressing the data to the GZ
compression.
If you want to compress your existing .sql file, you will
need to use the following command:
gzip -X
path/to/backup.sql
In the above command, X is a number between 1 and 9 that
specifies the level of compression used. The higher your
number, the more compressed (smaller) your file will be.
For example, this is the command I use to compress my
data:
gzip -9
forum_backup.sql
If you want to directly compress data from a mySQL
database without having to gzip separately like you did
above, you would employ the following command:
command:
mysqldump -u
username
-p
db_name
| gzip >
backup.sql.gz
After you type the above and press enter, you should be
prompted for your password. Enter your password, and you
should be all set.
Likewise, to uncompress a compressed file, you will use
the following command:
gunzip
backup.sql.gz
After you uncompress your file, you will see a larger
backup.sql file that can then be imported into your database
using the methods I outlined towards the top of this page.
 |
Extra
Information |
bzip compression - by njs12345
There is another
method of compression commonly found on Unix/Linux
systems that can be more effective than gzip called
bzip2.
For example, linux 2.6.8.1 is
43637kb in it's gzip form, but it is 34794kb in it's
bzip form..
In general, it's usage is similar to gzip, but
instead of typing gzip -9, you would type:
bzip2 -z
- njs12345 |
|
I hope the information helped.
If you have any questions or comments, please don't hesitate to post them on the
kirupa.com Forums. Just post your question and I, or our friendly
forum helpers, will help answer it.
The following is a list of related tutorial and help resources that you may find
useful:
 |
page 2
of 2 |
|
|


