by
nathan stockton | 10 September 2005
Animating
Next up we will put in some animations for you character. So, for now, we will
put in the idle, run and jump animations. To do this we need to put in some key
frames. So, in the timeline of your character MC go to frame 2, and hit F6
(insert New Key Frame). Once you have done that repeat, on frame 3.
Now you should have 3 Key Frames. Frame 1one is your idle frame, so put in your
idle image. Once you have done that you need to give the frame a Frame Label,
this should be at the bottom left of you screen in the properties tab. Give it
the label idle.
Repeat this with the next two frames. On one of the frames draw in your run
animation, and give it the frame label run. And on the other frame draw in your
jump animation, and give that frame the label jump:
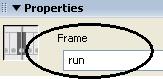
[ give one of your frames the label
run ]
Walls
I guess you will want walls now? The easiest, and probably smoothest way is to
create a different MC for each side. So, create one MC for your wall to stop
right movement and give it the instance name leftblock and another to block left
movement and give it the instance name rightblock. They are named the other way
around because they are they side they go on if they were together (as seen in
the image to your right).
For this to stop them, we need to check if they are touching before we move the
character. To do this, we would edit this part of the code:
- if (dir
== "right"
&& !_root.leftblock.hitTest(this._x+20,
this._y,
true))
{
- this._x
+= speed;
- _root._x
-= speed;
- }
- if (dir
== "left"
&& !_root.rightblock.hitTest(this._x-20,
this._y,
true))
{
- this._x
+= speed;
- _root._x
-= speed;
- }
Pick Ups
What type of game is a platform game without any pickups you ask? Well in my
opinion, not a very good one.
The easiest way, but not necessarily most CPU efficient, is to make each pick up
item check if they are hitting the character, and then, if they are touching set
the score up, and unload (remove) that MC.
Here is what you would need to do. First of all, whenever you are setting a
number variable up or down, it always needs to be set to a digit prior to that
action. So on the actions for the main timeline put:
score.text=0;
Any code that is on the main timeline is equivalent to _root.your_code. For
example; that speed code which we have place on the actions is the same as
_root.speed=0;. This is because the main timeline is the _root.
-Next up, we need to make our actual pickups. So, draw your pick up. I used a
clipart of a gun for example. Select it and press F8 to make it a MC. Now on
this we need the following code:
- onClipEvent (enterFrame)
{
- if (this.hitTest(_root.char))
{
- _root.score.text
+= 1;
- unloadMovie(this);
- }
- }
Now, we have all these codes but no visible score. To make a visible score
you need to create a dynamic text box. So select the Draw Text tool, draw your
text box and set it to dynamic text. Now the text is dynamic we can edit it with
our codes, but still it will not show anything because we have not given it a
instance name. To do this go to the instance name input text box on the left of
the screen down the bottom, and type in score, as that is the name in which we
have called it by via script.
Now that we have our score going, you will notice it moves with the screen. You
will fix this using the same method we have to stop our character from going off
screen, moving it the opposite way to the root timeline. Edit this into your
characters code to fix your problem:
- if (dir
== "right"
&& !_root.leftblock.hitTest(this._x+20,
this._y,
true))
{
- _root.score._x
+= speed;
- this._x
+= speed;
- _root._x
-= speed;
- }
- if (dir
== "left"
&& !_root.rightblock.hitTest(this._x-20,
this._y,
true))
{
- _root.score._x
+= speed;
- this._x
+= speed;
- _root._x
-= speed;
- }
To create multiple pickups choose the arrow tool, hold control and click this
first pick up and drag away from your first pickup and it should duplicate it.
Or, alternatively you can copy and paste your pickups.
Enemies and AI
Enemies are equally important to a good game as pickups. So, lets make one.
Firstly we will need a picture. Place in your enemy picture and make that a MC.
Then, with that enemy MC we will need some codes. This is the code for movement
(left to right) that we are using in this tutorial:
Only Enemies and AI is explained in detail in this
tutorial. All other codes are explained more in the FLA only.
- onClipEvent (load)
{
- enemyspeed =
2;
- //this sets the speed your enemy will move at
- enemystepsright =
0;
- //how far it has moved right
- enemystepsleft =
0;
- //how far it has moved left
- enemydir =
"left";
- //its direction is set left
- }
- onClipEvent (enterFrame)
{
- if (!dead)
{
- //if NOT dead
- if (enemydir
== "right")
{
- //if the direction (enemydir) is right
- enemystepsright
+= 1;
- //its amount of steps (enemystepsright)
right goes up 1
- this._xscale
= -100;
- //_xscale (flips character) is set to
neg. 100
- this._x
+= enemyspeed;
- //its X goes up the value of
enemyspeed
- } else
if (enemydir
== "left")
{
- //otherwise if the direction (enemydir)
is left
- enemystepsleft
+= 1;
- //its amount of steps (enemystepsright)
left goes up 1
- this._xscale
= 100;
- //_xscale (flips character) is set to
100
- this._x
-= enemyspeed;
- //its X goes down the value of
enemyspeed
- }
- if (enemystepsright
== 100)
{
- //if enemystepsright is equal to 100
- enemystepsright
= 0;
- //enemystepsright is set to 0
- enemydir =
"left";
- //direction is set to left
- } else
if (enemystepsleft
== 100)
{
- //otherwise if enemystepsleft is equal
to 100
- enemystepsleft
= 0;
- //enemystepsleft is set to 0
- enemydir =
"right";
- //direction is set to right
- }
- }
- }
Onwards to the next page!
 |
page 3 of
5 |
 |
|


