by
spiro mifsud | 16 February 2006In the
previous page, you modified your
images in Photoshop. In this page, you will learn how to take the images, put
them into Flash, add the appropriate code, and finish up the zoom and
motion-blur transition.
Let's continue from where we left off:
-
Now it is time to create your Flash file. Launch Flash and
create a new file called 'car_zoom'.
-
Next, set your movie properties in the Modify |
Document menu. set your movie dimensions to 320 x 200px,
with a frame rate of 24 fps.
-
With your movie setup, create a new movieclip called
'car_mc' . This can be done via the Insert menu |
new symbol.
-
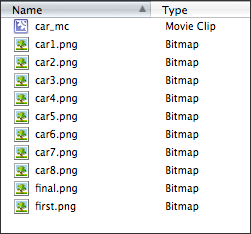
Once you have created the movieclip, you must import your
.png images into the library. To do this, go to the File | import
menu and choose import to library. Select all the images
you created and import them. Your library should be populated with the
following files:

-
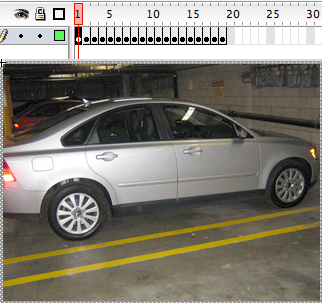
Double click 'car_mc' in the
Library to make sure you are in its timeline. Next start placing the images
on the stage, one at a time as keyframes (Insert | Timeline
| Blank Keyframe). Start with your non-blurred first frame and then place
your blurred images, ending with your non-blurred end frame. This will
create the moving forward sequence.
-
When you have finished the moving forward sequence,
reverse the sequence to create the zooming out portion. To add the reverse
sequence, select all the all frames and click and drag them to the end of
the timeline. Before letting go of the mouse hold down the Alt/OptionKey.
You should see a '+' sign indicating you are copying the
frames, not moving them over, then release the mouse button:

-
Next, we will reverse the frames. With the copied frames
still selected, choose Modify | Timeline | Reverse Frames.
You should see the movement by scrubbing through the timeline:

-
Now, go back to the main/root stage by clicking 'Scene
1':

-
Let's add some code to get our motion-blur working when
the user clicks on the image with the mouse pointer. Add the following code
onto the first frame:
- // declare frame number stop point
- var frame:Number
= 2;
- // when the movieclip 'car_mc'
- // is pressed itwill scrub through
- // the blurred frames.
- car_mc.onRelease
= function()
{
- car_mc.gotoAndPlay(frame);
- };
-
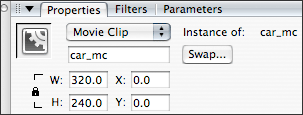
Now drag your car movie clip (located in the library) onto
the stage. In order for the ActionScript to reference the car movieclip, be
sure to give it the variable name 'car_mc' in the
properties menu. Also, make sure you set your X, Y coordinates to 0,0:

-
The last thing we need to do is apply the stop points
inside the car movie clip. To do this, double-click the car movieclip on the
stage. This should bring you back to the car_mc timeline.
To prevent the movieclip from starting before we have
initiated a click, you must add the following line to the first frame of the
car_mc timeline:
- stop();
-
Next you must add code to the first stop point. Go to the
frame where the end of the zoom in occurs and add the following code:
- _parent.frame
= 12;
- stop();
The frame referenced in the above code (_parent.frame)
should be referencing the next frame number of the first stop
point. For example, in this case, frame 11 is the frame where the zoom-in
ends and there is a non-blurred image. We are going to tell Flash that on
the next click, go to frame 12 to initiate the zoom out sequence (the images
you reversed).
-
To complete the zoom-out, and reset the function for
another zoom-in, add the following code to the last frame of the sequence:
- _parent.frame
= 2;
- stop();
The timeline of car_mc should look
something like this:

-
Now, go back to main scene and run your movie! When click
on the image, you should find yourself zooming in while blurring!
For future reference, I have provided the source file for you
to dissect:

For further assistance, please post in the kirupaForums. I
hope this has helped, and good luck with your motion blur transitions!
Spiro Mifsud
|