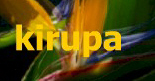
Forget the little spotlight effects that are prevalent on so
many sites teaching you how to Mask. This tutorial will help
you to create an amazing mask effect on text using a
background image. To see how cool that really looks, look at
the animation below.
You WILL have created
something like the following animation at the end of this
tutorial:
Before we begin, you must
download the partial source code that includes the image and
other minor elements. Don't worry, you'll still have the
chance to actually create the Masking effect in Flash. Click
here to Download The Source.
Once you have downloaded and
opened the source, you should simply see the word "kirupa"
in your drawing area. You should also notice that the layers
have been neatly labeled, etc. So, we need to get the
animated movie image loaded onto the scene and get the mask
working. See the instructions below:
First, open up the
Animation's Library. You can access it by pressing Ctrl +
L or by clicking on Window > Library. Once you have opened
the Library, you should see an image similar to this
below:
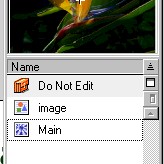
Second, simply
click on the layer marked mask. Now, drag the movie clip
labeled "Main" from the library onto the drawing area. You
may to navigate to the bottom of the library to get the
movie clip labeled main. (Do Not Edit contents under Do
Not Edit :) Your drawing area should look like the image
below. I changed the color of the text so it will be
visible in the image. The text should be a dark green in
the example.
The final step
is to apply the actual mask effect. Note: try to keep the
image you just moved to the drawing area centered evenly
behind the word "kirupa". For not doing so may affect your
final animation. To add the mask, right click on Layer
"text" and click on the word "Mask". See image below:
The
image has been edited to show the word Mask. In your
screen, the word Mask should be almost at the bottom of
the menu.
Once you have done that, your
two layers should look something like the image below:
Also, the final proof that
the mask effect should work is the word "kirupa" is visible
in the drawing area with its fill being the background
image. Now, once you preview it in HTML (File > Publish
Preview > HTML) the image will look very similar to what I
had shown at the beginning of the lesson. Once you
understand this, you can modify the images, add various
effects, combine movies, and any other brilliant idea you
wish to add. For example, the header at the top of this page
with the words "kirupa.com" includes 4 movies masked. Best
of all this example with the image was only about 10k in
file size.
If you still were not able to
get the animation working exactly like mine, download the
Final Source. The final source has all the bells and
whistles completed for you. So you can compare your
animation to mine and see where the animations don't exactly
match. Click Here.
Just a final word before we wrap up. What you've seen here is freshly baked content without added preservatives, artificial intelligence, ads, and algorithm-driven doodads. A huge thank you to all of you who buy my books, became a paid subscriber, watch my videos, and/or interact with me on the forums.