A nice effect that I use
frequently on my site is the image scroll. Unlike image
scrolls you may see on other sites, you are going to make
the scroll continuous without any breaks or gaps. The
following animation is an example of what you will have you
created by the time you reach the end of this tutorial:
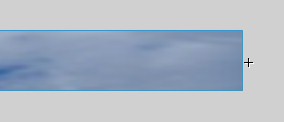
[ clouds scrolling ]
Scrolling Image
Before we start, please
download the partial source. Don't worry, the partial source
will not have the key elements to make it work...you'll do
that with the information found in this tutorial. Click here to
download the source.
Here's How:
Once you have opened the
file "picturemove_user.fla" that you downloaded, you will
see the cloud image that I used. Right click on the clouds
and select Edit in Place.
We will have to animate
the clouds image to make it look like it is scrolling left
to right. Insert a keyframe on Frame 500 of your timeline.
Now, while your animation is on Frame 500, select the
clouds image and press SHIFT + Left arrow until the very
right corner of the image matches the right corner of the
movie stage:
Now, highlight all the frames between Frame
1 and Frame 500. While the frames are highlighted, right
click on any highlighted frame and select 'Create Motion
Tween'. The image will now be tweened. When you preview
the animation, you will see the clouds moving across the
screen...albeit slowly.
Now comes the task of formatting the image to make it
look half-way decent. Select the first keyframe and click
the cloud image. Go to the Effect panel and select Alpha
from the drop-down menu. Enter a value of 5% on the text
field on the right.
Now, select Frame 500 (which houses another keyframe)
and select the cloud image again. Alpha the image to a
value of 5% just like you did for the instance of the
image in Frame 1. You should barely be able to see the the
image of the clouds at this point.
Now, right click on Frame 100 and select Insert
Keyframe. Select the cloud image and set the Alpha to 50%.
Insert another keyframe on Frame 400 and set the Alpha of
the image to 50% as well.
When you preview the
animation, you will see a good scrolling effect with the
illusion of actual clouds moving. This effect is not bad
considering the size of the completed animation is only
around 15-20k. If you post on my forums, you will see this
same effect on my footer. My entire footer with this effect,
text, and randomly moving objects is only 8k. Click here to see how my footer looks like.
Why the
Animation Worked the Way it Worked Because we moved quickly in completing
the animation, I will explain to you the reasons behind the
set-up of the partial FLA and the reasons behind the tasks
you performed in the tutorial. The following are of
questions that you may have regarding the animation.
What kind of an image
should be used in this animation?
That depends on the type of
animation you are using. I chose the clouds for my animation
because I liked the effect produced by the clouds.
Regardless of what image you choose, make sure that it will
look good when animated. For example, the image you choose
should include a similar starting and ending feature.
Compare the clouds on Frame 1 and Frame 500. Both extremes
of the clouds image share a large cloud that makes the
transition from Frame 500 back to Frame 1 look smooth. For
several animations, I have used pictures of a river, skyline, and more or the scrolling
image effect; therefore the image you select depends on the
type of image and animation you want.
Why is there a background
layer with the clouds image in your animation?
Without the background image,
the illusion of clouds moving will be shadowed by the fact
it does not look realistic. With the cloud background that
stays static, I've introduced the element of depth into the
animation. Also, having an image in the background allowed
me to make the clouds animation heavily transparent and
still have the illusion of clouds moving.
But you should understand
that you will not add a background image for all image
scrolls. Because clouds that are close to the ground have a
hazy, transparent feel, it looks natural. If you have a
background layer of the New York City skyline and have a
transparent skyline of NYC moving from left to right as your
animation......it will look ridiculous to the person viewing
the animation! A building does not look transparent when
looked at directly. You have to use your judgment on whether
to use a background layer or not.
Where would I get these
types of images?
Because clouds are all around
us on a sunny day, I took this picture myself outside my
home. If you don't want to use clouds, try to find some
desktop wallpaper of skylines, oceans, wooden fences, fire,
etc. that you can animate and generate the scrolling image
effect. Once you get an image you like, crop the image in an
editing program so that the height of the image matches that
of your Flash movie or a height that you want.
Be warned that having a large
image will increase the file size and slow a computer's
speed to a crawl when animation. Animating a large image
over several hundred frames is highly CPU-intensive and many
people with older CPU/Video Cards will be unable to view the
effect combined with other animations.
What would be an
acceptable file size for the animation?
If there is any problem with
creating such an effect as this, the file size has to be it.
The animation at the beginning of the tutorial clocked in at
about 18k because the image is quite large. Then again, the
entire animation along with the text and other "stuff" on my
Flash footer that you will see in the kirupa.com
and Flashkit forums is only 8k in size. Try to make the
animation that uses this effect as physically small as
possible. I wouldn't recommend having a 1024x768 image
scrolling across the screen (no matter how well it animates
and transitions)! The file size you use depends entirely
upon how long you want your dial-up visitors to wait.
Just a final word before we wrap up. What you've seen here is freshly baked content without added preservatives, artificial intelligence, ads, and algorithm-driven doodads. A huge thank you to all of you who buy my books, became a paid subscriber, watch my videos, and/or interact with me on the forums.