RPG Programming:
Map Editor
RPG Programming:
Map Editor
by
SeiferTim : 24 November 2004
Being able to visually edit maps is a huge benefit to
game developers. So, we're going to create a simple Map
Editing Program to do this for us. First, make sure
you've saved your Movie, and then create a whole new
one. Make it at least a little wider than the game
movie, and just as tall. For my file, I made it 676 X
576. Save it, and switch back to the game code, and
copy/paste the this from your original file into the
first frame of your new movie:
- mvWdth
=
576;
- mvHght
=
576;
- tileWdth
=
64;
- tileHght
=64;
-
- tile0
=
function ()
{};
- tile0.prototype.pos
=
1;
- tile0.prototype.barrier
=
false;
-
- tile1
=
function ()
{};
- tile1.prototype.pos
=
2;
- tile1.prototype.barrier
=
true;
-
- tile2
=
function ()
{};
- tile2.prototype.pos
=
3;
- tile2.prototype.barrier
=
true;
-
- map1
=
[[0,0,0,0,0,0,0,0,0],
- [0,0,0,0,0,0,0,0,0],
- [0,0,0,0,0,0,0,0,0],
- [0,0,0,0,0,0,0,0,0],
- [0,0,0,0,0,0,0,0,0],
- [0,0,0,0,0,0,0,0,0],
- [0,0,0,0,0,0,0,0,0],
- [0,0,0,0,0,0,0,0,0],
- [0,0,0,0,0,0,0,0,0]];
-
- function
MapMaker
(map)
{
- _root.attachMovie("blank",
"tiler",
d++);
- var
mapWdth
=
map[0].length;
- var
mapHght
=
map.length;
- for
(var
i
=
0;
i
<
mapHght;
i++)
{
- for
(var
j
=
0;
j
<
mapWdth;
j++)
{
- var
name
=
"tile_"+j+"_"+i;
- _root[name]
=
new
_root["tile"+map[i][j]];
- _root.tiler.attachMovie("TileSet1",
name,
i*100+j*2);
-
- _root.tiler[name]._x
=
(j*_root.tileWdth);
- _root.tiler[name]._y
=
(i*_root.tileHght);
- _root.tiler[name].gotoAndStop(_root[name].pos);
-
- }
- }
- }
-
-
- MapMaker(map1);
 |
Note |
|
You should
note that I changed my map1 to all 0s,
which would make it all grass for now.
This just makes a simple "empty pallet"
for us to work with. |
|
Next, go ahead and copy both your TileSet MC, and
your blank MC to the library of the new movie. All your
tiles should come with them. If you test the Movie, it
should make the map like in the other Movie. So far so
good.
Now, we need to add a variable to the _root, so put
this line of code at the very top of the ActionScript
panel for frame 1:
- selectedTile
=
0;
Next, make a button for each tile you have, and drag
an instance of the tile image into all 4 frames of the
button. Next, open up the TileSet MC, and make a new
layer on top of all the others. Create a new button,
which has nothing in it, except for a box on the "Hit"
frame, which is the exact same size as your tile. Place
this button in the layer above your tiles, and align it
to cover your tiles.
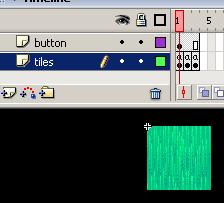
[ button
placement ]
Select the button, and add this ActionScript:
- on
(release)
{
- this.gotoAndStop(_root.selectedTile
+
1);
- }
Go back to the Main Timeline, and drag an instance of
the "TileSet" MC to the stage, somewhere to the right,
away from your other buttons. Name it "selector", and
put a TextBox near it that says: "current tile". Now,
select the button which shows your first tile, and enter
this code:
- on
(release)
{
- _root.selectedTile
=
0;
- _root.selector.gotoAndStop(1);
- }
Copy and paste the same code into your other buttons,
incrementing each number by one, so that the second
button would look like this:
- on
(release)
{
- _root.selectedTile
=
1;
- _root.selector.gotoAndStop(2);
- }
And so on. If you test it out at this point, you
should be able to click on a tile button, and then
change the map accordingly. All we did was make a button
in the TileSet which, when clicked, changes the Tile
displayed to whatever "_root.selectedTile" is set to.
Simple enough, right? Now, we need to find a way to
save, or export these maps into a matrix. Unfortunately,
according to Macromedia, Flash is not allowed to write
to an external Text file directly... In order to do
this, you have to use ASP, JavaScript, or some other
Server-Side Scripting... I don't feel like even trying
to do this for such a quick and simple tool... if you
feel you absolutely have to have such features, you're
on your own. However, we can do something simpler: Have
Flash create a the matrix for us, and display it on the
screen for us to copy/paste, and do whatever we want.
This is good enough for my purposes, so here we go:
First, make a new MovieClip, and name it: "mapBox".
In this MC create a TextBox, set it to Dynamic, and name
it: "mapTxt". I would make some kind of background for
this textbox, so that you can read it above the map.
Also, make a small "close" button, and place it in this
MC. Right-click the mapBox in the library, choose
linkage, and set it to "Export for ActionScript". Use
the same name. The code for the close button should look
like this:
- on
(release)
{
- _root.Clicked
=
false;
- _parent.removeMovieClip();
- }
Now, you'll want to make a button on the main
timeline, which will have this code:
- on
(release)
{
- if
(!_root.Clicked)
{
- _root.Clicked
=
true;
- _root.attachMovie("blank",
"map",
this.getNextHighestDepth())
- _root.map.attachMovie("mapBox",
"mapBox",
this.getNextHighestDepth());
- _root.map.mapBox._x
=
300;
- _root.map.mapBox._y
=
200;
- _root.mapString
=
"[";
- var
mapWdth
=
_root.map1[0].length;
- var
mapHght
=
_root.map1.length;
-
- for
(var
r
=
0;
r
<
mapHght;
r++)
{
- _root.mapString.concat("[");
-
- for
(var
n
=
0;
n
<
mapWdth;
n++)
{
- var
name
=
"tile_"+n+"_"+r;
-
- _root.mapString+=
String(_root.tiler[name]._currentframe
-
1);
-
- if
(n
<
mapWdth
-
1)
{
- _root.mapString+=
",";
-
- }
else
{
- _root.mapString+="]";
-
- }
- }
- if
(r
<
mapHght
-
1)
{
- _root.mapString+=",\r";
- }
-
- }
-
- _root.mapString+=
"]";
- _root.map.mapBox.mapTxt.text
=
_root.mapString;
- }
-
- }
All this does it look at the map on the screen, and
create a string, which will look like the matrix that we
want to create, then it creates an instance of the
mapBox on the screen, and fills the mapText with the
string.
And that's it! Try it out, and see how it works!
Hopefully this editor is easy for you to modify to your
own needs. You should have no problem creating one of
your own for your own game later on. Next, we'll discuss
how to put maps together, so that our Guy can move from
place to place.
Wait - this tutorial isn't over! There is more that
needs to be written, and the rest of this tutorial will
appear right here shortly. Until then, I hope this
helped.
If you have any questions, feel free to post them @
kirupaForum.
 |
page 7
of 7 |
|
|