by
kirupa | 18 August 2005Using
hover captions is a great way to provide more information about some feature or
element on your site. I'm sure you have seen hover captions in your operating
system when you hover over an icon, for example. What we are doing in Flash is
very similar. When a user hovers over a button, in our case, a text caption
appears detailing what exactly you hovered over.
The following animation is an example of what you will create
in this tutorial. Hover over the icons to see the hover caption:
[ hover over the above
icons to display a caption ]
Notice that when you move your mouse over an icon,
a small caption is displayed with some informative text. If you
hover your mouse over the icons on the far right, you will see that
the captions appear to your left to ensure that your text is not
cut-off by the boundaries of our movie.
Let's Flash!
Now that you have seen what we are planning on doing, let's re-create the above
effect in Flash. I have provided a sample FLA with just the buttons provided.
That way, you can focus more on creating the caption as opposed to fiddling with
creating perfect
buttons.
Once you have opened the above FLA in Flash, let's get started.
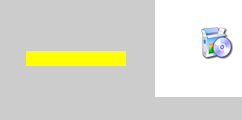
- First, we need to create the text field and background rectangle that will
house the caption. Click on the Rectangle Tool from your toolbox and draw a
rectangle that is 100 pixels wide and 15 pixels tall. Choose a lighter color
for the rectangle also:
[ draw a rectangle ]
- Once your rectangle has been drawn, we will convert it to a
Movie Clip symbol. Select your rectangle and press F8 or go to Modify |
Convert to Symbol. The Convert to Symbol dialog box should appear. Select
the option for Movie Clip and press OK.
- Right click on your newly created movie clip and select Edit in Place.
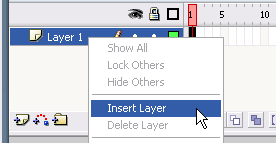
You should now see the timeline for your movie clip. In the timeline area, right
click on the Layer 1 label and select Insert Layer:
[ Insert a new layer above your
existing layer ]
- A new layer called Layer 2 should be created above Layer 1. We
will add our text field to Layer 2, so you may want to lock Layer 1 to avoid
accidentally selecting it while working in Layer 2. Make
sure Layer 2 is selected, and click on the Text Tool icon from your
Toolbox.
- Now, draw a text field over your rectangle. Once your text field has
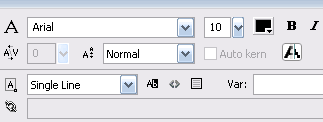
been drawn, we will need to modify the text field properties. Make sure your
text field type is Dynamic Text, your font style is Arial,
font size is 10, and that the Alias text icon is checked:
[ your text properties panel should
look like the above image ]
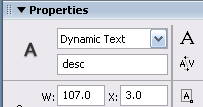
- Next, we need to specify an instance name for our text field.
Click in the <instance name> field found on the left-side of your Text
Properties panel and enter the word desc:
[ give your text field the instance
name desc ]
- Finally, make sure your text field is positioned over your rectangle. It
will make for a much nicer caption if the text looks like it is being
displayed within the rectangle you created earlier:
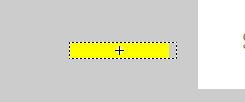
[ ensure your text field is over your
rectangle ]
- Click on the Scene 1 tab located above your timeline. You should now be
back in your main timeline. Select your rectangle movie clip, and give it
the instance name cap.
- If you look in your timeline, you should see a layer labeled actions.
Select the first (and only) frame from that layer and press F9 or go to
Window | Development Panels | Actions.
The actions window should be visible. Copy and paste the following code:
[ copy and paste the above code
into your Actions window ]
- Test your animation. You should now see your captions appear when you roll
over the buttons.
In the next page, I will explain the code and why your animation works the
way it does.
Onwards to the next page!
| |
page 1 of
3 |
 |
|