 Creating
a Simple 3D
Animation
Creating
a Simple 3D
Animation
by kirupaYou want to create an
animation. But wait! You don't want just any animation - you
want an animation that is in 3D, spins, flips, and does your
exams for you. Well, you are in luck because Swift 3D is the
program you need that solves all your problems (including
your exams if you want to a low grade).
In this tutorial, I (Kirupa Chinnathambi),
will help you to use Swift 3D to animate an object such as a
square. Because this is an introductory tutorial, you will
use the custom animations that come configured with Swift 3D
itself. As always, the final source file will be provided
near the end of this tutorial.
Your final Swift 3D project will look like
the following animation:
Creating the Animation:
In this half of the tutorial, you will
create the animation that you see above. In the second half,
we will export the animation you create into the Flash
format viewable on the Internet.
-
Launch Swift 3D and create a new document.
-
Press the Create Box button from your main toolbar:

[ create box button ]
-
Once you click the 'Create Box' button, a square should be
displayed in your main work area (Front and Top panels).
-
Select the square that is drawn by clicking on it. If the
square is taking up too much space in your work area,
right click on the square and drag back.
-
Make sure the square is selected and press the Show
Animations button on your bottom right:
[ show animation button ]
-
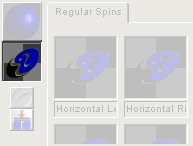
You will see the Regular Spins tab selected, and you will
also see pictures with text under them such as "Horizontal
Left" or "Horizontal Right".
-
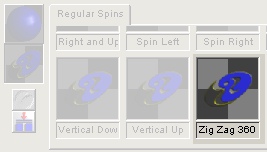
Use the scrollbar on the bottom right and scroll down till
you see Zig Zag 360 on the bottom row.
[ zig zag
360 animation option ]
-
Click the picture (the one with the blue shape and
checkerboard background) directly above Zig Zag 360 to see
a representation of how the animation looks. Now, drag the
picture above Zig Zag 360 and drop it on the square
in your work area.
-
You will notice that your timeline now has 'keyframes'.
That means the square does 'something' at the intervals in
your timeline. Click the Red dragger in your timeline and
drag it to your right to see your square move:
[ the
timeline and the red dragger ]
Exporting Animation
Now that the animation portion of the
square is complete, let's export it to the Flash 5 format:
-
Click the Preview and Export editor tab near the top of
the Swift 3D window:

[ preview
and export editor tab]
-
Once you have clicked the Preview and Export Editor tab,
you will see a section labeled Render Preview. More
importantly, you should see four buttons near the left of
that section. Click the Render Entire Animation button.
Your animations will begin to be rendered in the Flash
format:
[ rendering the frames of your
animation]
-
After a short while, your animation will be fully
rendered. After your animation has rendered, the Export
Entire Animation button on the right will be enabled.
Press the Export Entire Animation button and save your SWF
file to a location.
-
You should be able to view the animation by
double-clicking on it.
As always, I have provided the source file
above for you to download. Notice that my square was
colored; I have not discussed how to change the color of the
square in this tutorial, so do not fear!
Just a final word before we wrap up. What you've seen here is freshly baked content without added preservatives, artificial intelligence, ads, and algorithm-driven doodads. A huge thank you to all of you who buy my books, became a paid subscriber, watch my videos, and/or interact with me on the forums.
Your support keeps this site going! 😇

|


