Integration
of Pre-Rendered 3D Elements
Having balls and flat figures can be fine to a
degree, but often, your scene may require more
than that flat look. Using pre-rendered elements,
either hand-drawn, or more commonly pre-rendered
in an external 3D application then imported into
Flash can be used to enhance your 3D scene by
adding a more realistic 3D impression.
Such elements would require a fully rendered frame-by-frame
rendition with 360 degrees of rotation. That way, no matter what angle you are
looking at the object, you will be able to see its correct side. Here is an
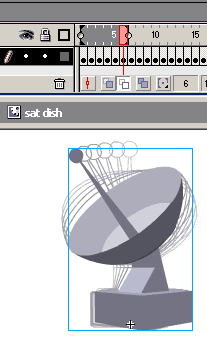
example created in Swift3D.
[ a satellite dish rendered with
360 degrees of rotation ]
You can imagine yourself running around this satellite to view
it at all angles as seen above. Using those angles of view, we can stick that
element into a 3D scene to give a better sense of realism though only requiring
Flash to calculate position and scaling for one single movieclip.
The Satellite Dish This will use the same methods of navigation as the example on Moving the
Camera With Panning. Instead of figures, however, this example will use two
pre-rendered satellite dishes. When moving around these dishes you will see them
as they should appear in being perspectively correct (at least within the
extents of their frames of animation).
[ perspectives for pre-rendered
satellite dishes ]
Steps to Create Animation (partial)
The elements in this
example consist of the background, which hasn't really changed; a small, red
circle movieClip; and the movieclip consisting of the frames that make up the
rotating pre-rendered element. Each one of these frames are placed in a single
movieclip used to represent the satellite dish. Telling this movieclip to play
different frames will allow it to appear to change perspective based on your
rotation around it.
[ frames of dish movieclip.
onion skin shows rotation ]
Here,
again, the Example 8: Moving the Camera With Panning method of navigation will
be the same with the added side-stepping of Example 9. We only need to address
the issue of the pre-rendered dish in its display function. It's there that we
will tell the dish movieclip to go to and stop and the correct frame
representing its correct perspective given the current camera angle. That
frame is based around the following function. What this function does is takes
an angle of rotation, r, and finds out which frame out of the total
number of frames reflects the passed angle based on a full rotation
of 360 degrees or 2 Pi radians. In other words, if the rotation is 0, this
function uses the first frame of the span of frames. At 180 degrees, or a half
circle, the number in the middle of frames and at around 360, the last frame
in frames.
The first two statements
r %= 2*Math.PI;
if (r < 0) r += 2*Math.PI;
make sure the rotation passed is within a range of 0 to 2 Pi (we're dealing
with radians here). r %= 2*Math.PI; uses mod (%) to bring the rotation down if
its past 360 and if (r < 0) r += 2*Math.PI; keeps it from being negative.
Following that, the return value is the frame calculated by deriving a ratio
from r with 2 Pi radians, or a full circle, and multiplying that by frames.
return
Math.floor(1 +
frames * r/(2*Math.PI));
An added 1 is included because frames in movieclips start at 1 and not 0 which
would be a possible result from this equation.
Now we can
get into the display functions to make this work. The little red markers
around the satellites are nothing new. Actually, the satellites themselves
aren't very different either aside from the portion of code changing their
frame. And that frame change is pretty much just calling the frameFromAngle
function. However, I have thrown in another small piece of code to, in a way,
enhance that effect.
Given the current state of frameFromAngle, no matter where the camera is
turned, as long as the camera remains in the same location, the angle of the
satellite would remain the same. Other screen elements, though, when they are
put into perspective and the camera turns within the environment, move in
relation with each other and give a shifting appearance as they move to the
edge of the view which frameFromAngle does not reflect. That can be added
however, just by adding a little extra angle of rotation based on the rotation
of the dish in respect to the rotation of the camera view. If looking straight
ahead, you'd have a correct full-on frameFromAngle perspective. However, as
that angle changes and the dish moves to the edge of view, that angle should
change. To compensate, we can just alter the angle used in frameFromAngle with
the calculation used in determining x since our x calculation is in fact our
distance from the center of the view. Be careful, however, since the x
actually changes based on distance back in z. When a dish is far back in the
scene with a large z, the range it has in x is large - you panning the camera
means a big jump in x value. Alternatively, with a close dish, when you pan
the camera the x only alters slightly. So to offset that we can divide by the
calculated radius to make this compensation greater when the radius is
smaller - or when the object is closer in view and less so, being more subtle,
when the object is further away.
So with that, we can include in the check for visibility (when z > 0) the
addition of the frame change
The rest is
just as done before; attaching the clips, assigning the display function and
running an onEnterFrame to control camera movement and display all the objects
in the objectsInScene array.
WARNING! Proximity and
Pre-rendered 3D Elements
First of all, using pre-rendered elements in such a 3D
scene is not an exact science. Such elements will be limited by the
number of frames which make them up - and the more frames you use, the
larger the file size of your movie, so you'll need to be careful of
that. But also, there can be undesirable perspectives, or at least
perspectives that don't appear to be visually correct, when you start to
get close to these objects.
This is because their frame is based on the rotation that
element is in relation to the camera. When you get closer to the camera,
you have a wider range of angles in a shorter range of space which could
give you unusually fast changing perspectives which may appear not to
match up with the view correctly. Besides, its not technically the view
that the angle is based on, its the camera position. The extents of the
view can actually extend beyond the camera as seen with the
merry-go-round example.
You may feel that you have learned everything
there is to know about 3D in Flash, but there
is still a bit more left. You do have cool examples
though, so continue on.