Flash 5:
Drawingboard
written by ilyas usal a.k.a. pom
In this very long tutorial, you will learn how to create a
drawing board with Flash. In order to achieve this with
Flash 5, we will see two very important things : drawing a
line between 2 points, and duplicating/attaching movie
clips. Then we'll see how to do the same thing much more
easily with Flash MX.
There are two ways (at least) to do this. Both have their
pros and cons. We'll see one of them only. I made an example
of the other in a fla provided at the end of the tutorial
called rotating.fla.
First Technique: Rescaling Everything
The idea here is to draw a line, and then rescale it on both
the _x and the _y axis.
The first thing we need to do
is to draw a line with an angle, just like on the
screenshot. It will have the right angle if you press SHIFT
while drawing the line. Be sure to choose hairline in the
Stroke panel
[ the info and stroke panels ]
To make this work, the line has to be 100
pixels high and 100 pixels wide. Take the Black Arrow tool
and select the line. In the Info panel, you should see an
input box for this purpose : set W=100 and H=100.
Now we have to turn the line
into a movie clip to be able to use it. The line should
still be selected. Press F8 and give it the name line and
select movie clip. You should now see a blue outline around
the line. Double click it to edit it. You have to put the
left end of the line at the center of the movie clip (look
for the crosshair).
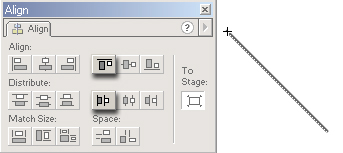
Open the Align Tool (Ctrl + K). Press 'To Stage', and the
4th button of the Align and Distribute line.
[
the align panel is used to align the line ]
It's now time to write some
Actionscript, isn't it? First give your line the Instance
Name line in the Instance panel. The problem
is: where should we write it? It is totally possible
to put it inside the movie clip itself, but as I'll explain
later on, it's easier to put it in a controller movie clip.
Create a new layer that you
will name controller. The controller movie
clip will be empty, simply with Actionscript attached to it.
Press CTRL + F8 to create a new movie clip, name it
control and of course make it a movie clip. You are now
editing the clip, but since there's nothing to put there,
just go back to the main scene by clicking on Scene 1
vignette that is just under the timeline.
Open your library with CTRL + L and drag the control
movie clip on the scene, on the controller layer, a
little bit outside the scene. Open it's Actions Panel and
write the code:
Increase the fps a bit and save
your work. You should now see the end of the line follow
your mouse. Now how does the code work:
mcLine =
_root.line;
I just gave the line another
name for simpler use. That's not necessary at all, simply
more practical.
mcLine._xscale = _root._xmouse-mcLine._x;
I rescale the line so that it
streches from it's position to the mouse.
You can experiment a little bit
on your own, and I'm sure you'll be able to do things like
this without too many difficulties (the source is given at
the end of this tutorial):
[
The line is connected to 2 points ]
We almost have all the tools in our hands to build our
drawing board. All but one, actually:
attachMovie. Of course, we
could do it with duplicateMovieClip,
but it's interesting to see how this function works as it is
slightly different.
Note
duplicateMovieClip : the clip that's being
duplicated has to be on the scene, which often forces us
to use not-so-elegant tricks (putting it outside the
scene, or making it invisible). The other thing is that
the code attached to the movie clip is also duplicated.
attachMovie : the clip has to be present in the
library but not on the scene. This time, the code is not
duplicated when the clip is attached. That's why it is
more often used in trailers for instance. Thoriphes made
an example that you will find at the end of this
tutorial.
Here we put the code outside the movie clip, so it
gives us the choice between the functions. I find it
casual to take the clip off the scene before the movie
loads.
So..Save your first animation
under a new name. Delete the line from the screen, but not
the controller movie clip. If you remember, the controller
controls a movie clip that is called line. Since we
deleted from the scene the object whose instance name was
line, it's not controlling anything anymore. That's why we
are going to attach the line under the same name: line
(so that we don't have to change the code).
In your library, right click
the line movie clip, and select LINKAGE. Check the
second box (Export to Actionscript) and enter the Identifier
mcLine. This is the name we are going to use when
attaching the movie. attachMovie is a movie clip method,
which means that we are going to attach the line now called
mcLine TO A MOVIE CLIP (EMPTY is better). We might as
well take controller. The code of the controller has
to change a bit to make it work:
this.attachMovie("mcLine","line",1);
this. means that we're attaching the line in THIS movie
clip. We could also do _root.other_clip.attach... to attach
it to another movie clip.
We attach mcLine under the name line, on level
1. The level is not so important, but it has to be superior
to 1.
line._xscale =
_xmouse-line._x;
Now we access line directly, without _root. and the same
with _xmouse. All the properties are now relative to the
movie clip, and not the main timeline because the line is no
longer located in the _root but in this movie clip.
Save your work.
Take a walk, eat something, breath some fresh air and come
back in half an hour.