|
by
kirupa | 27 November 2009
As you may know, Windows 7 introduces an improved taskbar with some
cool new features. One of these features is displaying progress information
directly in the application's taskbar item itself. Instead of having to rely on
looking at a progress bar inside the application like you've done in the past...
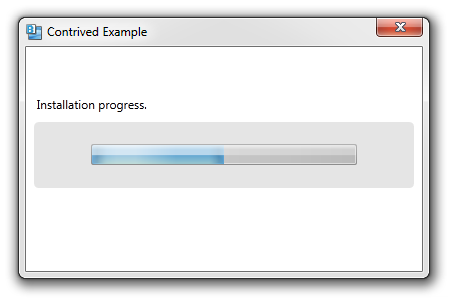
[ old
school ]
...you can glance at the taskbar and get the same
information with the progress information visible
behind the application icon:
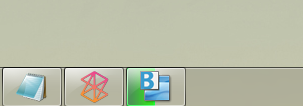
[ new
school ]
In this short tutorial, I will quickly explain
how you can write a few lines of code and have your
application display progress information in its
taskbar item.
Before we get to the code, let's make sure you have
the right stuff for all of this. This functionality
requires .NET4 and a version of Expression Blend
that works with .NET4. If you do not have either of
those prerequisites, download and install both of
them from the following two links:
Once you have downloaded and installed both the
.NET Framework and Blend, you are ready to start. Go
ahead and launch Expression Blend, create a new WPF
project, and open MainPage.xaml.cs:
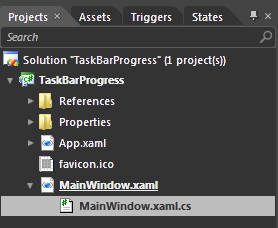
[
create a new WPF project and open MainWindow.xaml.cs
]
Right now, Blend will have your MainPage.xaml.cs
code file open and ready for you to edit. This is a
good point to take a quick breath before moving on.
First, let's look at how you can access the Taskbar
Item via code. All of the functionality for working
with your taskbar lives in the System.Windows.Shell
namespace, so add the following using statement to
your file:
- using
System.Windows.Shell;
After you've added this using statement, you can
work with the types that relate to your taskbar. In
your constructor, directly below your
InitializeComponent call, add the following code:
-
public
MainWindow()
-
{
-
this.InitializeComponent();
-
- // Insert
code required on object creation below this
point.
- TaskbarItemInfo
taskbarItemInfo
=
new
TaskbarItemInfo();
- this.TaskbarItemInfo
=
taskbarItemInfo;
-
}
This code doesn't really do anything that you can
notice. What it does do is create a TaskbarItemInfo
object called taskbarItemInfo and assigns it to your
current application's TaskbarItemInfo. As you can
guess, this does absolutely nothing...yet.
Like I mentioned earlier, your taskbar item in Windows 7 is partly a progress
bar that uses its width to display progress:
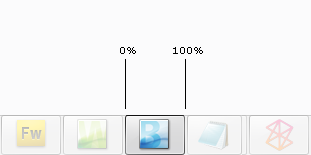
[
think of your taskbar item as a progress bar ]
The value of the progress bar is determined by
the ProgressValue
property that lives in the
TaskBarItemInfo class. Let's add some code to
what you already have. Go ahead and add the
highlighted line:
-
public
MainWindow()
-
{
-
this.InitializeComponent();
-
-
// Insert code required on object creation
below this point.
- TaskbarItemInfo
taskbarItemInfo
=
new
TaskbarItemInfo();
-
taskbarItemInfo.ProgressValue
=
.5;
-
- this.TaskbarItemInfo
=
taskbarItemInfo;
-
}
The ProgressValue
property is of type double
whose values go from 0 to 1, so by setting the value
to .5, you are setting the progress at 50%. If you
run your application right now, you will easily see
that a green progress bar appears and stops about
half-way through.
There is more to displaying the progress beyond just
setting a simple value between 0 and 1. There are
various states that you can't simplify such as
errors, indeterminate situations, etc. To deal with
those cases, you have the
ProgressState property.
Add the highlighted line to your code:
-
public
MainWindow()
-
{
-
this.InitializeComponent();
-
-
// Insert code required on object creation
below this point.
- TaskbarItemInfo
taskbarItemInfo
=
new
TaskbarItemInfo();
- taskbarItemInfo.ProgressValue
= .5;
-
taskbarItemInfo.ProgressState
=
TaskbarItemProgressState.Normal;
-
-
this.TaskbarItemInfo
=
taskbarItemInfo;
- }
If you run your application, you won't see
anything different than what you saw earlier. The
reason is that your
TaskbarItemProgressState, an enum that
contains all of the progress states you can use, is
currently set to Normal.
It actually can be set to
Error, Indeterminate,
None,
Normal, or
Paused:
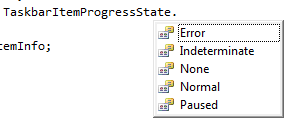
[ you
can select from five predefined progress states ]
Depending on which state you select, your
progress bar will look different. The following
screenshot gives you a static visualization of what
your progress bar looks like in each of the five
states:
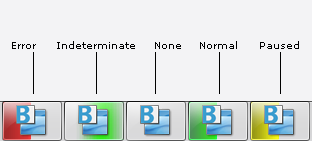
[ the
five amigos in one picture ]
Whatever you set for the
ProgressState will override your
ProgressValue as
necessary. For example, setting your ProgressState
to Indeterminate will simply loop through the
progress animation regardless of what you specify
for your ProgressValue. Setting a ProgressState of
None will not display anything as you can see above.
That
is all there is to working with the taskbar progress
notifications in Windows 7. As you can see, .NET 4
makes it easy to work with the native Windows 7
taskbar functionality. While you can do much of this
with earlier versions of the .NET Framework, the
amount of code and underlying Windows API knowledge
you needed would have been too great to cover in a
single page.
If you are curious to see what my application
used as part of this tutorial looks like, feel free
to download the source files from below:
Just remember that these source files will only
work in a version of Expression Blend or Visual
Studio that supports .NET 4.
Just a final word before we wrap up. What you've seen here is freshly baked content without added preservatives, artificial intelligence, ads, and algorithm-driven doodads. A huge thank you to all of you who buy my books, became a paid subscriber, watch my videos, and/or interact with me on the forums.
Your support keeps this site going! 😇

|


