|
by
kirupa | 17 February 2010
Traditionally, in Windows, your taskbar only displayed an icon of your
running application along with some text:

[ the Windows 95 taskbar (source)
]
Even though my screenshot is of the Windows 95
taskbar, nothing really major changed in that area
for many years through several major Windows
releases. With Windows 7, the whole taskbar area was
significantly revamped. You can read more about the
new taskbar improvements in this
blog
post.
One of the overarching themes of the revamp was
to allow your taskbar to show more information about
your running application. One feature that came out
of that is the icon overlays, and you can see an
example of that in the Windows Live Messenger icon:
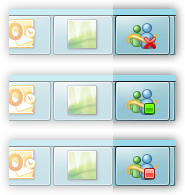
[ notice the different icon overlay in each
variation ]
Notice that the bottom-right corner of the
Windows Live Messenger taskbar item displays a
different visual in each of the three images. That
visual represents the icon overlay that you will
learn to add to your WPF applications running in
Windows 7.
Because this is a Windows 7 feature, you will need
to create a WPF project that supports .NET 4. The
latest versions of Expression Blend and Visual
Studio will allow you to do this. Once you have
created a new WPF project, go to the code file
Page.xaml.cs and add the following using statement:
- using System.Windows.Shell;
Your code should look basically as follows:
- using
System;
- using
System.Collections.Generic;
- using
System.Text;
- using
System.Windows;
- using
System.Windows.Controls;
- using
System.Windows.Data;
- using
System.Windows.Documents;
- using
System.Windows.Input;
- using
System.Windows.Media;
- using
System.Windows.Media.Imaging;
- using
System.Windows.Shapes;
- using
System.Windows.Shell;
-
- namespace
IconOverlay
- {
- /// <summary>
- /// Interaction
logic for MainWindow.xaml
- /// </summary>
- public
partial
class
MainWindow
:
Window
- {
- public
MainWindow()
- {
- this.InitializeComponent();
-
- // Insert
code required on object creation
below this point.
- }
- }
- }
This is a good starting point, so the next two
sections will describe the two types of overlays you
can add to your taskbar icon - images and XAML
visuals.
If you want to display an image
as your icon overlay, first go ahead and add an
image to your project.
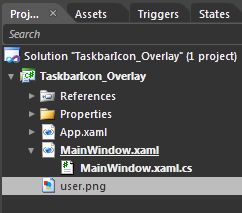
[ add the image you want to use to your project ]
If you are using Visual Studio, make sure the
image you add has is Build Type set to
Resource and its Copy to Output Directory
value set to Do Not Copy:
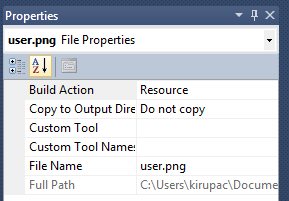
[ the default VS settings for an image ]
Anyway, once you have your image added to your
solution, add the following code to display it as
your taskbar item's icon overlay:
- BitmapImage
image
=
new
BitmapImage();
-
- image.BeginInit();
- image.UriSource
=
new
Uri("pack://application:,,,/user.png",
UriKind.Relative);
- image.EndInit();
-
- TaskbarItemInfo
taskbarItem
=
new
TaskbarItemInfo();
- taskbarItem.Overlay
=
image;
-
- Window.TaskbarItemInfo
=
taskbarItem;
The code for doing this is fairly
straightforward, so I am not going to go into great
detail. Just note that, because your image is a
resource, I am using the extremely weird pack URI
syntax for accessing it:
pack://application:,,,/user.png
You are not restricted to using just
images for your icon overlay. You can also define
content in XAML and have it display in the icon
overlay location. First, you will need to create the
XAML and store it as a DrawingBrush resource. Once
you have your DrawingBrush resource, the second (and
last!) thing you will need to do is convert it into
a DrawingImage. Don't worry, it is not that scary.
Jump into Expression Blend and create something
really simple. I'm going to draw a small red
rectangle with rounded corners:
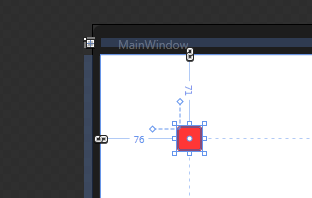
[ draw something that you want as your icon ]
Once you have drawn your shape, make sure it is
selected. Go to Tools | Make Brush Resource | Make
DrawingBrush Resource:
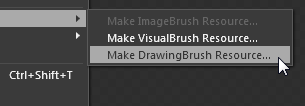
[
let's make a DrawingBrush resource ]
The Create DrawingBrush Resource dialog will
appear. Under Name (Key), give your brush a name
that you can remember later. I'm giving mine the
name RedVisual:
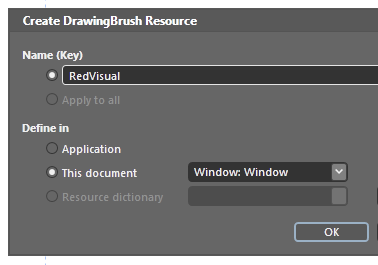
[
give your DrawingBrush a resource name ]
Once you have given your DrawingBrush a name,
click OK to close the dialog. We are done with the
XAML for now, so let's jump back into code.
In the code-behind file (probably
MainPage.xaml.cs) associated with the XAML document
you just edited, the code for displaying your
RedVisual DrawingBrush as an icon overlay is:
- DrawingBrush
visual
=
this.Resources["RedVisual"]
as
DrawingBrush;
- DrawingImage
image
=
new
DrawingImage(visual.Drawing);
-
- TaskbarItemInfo
taskbarItem
=
new
TaskbarItemInfo();
- taskbarItem.Overlay
=
image;
-
- Window.TaskbarItemInfo
=
taskbarItem;
Notice that I am simply converting our
DrawingBrush to a DrawingImage so that it can be
used as the input to the Overlay property. In your
example, if you didn't use RedVisual as the name of
your DrawingBrush, be sure to change it
appropriately so that you aren't running into any
errors.
If I run my version of the application, here is
what I see:
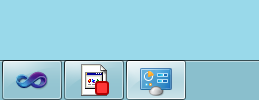
[
notice my XAML-ific icon overlay ]
Notice that the red
rectangle that I drew earlier and converted into a
DrawingBrush is displayed as my application's
taskbar icon overlay.
Well,
that is pretty much it! There are two common ways to
have an icon overlay appear. One way is by setting
an image directly, and the other way is by taking
some XAML and displaying its visuals there.
Just a final word before we wrap up. What you've seen here is freshly baked content without added preservatives, artificial intelligence, ads, and algorithm-driven doodads. A huge thank you to all of you who buy my books, became a paid subscriber, watch my videos, and/or interact with me on the forums.
Your support keeps this site going! 😇

|


