|
by kirupa |
17 August 2008
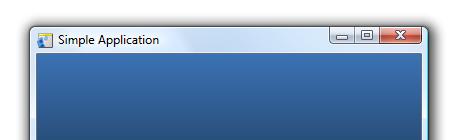
By default, when you create a WPF application, it will
look like your standard Windows application with the default
window styles and borders that your OS specifies:
While having applications match the look and feel of your OS
is good for consistency, you may want your app to look
completely different. Traditionally, creating such a custom
look was hard. It required a fairly good understanding of
how windows in Windows were actually created and how to
modify them. With WPF, though, the task of creating your own
custom windows becomes quite easy.
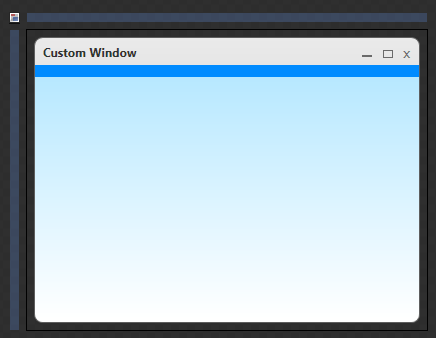
For example, the following is a small WPF app that I created
using a custom window that I designed inside Expression
Blend:

Creating this custom window did not take more than a few
minutes, so in this tutorial, let's learn how to do that.
The key to creating your own custom windows is to get rid of
the default window style your operating system provides.
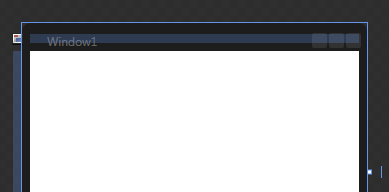
Create a new WPF project in Expression Blend. By default you
will see a preview of something that resembles your window
appear:
[ your default WPF application ]
In case you were wondering,
Blend fakes the title bar and other elements of your window
style, for the chances are your window isn't styled in
black.
From the Object tree, select Window to explicitly set the
focus on the Window element:
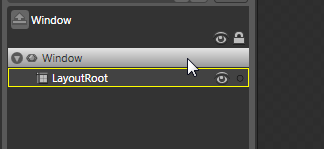
[ give your Window element focus by selecting it on the
Object Tree ]
With your Window element selected, your Properties Inspector
now displays all properties that are relevant to just your
Window. While a lot of the properties are interesting, the
one that will be most interesting to you are the ones found
in the Appearance category:
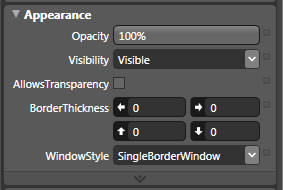
[ the Appearance category provides you with visual
customizations ]
Notice the property called AllowsTransparency. Click on the
checkbox next to it to set the value for AllowsTransparency
to True. Once you have done that, notice that the titlebar
and other window elements from Window on your design
surface are now gone:

[ all default window elements are now removed ]
What you now have is the equivalent of a blank canvas on
which to design not just your application but also the
window in which your application will be hosted in. For
example, here is how I ended up designing my Window, and
notice that all I am really using are just curved rectangles
for the various shapes that make up this window:
That's all there is to creating your own custom windows. The
trick was knowing that by setting AllowsTransparency to
true, you have full freedom in defining the look of your
windows. This freedom isn't cheap though. If you want to
emulate the default window functionality, you'll need to
provide your own code for minimizing, maximizing, resizing,
and repositioning.
Three code snippets that will come in handy are those
for minimizing, maximizing, and dragging your window:
- private
void
Minimize(object
sender,
RoutedEventArgs
e)
- {
- this.WindowState
=
WindowState.Minimized;
- }
- private
void
Maximize(object
sender,
RoutedEventArgs
e)
- {
- this.WindowState
=
WindowState.Maximized;
- }
- private
void
DragStart(object
sender,
MouseButtonEventArgs
e)
- {
- this.DragMove();
- }
Resizing your window is a little bit tricky - even with
the ResizeGrip control, so I'll defer covering that topic
for a later date. If you just want the code for resizing a
custom window, visit my blog post titled
Resizing Custom / Transparent Windows.
Just a final word before we wrap up. What you've seen here is freshly baked content without added preservatives, artificial intelligence, ads, and algorithm-driven doodads. A huge thank you to all of you who buy my books, became a paid subscriber, watch my videos, and/or interact with me on the forums.
Your support keeps this site going! 😇

|


