# The Component Lifecycle
by [ kirupa](https://www.kirupa.com/me/index.htm) | filed under [Learning React](https://www.kirupa.com/react/index.htm)
In the beginning, we started off with a very simple view of components and what they do. As we learned more about React and did cooler and more involved things, it turns out our components aren't all that simple. They help us deal with properties, state, events, and often are responsible for the well-being of other components as well. Keeping track of everything components do sometimes can be tough.
To help with this, React provides us with something known as **lifecycle methods**. Lifecycle methods are (unsurprisingly) special methods that automatically get called as our component achieves certain milestones. Here is one way to think about them. We humans tend to celebrate important milestones in our life - milestones like birthdays (🍰), anniversaries ( 💍), [getting a pet](https://twitter.com/kirupa/status/873071391511162881) (🐱), [earning the high score in Frogger](https://www.youtube.com/watch?v=Dj3kXXIw02s) (🕹️), [eating your first grapefruit](https://www.youtube.com/watch?v=waCF81HdKAA) (🍊), etc. Similarly, components in React tend to celebrate important milestones in their life as well. They tend to celebrate milestones like when the they get initialized, are about to render, have finished updating, are about to be destroyed, and so on. What React's lifecycle methods do is commemorate these milestones by allowing you to run your own code at these special moments. Think of these lifecycle methods as being no different than special event handlers similar to the ones you may have when listening to the **DOMContentLoaded** or **load** events on a HTML page.
In this tutorial, we are going to look at these lifecycle methods in great detail and learn all about what we can do with them.
Onwards!
## Meet the Lifecycle Methods
There are a bunch of things our components do as part of just being around, but the important ones are commemorated by the lifecycle methods displayed [in the following diagram](http://projects.wojtekmaj.pl/react-lifecycle-methods-diagram/):
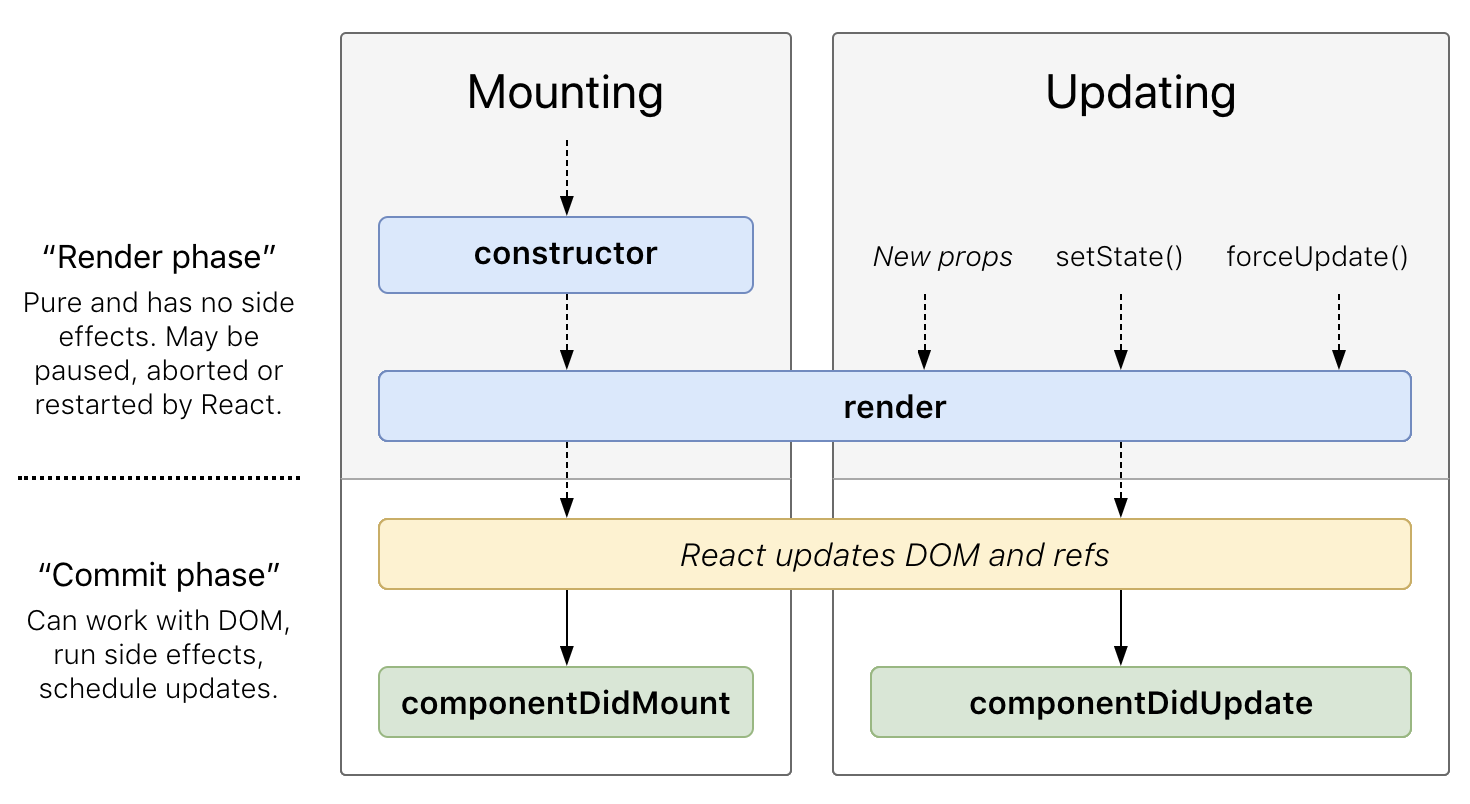
What this diagram shows are the two main phases your component operates in. The phase where it attaches itself to the DOM is known as **mounting**. The phase where the component updates because of new props or state changes is the **updating** phase. Within these two phases, a handful of lifecycle methods get called. The mounting phase has the `constructor`, `render`, and `componentDidMount` methods. The updating phase has just the `render` and `componentDidUpdate` methods. Some of these methods should be very familiar to you, some we've only seen here and there, and a few you are probably seeing for the first time. What we are going to do in the following sections is make these lifecycle methods seem as familiar to you as the back of your hand! To help with this, we are going to start with a simple example.
Create a new HTML document and add the following stuff into it:
```html
Lifecycle Methods : Simple Counter
```
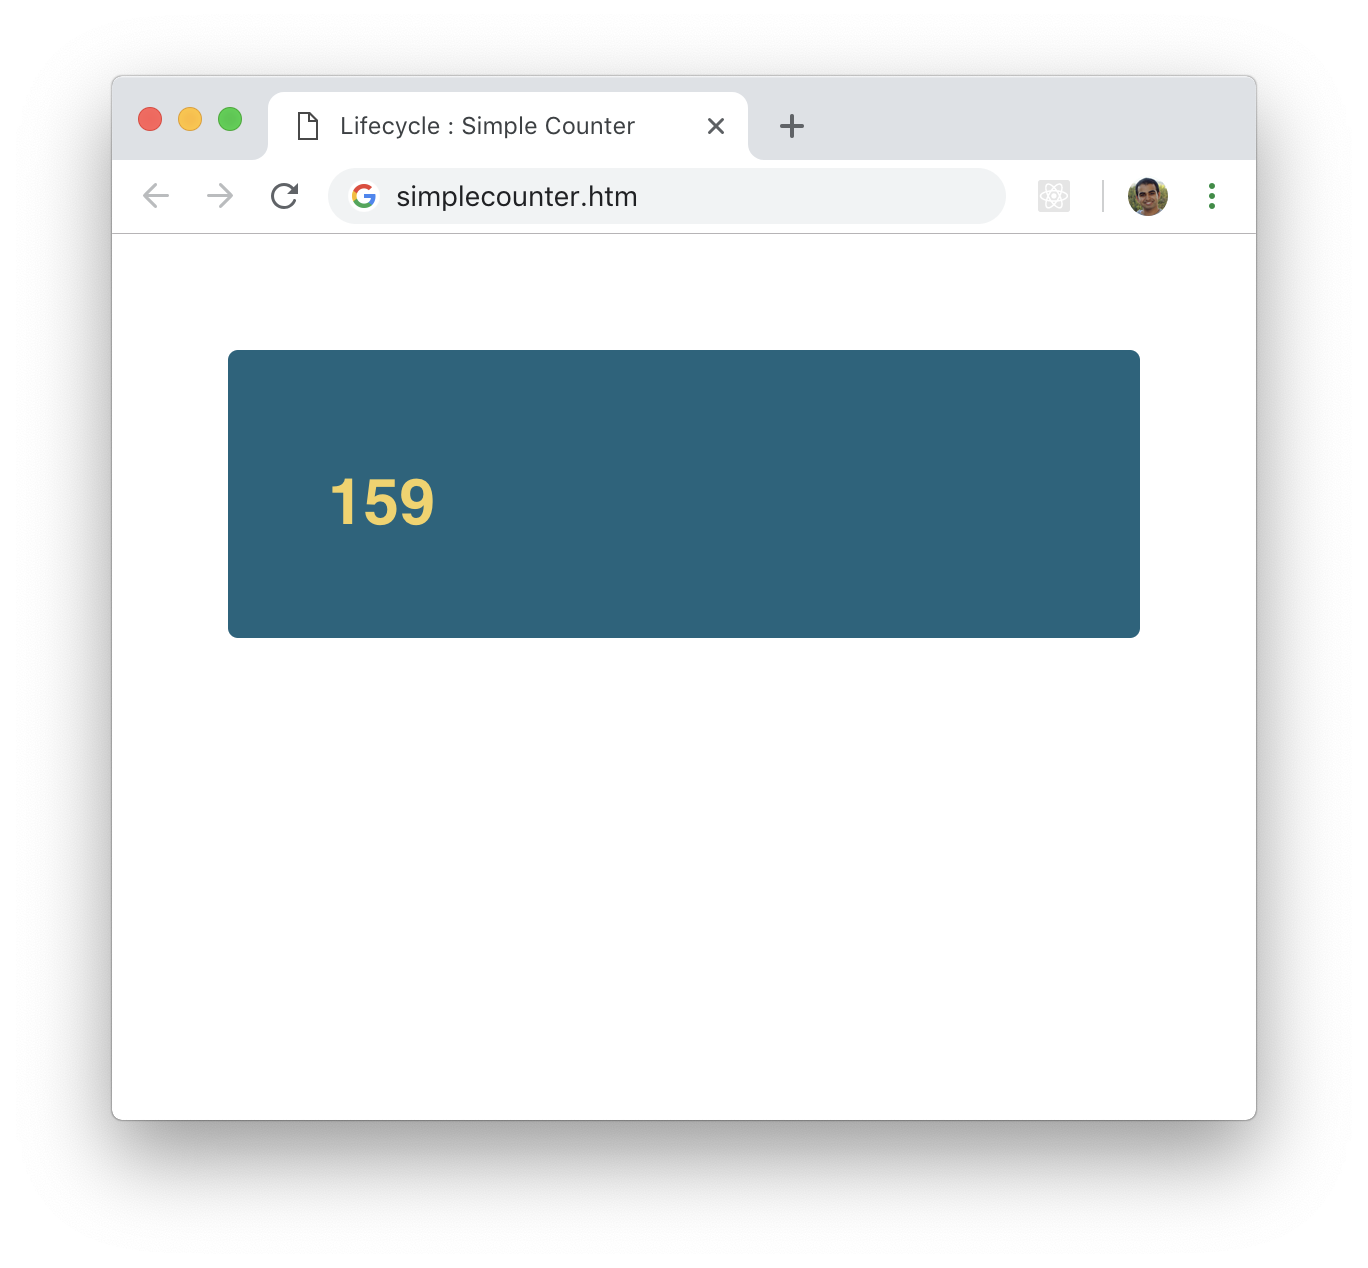
Go ahead an preview this page in your browser. If everything worked properly, you will see a counter value that increases when the page loads:
If you take a look at the code that makes this work, you'll notice that this is a near exact replica of the `LightningCounter` component ([see source](https://github.com/kirupa/kirupa/blob/master/reactjs/dealing_with_state.htm)) we saw in the [Dealing with State](https://www.kirupa.com/react/dealing_with_state.htm) tutorial. The only minor differences are that there is no additional parent component, we explicitly defined our `componentDidUpdate` method, and some of the variable names are different.
Ok! Now that we have our counter example up and running, let's see these lifecycle methods in action. In our example, add the following highlighted `console.log` statements into the `constructor`, `render`, `componentDidMount`, and `componentDidUpdate` methods:
```jsx
class SimpleCounter extends React.Component {
constructor(props) {
super(props);
this.state = {
count: 0
};
this.timerTick = this.timerTick.bind(this);
console.log("Constructor!");
}
timerTick() {
this.setState((prevState) => {
return {
count: prevState.count + 1
};
});
}
componentDidMount() {
this.timer = setInterval(this.timerTick, 100);
console.log("Component has mounted!");
}
componentDidUpdate(prevProps, prevState) {
console.log("Component updated from: " + prevState.count);
}
render() {
console.log("SimpleCounter render call!");
return (
{this.state.count}
);
}
}
ReactDOM.render(
,
document.querySelector("#container")
);
```
After you have made these highlighted changes, re-run the example again. This time, take a look at your console:
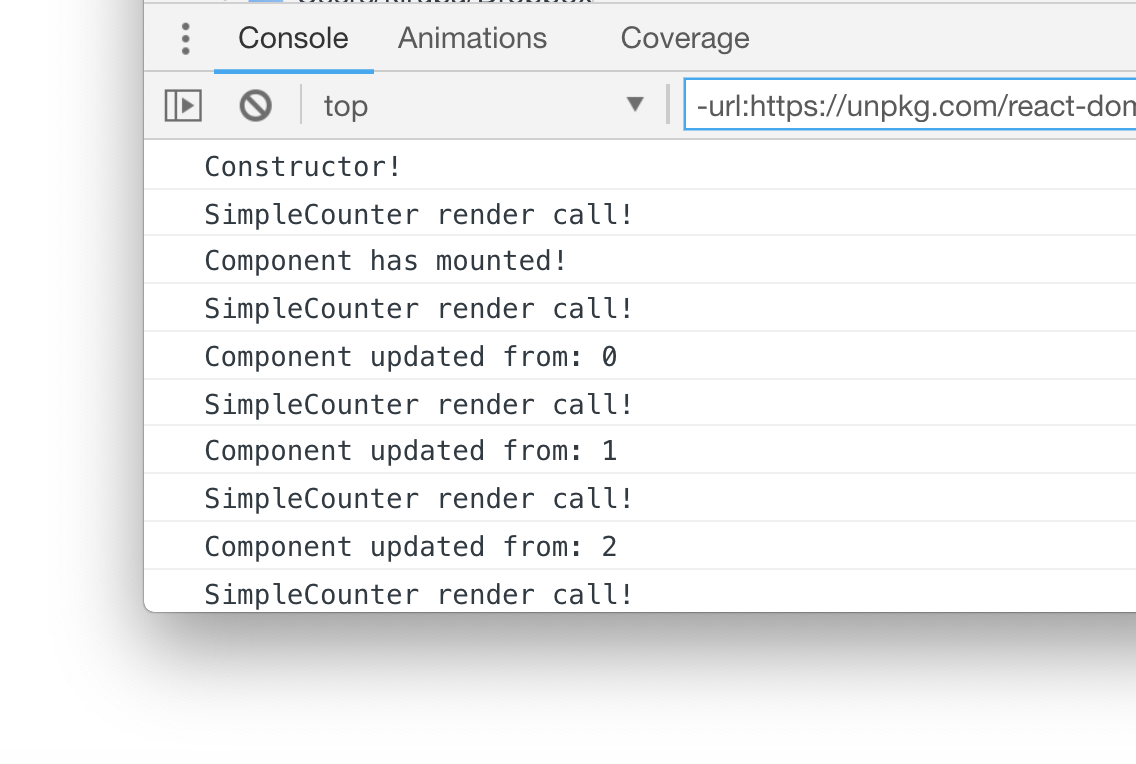
You'll see all of the `console.log` statements printing things to the screen. What you will see printed should closely mimic the lifecycle diagram we saw earlier.
#### Deeper Look at the Mounting Phase
The mounting phase is captured by the first three lines:
Constructor!
The `constructor` method is called first, and we place any code here that we would want to run when the component is getting initialized. Below is the `constructor` method from our example in all its glory:
```jsx
constructor(props) {
super(props);
this.state = {
count: 0
};
this.timerTick = this.timerTick.bind(this);
console.log("Constructor!");
}
```
Examples of the sorts of things we put here include defining our `state` object and any binding-related shenanigans for `this`. In our example, we do both!
The familiar `render` method is called next:
```jsx
render() {
console.log("SimpleCounter render call!");
return (
{this.state.count}
);
}
```
Like we've seen many times before, this method is responsible for returning some data (like JSX!) to whatever parent component is responsible for instantiating the current component.
Lastly, we have our `componentDidMount` method:
```jsx
componentDidMount() {
this.timer = setInterval(this.timerTick, 100);
console.log("Component has mounted!");
}
```
This method gets called after our component has successfully inserted itself into our DOM. At this point, you can write code to interact with the rest of your app without needing to worry about whether your component is fully ready or not. In our example, we start our timer that is responsible for making our counter actually count.
#### Deeper Look at the Updating Phase
The rest of the lines on our Console are all from the updating phase:
SimpleCounter render call!
While the mounting phase happens just once, the updating phase happens every time there is an internal change that requires an update. Since we have a timer that changes our state, each timer tick ends up causing a `render` call along with a call to `componentDidUpdate`.
The `componentDidUpdate` method looks as follows:
```jsx
componentDidUpdate(prevProps, prevState) {
console.log("Component updated from: " + prevState.count);
}
```
By the time this method gets called, all of the changes your component needed to make have already been made with the DOM reflecting the latest state. The work you would do in this method is to make further changes to the DOM or perform additional tasks revolving around whether the component's props or state were *actually* updated.
You can check the state of whether your props or state were *actually* updated fairly easily. When the `componentDidUpdate` method gets called, you gain access to the props and state **from when before the update** was made. You can get the current value for the props and state by calling `this.props` and `this.state` respectively. You can do a comparison to see what exactly changed (if anything) and then react accordingly.
### The Unmounting Phase
There is a third phase beyond the mounting and updating phases. That is the **unmounting phase**:
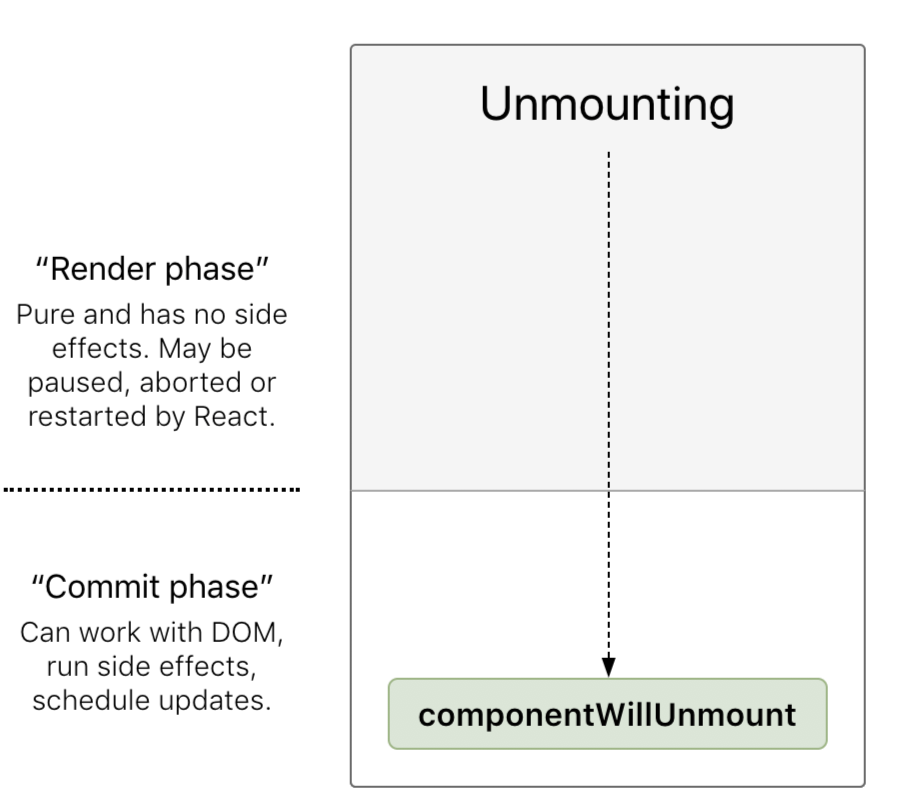
This phase kicks in when a component is about to be destroyed. The only method that exists here is `componentWillUnmount`. You can use this method to clean-up any long-running tasks like timers before your component goes away for good. To see this component in action, make the following highlighted changes:
```jsx
class SimpleCounter extends React.Component {
constructor(props) {
super(props);
this.state = {
count: 0
};
this.timerTick = this.timerTick.bind(this);
console.log("Constructor!");
}
timerTick() {
this.setState((prevState) => {
return {
count: prevState.count + 1
};
});
}
componentDidMount() {
this.timer = setInterval(this.timerTick, 100);
console.log("Component has mounted!");
}
componentDidUpdate(prevProps, prevState) {
console.log("Component updated from: " + prevState.count);
if (this.state.count == 50) {
ReactDOM.unmountComponentAtNode(document.querySelector("#container"));
}
}
componentWillUnmount() {
console.log("Component is about to be unmounted!");
clearInterval(this.timer);
}
render() {
console.log("SimpleCounter render call!");
return (
{this.state.count}
);
}
}
```
What we are doing is forcing our component to get unmounted when the value of `count` equals **50**. We trigger the unmounting in the `componentDidUpdate` method, and this in-turn calls `componentWillUnmount`:
```jsx
componentWillUnmount() {
console.log("Component is about to be unmounted!");
clearInterval(this.timer);
}
```
Inside this method, all we do is clear the timer that we had running from earlier. Because this component is about to be unmounted, you will no longer see anything in your browser shortly after this point because the component will be gone from the DOM:
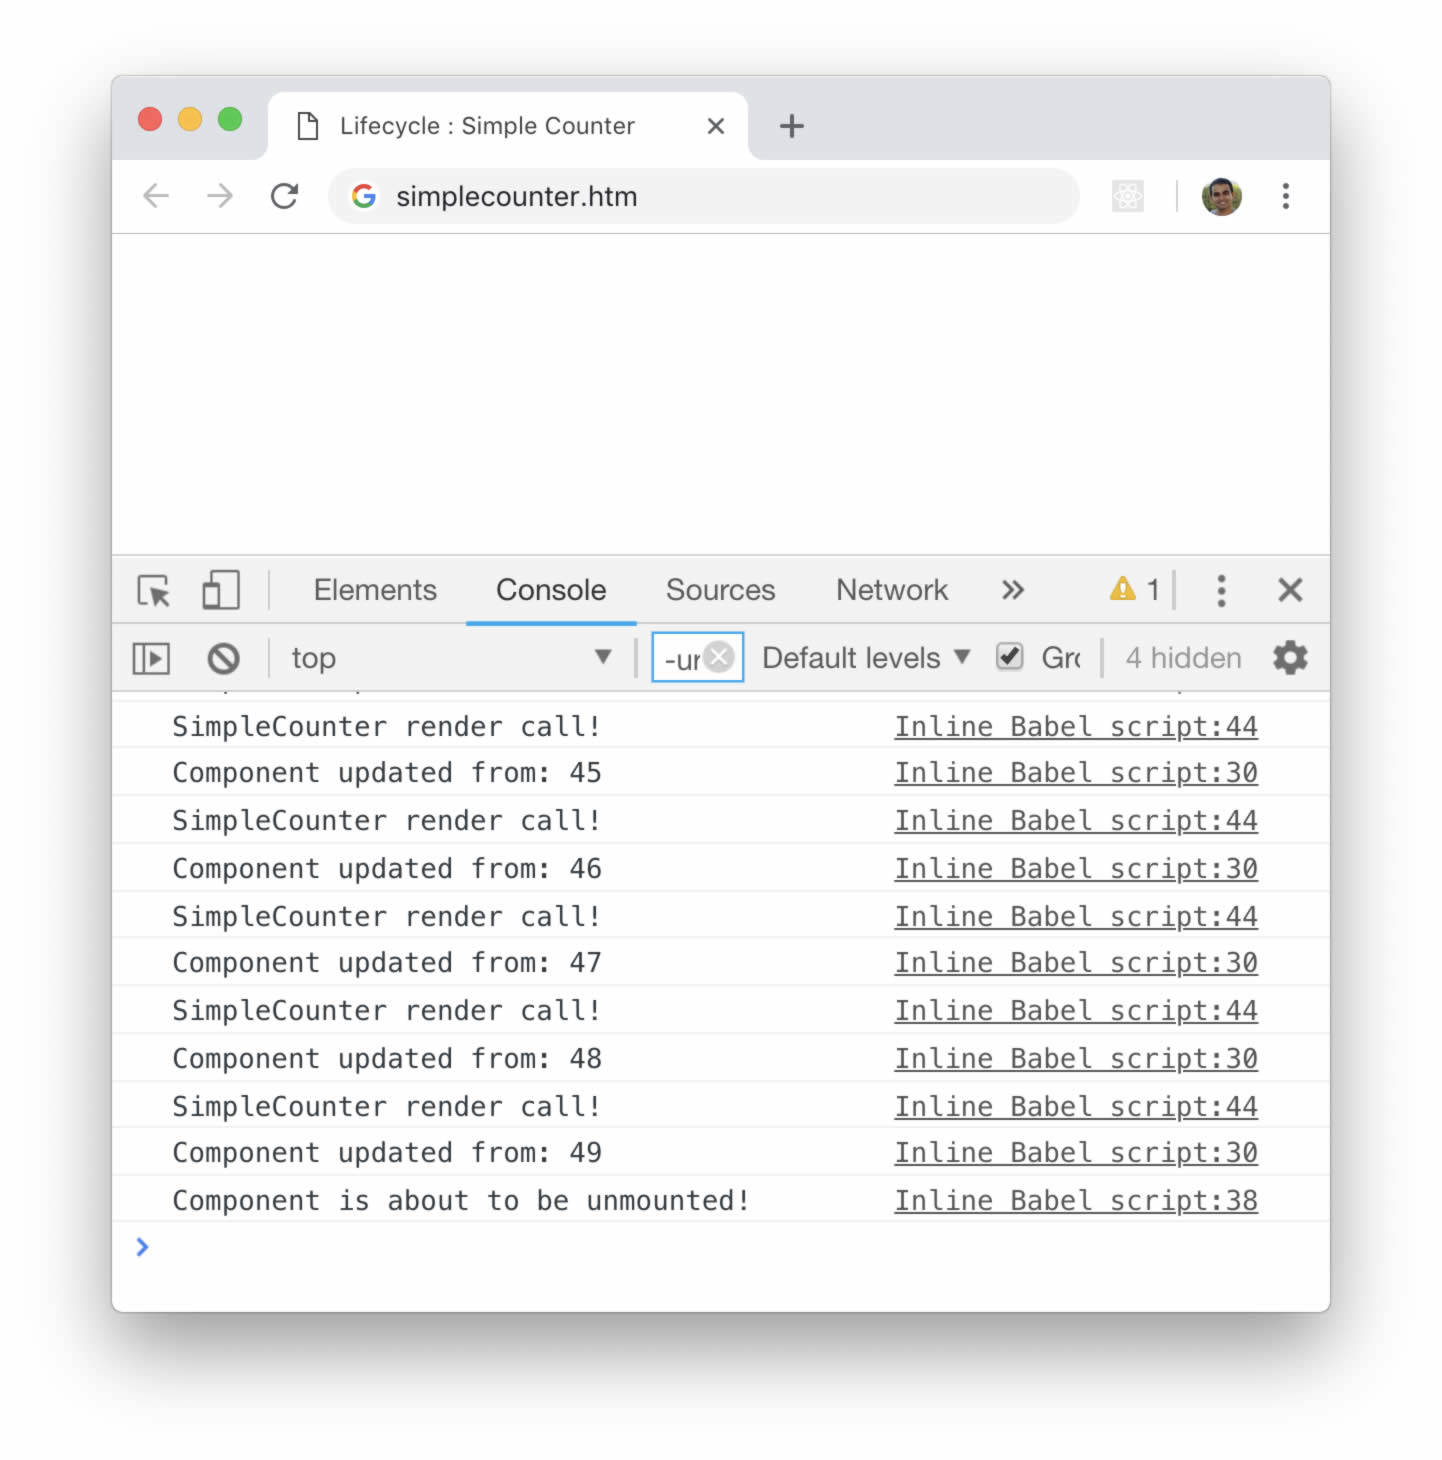
If you look at the Console, the last message you will see is the ominous ***Component is about to be unmounted!*** log statement we had specified, also in `componentWillUnmount`.
At this point, we are done fiddling with our `SimpleCounter` component. For a look at the final source, you can look at [simplecounter.htm on Github](https://github.com/kirupa/kirupa/blob/master/reactjs/simplecounter.htm).
## Conclusion
Our components are fascinating little things. On the surface they seem like they don't have much going on. Digging just a little bit deeper, we find that React is constantly watching and notifying our components every time something interesting happens. All of this is done via the lifecycle methods that we spent this entire tutorial looking at.
Before we wrap-up and send you on to the next big React thing, there is one detail you should be aware of. The lifecycle methods we looked at are the common ones you'll almost always end up using. There are a handful of uncommon lifecycle methods that you may need for some rare and specialized situations. You can see them under the [Rarely Used Lifecycle Methods](https://reactjs.org/docs/react-component.html#rarely-used-lifecycle-methods) section of the React documentation.
**Next tutorial:** [Accessing DOM Elements](https://www.kirupa.com/react/accessing_dom_elements.htm)