# Getting Started with the Canvas
by [kirupa](https://www.kirupa.com/me/index.htm) | filed under [Working with the Canvas](https://www.kirupa.com/canvas/index.htm)
In the previous article, we got a high-level overview of the mysterious canvas by comparing it to the more-familiar DOM. That article was missing something crucial, though. It was missing the part where you get your hands wet writing markup and code. We are going to fix that up in this article.
We are going to put some of that conceptual knowledge you gained to good use by creating a simple example using the `canvas` element. I know that sounds a little scary, but you'll have a lot of help along the way. As you will find out soon enough, getting bizarre lines of JavaScript to draw something on the screen is a whole lot of fun.
Onwards!
## Meet the Canvas Element
The first thing we are going to do is add a `canvas` element to our page and make some adjustments to make them easier to work with. Before we get to any of that, you need is a blank HTML page that we will be working on. If you don't have a blank HTML page and need some help creating one, go ahead and create a new document and add the following lines of markup into it:
```
Simple Example
```
Once you have a blank HTML document setup, it's time for the main event you have been eagerly waiting the past 30-ish seconds for!
### Adding the Canvas Element
The canvas element is represented by the appropriately named `canvas` HTML tag, and it behaves just like any other HTML element you might have used in the past. To add a `canvas` element to your page, simply add the following opening and closing tag:
```html
```
With this line, you have successfully added a `canvas` element to your document!
All that said, let's not celebrate too soon. If you preview your page right now, you'll be greeted with a deafening blank screen. The reason is that your `canvas` element by itself has nothing interesting going for it. It is merely a screen that JavaScript will ***eventually*** project pixels onto.
### Visualizing our Canvas
Working with something invisible isn't fun. To help us visualize our `canvas` element, let's specify some CSS to give it a border. Add the highlighted `style` block to your document inside your `head` block:
```html
Simple Example
.
.
.
```
Once you've added that CSS, preview your page now. If everything worked out properly, our page will look as follows:
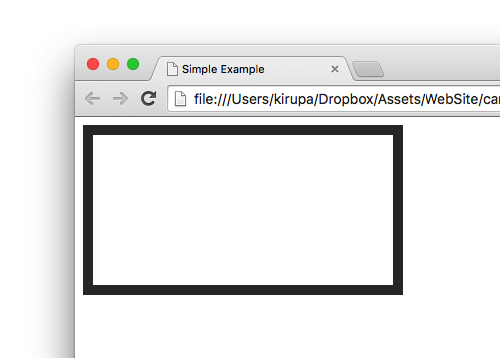
As expected, our CSS gave our canvas a 10 pixel wide dark gray border! While this is ***normally*** nothing to write home about, in our case, we can at least see some evidence that the canvas element is indeed alive...and possibly well. Now that we can see our `canvas` element, doesn't it look a little too small? Let's fix that next!
### Resizing our Canvas Element
By default, your canvas elements are 300 pixels wide and 150 pixels tall. That might be a good size, but we want something bigger...like 550 pixels by 350 pixels. Our initial reaction might be to add some width and height properties to our existing style rule that targets our `canvas`. As it turns out, you can't really do that and get the intended result.
To properly change your `canvas` element's dimensions, add the **width** and **height** attributes to your `canvas` element's HTML directly:
```html
```
Yes, I know that looks a bit odd given that we have been told to use CSS for setting the size of elements in HTML. I am not saying that you can't use CSS for setting the size. You can use CSS for setting the size on one condition: **you preserve your canvas element's aspect ratio**. If you aren't like we are, then setting the size via HTML is the only way to get the proper size without having all the pixels inside our canvas look all stretched and weird.
As you will keep finding out, there are some quirks about working with the `canvas` element that we all have to tolerate above and beyond the usual silliness commonly found in HTML elements :P
### Giving Our Canvas Element an ID
The last and probably most important step is to give our `canvas` element an ID value so that you can reference it via JavaScript. On the `canvas` element, add the **id** attribute and give it a value of **myCanvas**:
```html
```
The full markup for everything you should have in your document so far should look something similar to the following:
```
Simple Example
```
At this point, I would say don't preview what you have in your browser. The reason is that you still won't see anything different or drastic from what you had earlier. That is about to change, though!
## Drawing Things
In the previous section, we basically defined our `canvas` element in markup. While important, what we've just done is a very VERY minor part of working with the `canvas` overall. The real work is about to happen in this section when we write the JavaScript that interacts with the `canvas` element to get pixels to show up on the screen.
### Adding the Script Tags
Before we can write JavaScript, we need a `script` tag that will house the JavaScript we write. You can use an external JavaScript file or keep all of the code in the same document. For simplicity, I'll be keeping all of our code in the same document, and that will look something as follows:
```html
Simple Example
```
With this minor addition, you are now set to write some JavaScript that will interact with our `canvas` element!
### Accessing our Canvas Element
When it comes to working with the `canvas`, the first line of JavaScript you will almost always write will involve getting a reference to the `canvas` element in your HTML. This will allow you to start doing all sorts of canvas-ey things using JavaScript.
Now to get the reference, inside your `script` tag, go ahead and add the following line:
```js
var canvas = document.querySelector("#myCanvas");
```
All we are doing here is initializing our `canvas` variable to our **myCanvas** element we defined in HTML earlier. We get a reference to the **myCanvas** element by relying on the [querySelector](https://www.kirupa.com/html5/finding_elements_dom_using_querySelector.htm) function. This function is the cooler way of finding elements in HTML compared to the older `getElementById` and `getElementsByClass` functions you might be familiar with.
### Getting the Rendering Context
Here is some useful trivia. Our canvas element has two modes of operation. One mode is designed for drawing things in 2D, and this is the mode we care about for now. The other mode is all about supporting drawing in 3D. These modes are more formally known as **rendering contexts**. To be able to draw to our `canvas` element, we need to first specify the rendering context we want to use. That is done by calling the `getContext` method on our `canvas` object and passing in the argument for the 2D rendering context we want:
```js
var canvas = document.querySelector("#myCanvas");
var context = canvas.getContext("2d");
```
The `context` variable now stores a reference to our `canvas` element's 2d rendering context and all the sweet drawing-related properties and functions that go along with it. To put all of this more simply, with a hook into the rendering context, you now have a pipeline through which you can issue commands to get pixels to show up inside your canvas!
### Issuing Draw Commands
All that remains at this point is to use the various tools JavaScript provides to get things drawn on the screen. We've covered a lot of ground here already, so I won't overwhelm you with what all the various draw commands are and how to use them. Instead, I am going to first provide some code for you to copy/paste/write to see our `canvas` element in action.
Go ahead and add the following lines to your code:
```
// draw a diagonal line
context.moveTo(50, 50);
context.lineTo(450, 300);
// close the path
context.closePath();
// specify what our line looks like
context.lineWidth = 45;
context.strokeStyle = "steelblue";
// get the line drawn to the canvas
context.stroke();
```
Once you have done this, preview your HTML page in your browser. If everything went well, this time you will actually see something drawn with a thick blue diagonal line showing up:

All of the code you just pasted is responsible for getting this line to show up. Take a few moments to look at what each line of code does. Don't worry if it doesn't fully make sense. For this introduction, just notice that we are doing what looks like moving a virtual pen around and specifying the starting and ending co-ordinates:
```
// draw a diagonal line
context.moveTo(50, 50);
context.lineTo(450, 300);
```
There is even some code that seems to specify the thickness and color of the line that gets drawn:
```
// specify what our line looks like
context.lineWidth = 45;
context.strokeStyle = "steelblue";
```
In future articles, we will dive much deeper into what each of these commands do and learn precisely how they work. We will also look at the supporting code that is very important...despite me ignoring them in this lightning-fast overview haha. For now, just be proud of the massive amount of progress you made!
## Conclusion
In this tutorial, we created a basic template that all future canvas-related content will follow. You have your `canvas` element in the HTML with some optional CSS and inline HTML attributes to help style it. You then have your JavaScript where you reference the `canvas` element, gain access to its rendering context, and then issue the draw commands needed to get pixels to appear.