Table of Contents

The last major new topic we are going to look at is less about React and more about setting up your development environment to build a React app. Up until now, we've been building our React apps by including a few script files:
<script crossorigin src="https://unpkg.com/react@16/umd/react.development.js"></script>
<script crossorigin src="https://unpkg.com/react-dom@16/umd/react-dom.development.js"></script>
<script src="https://unpkg.com/[email protected]/babel.min.js"></script>
These script files not only loaded the React libraries, but they also loaded Babel to help our browser do what needs to be done when it encountered bizarre things like JSX:
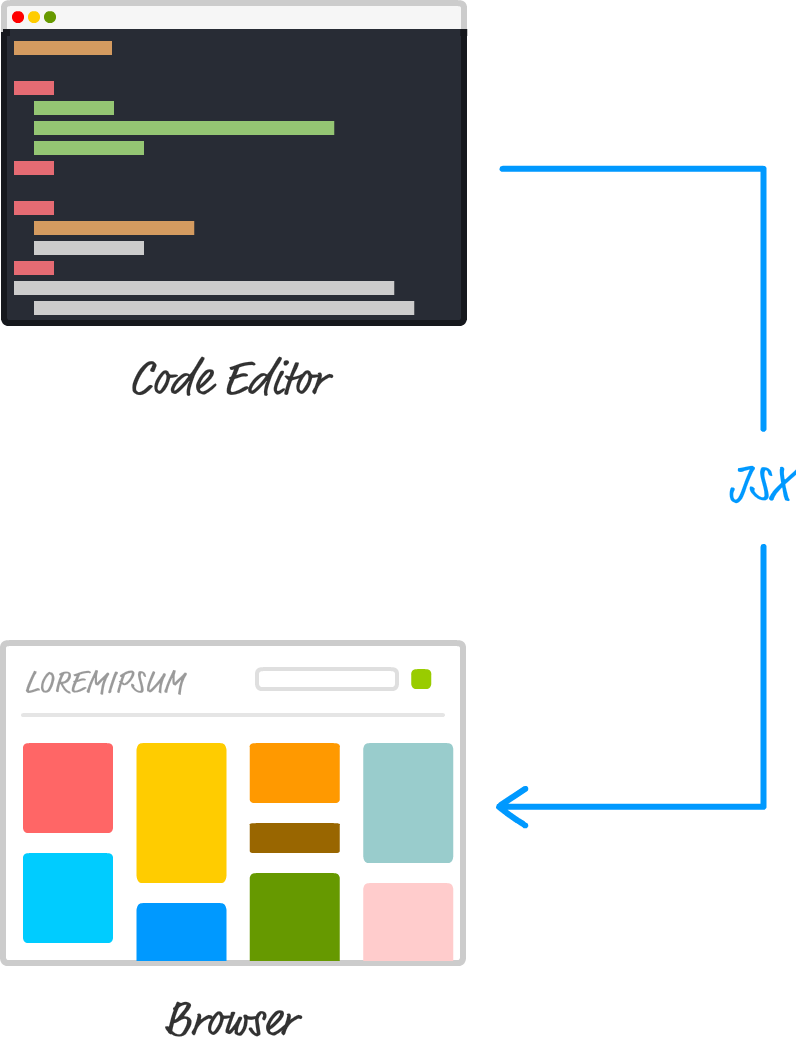
To review what we mentioned earlier when talking about this approach, the downside is performance. As part of your browser doing all of the page-loading related things it normally does, it is also responsible for turning your JSX into actual JavaScript. That JSX to JavaScript conversion is a time-consuming process that is fine during development. It isn't fine if every user of your app has to pay that performance penalty.
The solution is to setup your development environment where your JSX to JS conversion is handled as part of your app getting built:

With this solution, your browser is loading your app and dealing with an already converted (and potentially optimized) JavaScript file. Good stuff, right? Now, the only reason why we delayed talking about all of this until now is for simplicity. Learning React is difficult enough. Adding the complexity of build tools and setting up your environment as part of learning React is just not cool. Now that you have a solid grasp of everything React does, it's time to change that with this tutorial.
In the following sections, we're going to look at one way to set up your development environment using a combination of Node, Babel, and webpack. If all of this sounds bizarre to you, don't worry. We are going to use a really nifty solution created by Facebook that makes all of this a breeze!
Onwards!
A few years ago, getting your build environment setup would have been a huge pain. You would have to manually configure all the tools we talked about. Asked your really smart friend for some advice. You may even have questioned your decision to learn programming and React in the first place. Fortunately, the Create React project came about that greatly simplified setting up your React environment. You just run a few commands on your command line and your React project is created with all of the proper behind-the-scenes configurations automatically hooked up.
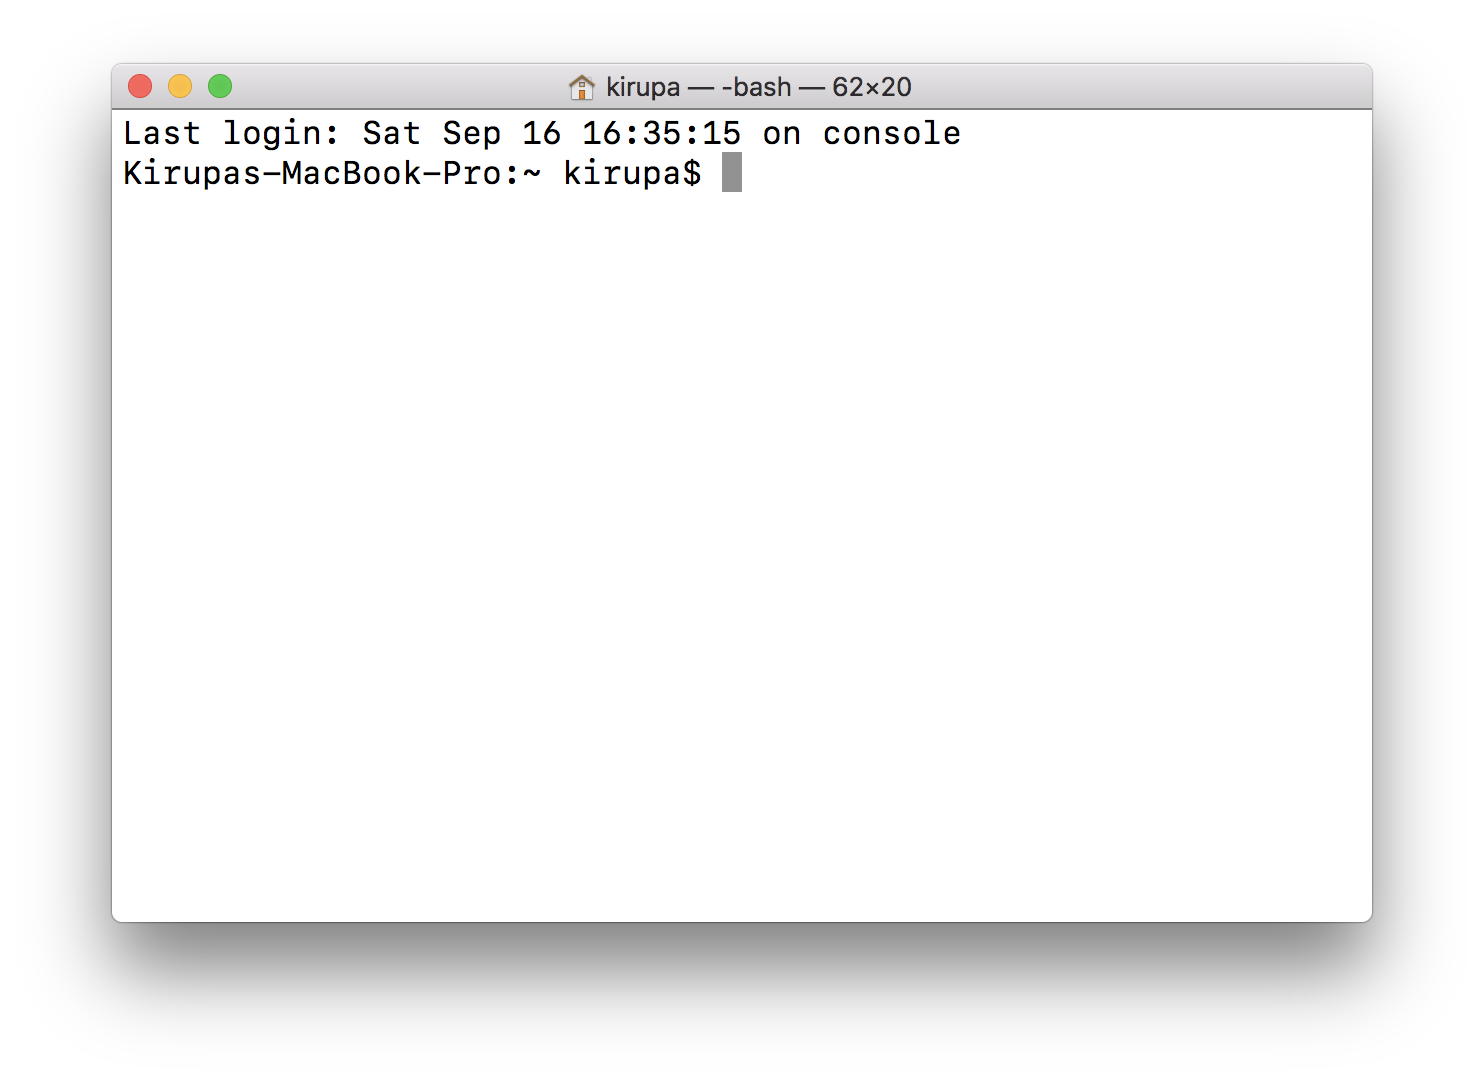
To get started, first make sure you have the latest version of Node installed. Once you have done, bring up your favorite command line. If you aren't too familiar with command lines, don't worry. On Windows, launch either the Command Prompt or the BASH Shell. On Mac, launch the Terminal. At the end of the day, you will see something that looks like this:
You will see some bizarre window with a blinking cursor that allows you to type things into it. The first thing we need to do is install the Create React project. Type the following in your command line and press Enter/Return:
npm install -g create-react-app
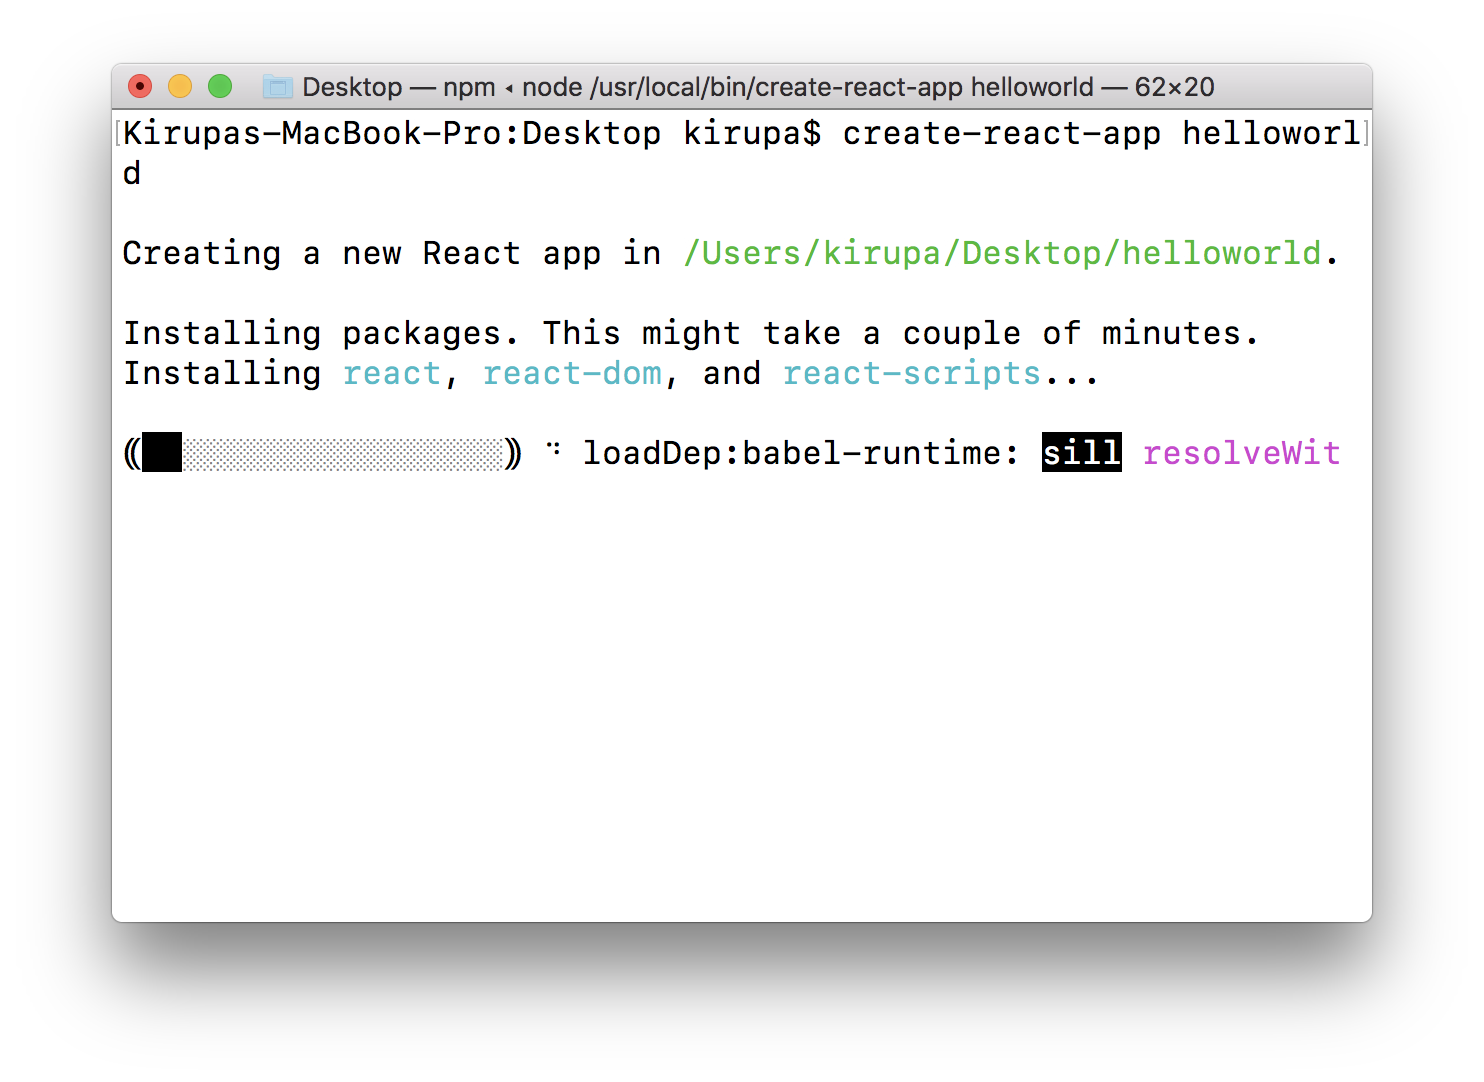
This could take anywhere from a few seconds to a few minutes, but once your installation has completed, it's time to create our new React project. Navigate to the folder you wish to create your new project. This folder could you be your Desktop, it could be a location under Documents, etc. Once you've navigated to a folder in your command line, enter the following to create a new project at this location:
create-react-app helloworld
You will see something that looks as follows:
Once the command has fully executed, a project called helloworld will be created for you. Don't worry too much about everything that is going on. We will look at our project contents later, but for now, the first thing we will do is test this project out. To do this, we will first need to navigate into our newly created project's helloworld folder. You can navigate there by typing the following:
cd helloworld
From inside this folder, enter the following to test the app:
npm start
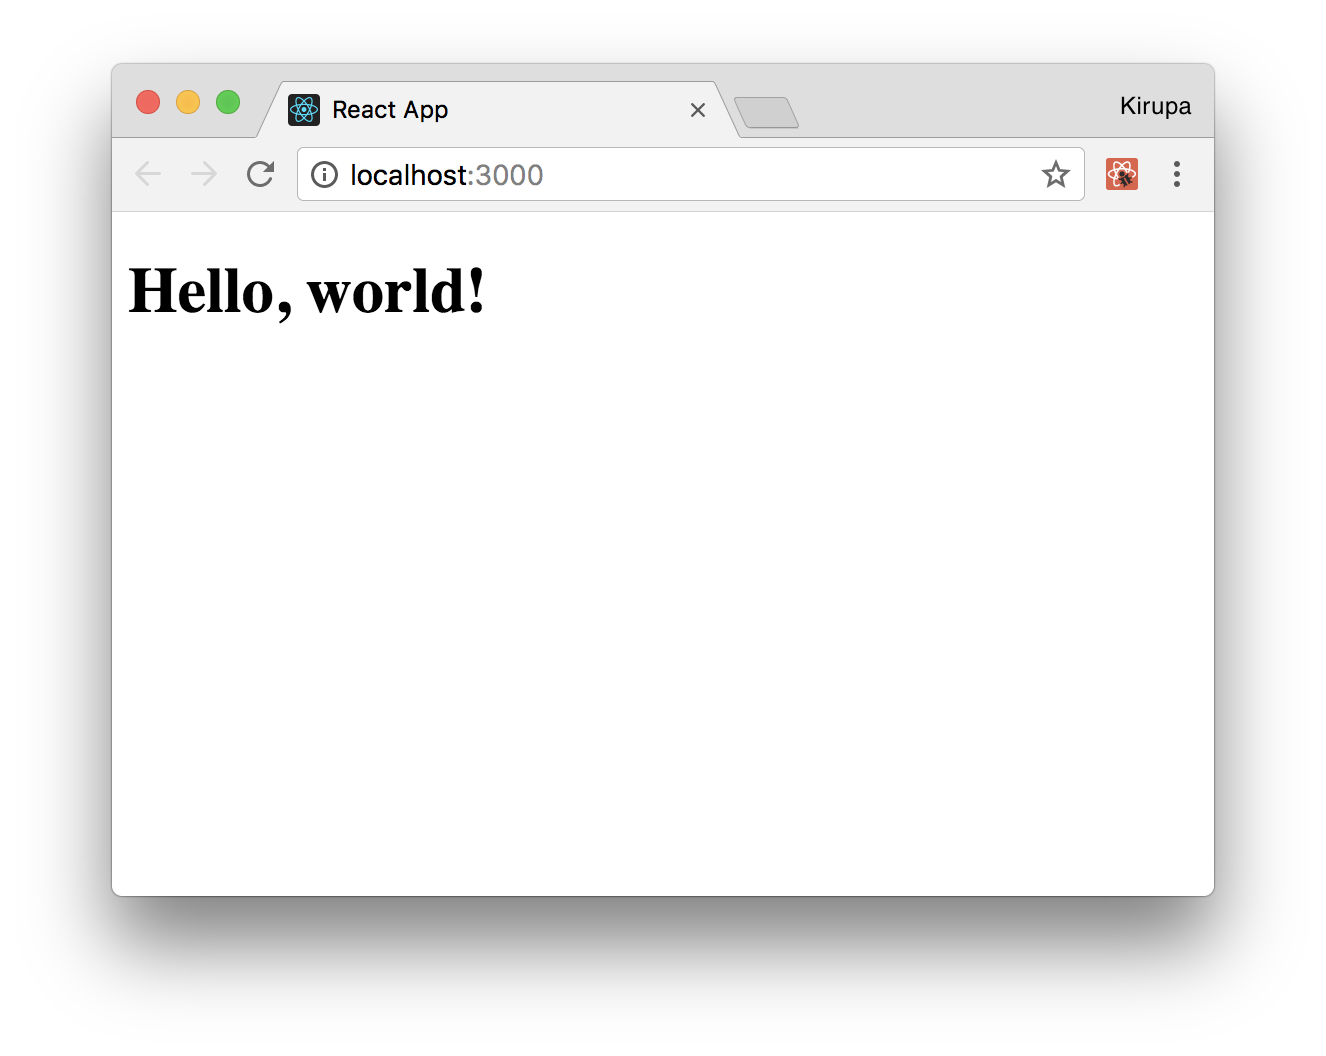
Your project will get built, a local web server will get started, and you will see your project running similar to the following image:
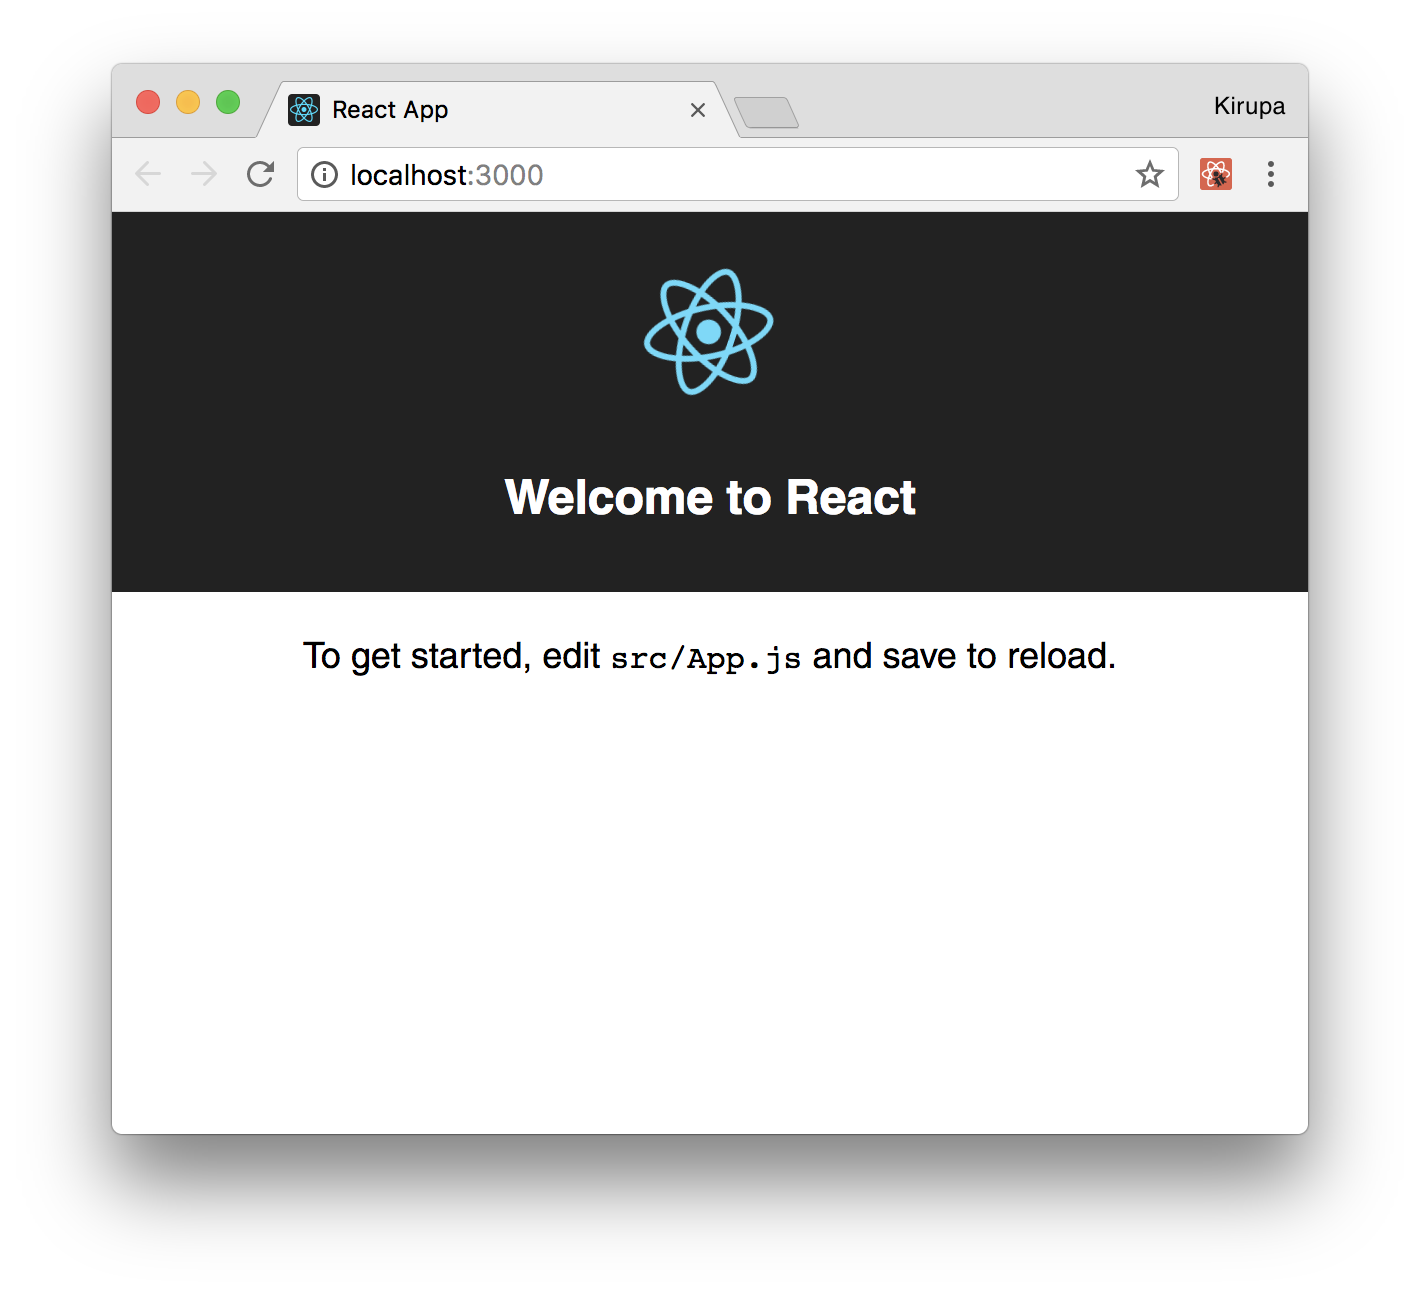
If everything worked out properly, you should see the same thing. If this is your first time creating a new React project using the command line, congratulations! This is a really big step. We aren't done, though. The next thing is for us to take a few steps back and revisit what exactly just happened.
Right now, we just see whatever default content the create-react-app command generated for us. That isn't very helpful. First, let's take a look at what exactly gets generated. Your file and folder structure after running create-react-app helloworld will look as follows:
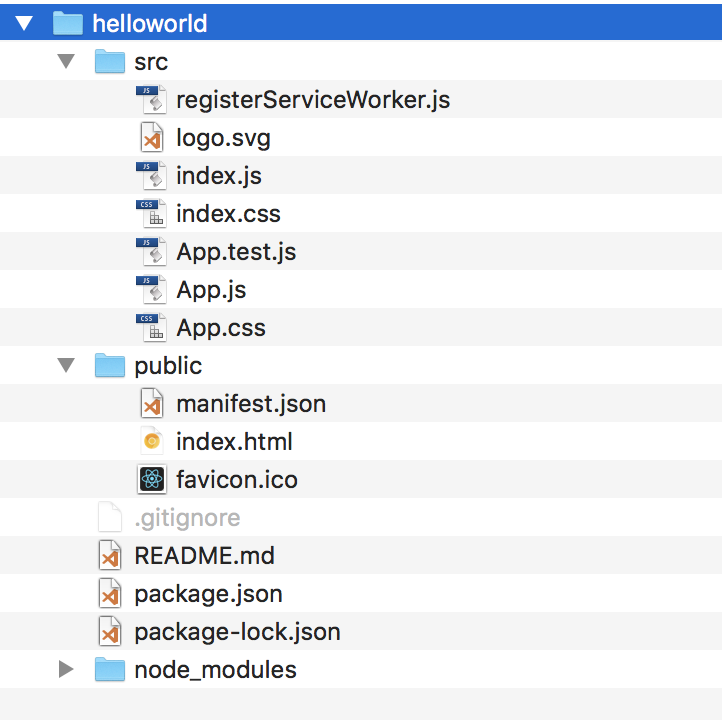
The index.html in your public folder is what gets loaded in your browser. If you take a look at this file, you'll realize that it is very basic. Here are the contents of this file with all of the comments removed:
<!doctype html>
<html lang="en">
  <head>
    <meta charset="utf-8">
    <meta name="viewport" content="width=device-width, initial-scale=1, shrink-to-fit=no">
    <meta name="theme-color" content="#000000">

    <link rel="manifest" href="%PUBLIC_URL%/manifest.json">
    <link rel="shortcut icon" href="%PUBLIC_URL%/favicon.ico">

    <title>React App</title>
  </head>
  <body>
    <noscript>
      You need to enable JavaScript to run this app.
    </noscript>

    <div id="root"></div>

  </body>
</html>
The important part to look at is the div element with an id value of root. This is where the contents of our React app will ultimately get printed to. Speaking of which, the contents of our React app with all of their JSX are contained inside the src folder. The starting point for our React app is contained in index.js:
import React from 'react';
import ReactDOM from 'react-dom';
import './index.css';
import App from './App';
import registerServiceWorker from './registerServiceWorker';

ReactDOM.render(<App />, document.getElementById('root'));
registerServiceWorker();
Notice the ReactDOM.render call that looks for the root element we called out inside index.html. The other thing you'll see are a bunch of import statements at the top of the page. These import statements are part of something known in JavaScript as Modules. The goal of modules is to divide the functionality of your app into smaller and smaller pieces. When it comes time to use a piece, you import only what you need as opposed to everything and the entire kitchen sink.
In our code right now, we are importing both the React and React-DOM libraries. That should be familiar to us from when we were including the script tags for them earlier. We are also importing a CSS file, a service worker script which we'll reference as registerServiceWorker, and a React component which we reference as App.
Our App component seems like our next stop, so to see what is inside it, open App.js:
import React, { Component } from 'react';
import logo from './logo.svg';
import './App.css';

class App extends Component {
  render() {
    return (
      <div className="App">
        <header className="App-header">
          <img src={logo} className="App-logo" alt="logo" />
          <h1 className="App-title">Welcome to React</h1>
        </header>
        <p className="App-intro">
          To get started, edit <code>src/App.js</code> and save to reload.
        </p>
      </div>
    );
  }
}

export default App;
Notice that our App.js file, in turn, has import statements of its own. Some like the one for React and React.Component seem necessary given what our code is doing. The last line here is interesting: export default app. It contains the export command and the name that our project will use to identify the exported module. It is this exported name that you use when importing our App module in other parts of our project - parts like index.js. Closing out what this file is doing, it also imports an image and CSS file that are needed to make this page work.
Now, we've seen a different way of structuring our code using some potentially new keywords. What is the purpose of all of this? The purpose of these modules, import statements, and export statements is simple. They are just niceties to help our app's code be more manageable. Instead of having everything defined in one giant file, you can break your code and related assets across multiple files. Depending on which files you reference and what files get loaded ahead of other files, our mysterious build process (currently kicked off with an npm start) can optimize the final output in a variety of ways that we don't need to worry about.
The important thing to note is that all of these things you are doing to your code doesn't affect the functionality of your final app in any major way. Behind the scenes, when we are about to test our app, a build step takes place. This build step takes care of making sense of all of the various files and components you are importing to present them all as an easily-digestible set of combined files for our browser to take care of. There will be one JS file with all of the relevant pieces represented:
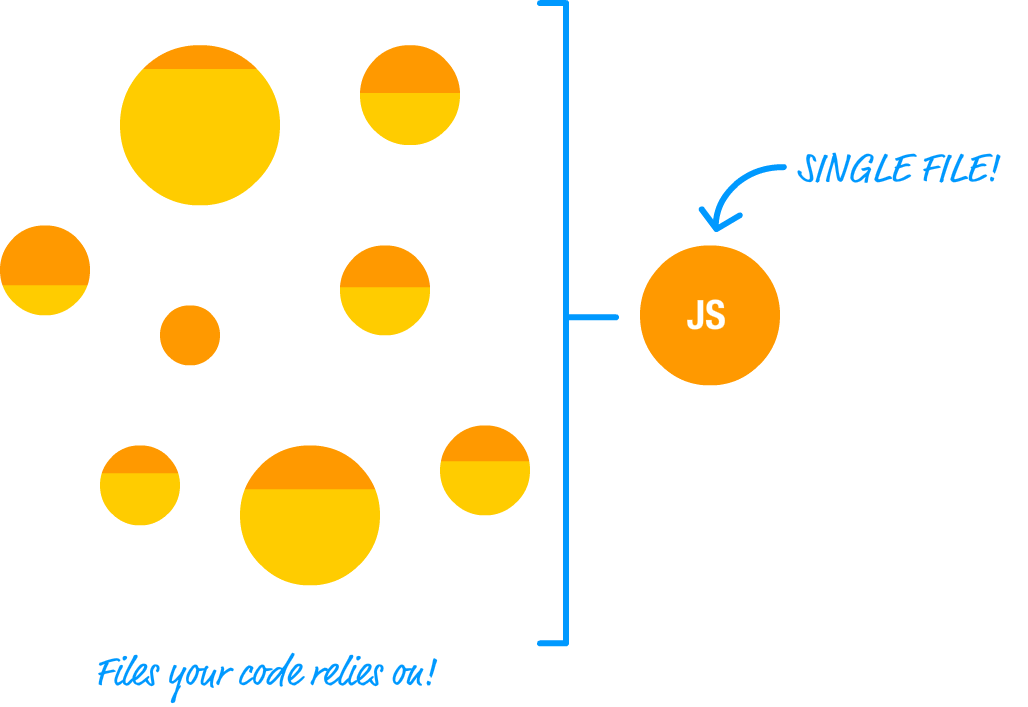
There will be one combined CSS file. Depending on what else you may have configured, there may be other combined files for your HTML and more. All of these things will in a form that our browser immediately knows what to do with. There is no additional work our browser needs to do like our in-browser solution we had been using initially. Everything gets generated as vanilla HTML, CSS, and JavaScript.
Ok, now that we've gotten a better idea of what our project is doing, let's modify this example. What we want to do is display the words Hello, world! to our screen. The way we are going to do that is by creating a component, appropriately called HelloWorld, to do this for us. The new part in this is not in getting some text to display on screen. You are a pro at that by this point. The part that we will focus on is how to structure the files in our project to ensure we are creating our app the right way.
To get started, go to your src directory and delete all of the files you see there. Once you have done that, create a new file called index.js. Inside that file, add the following contents:
import React from 'react';
import ReactDOM from 'react-dom';
import HelloWorld from './HelloWorld';

ReactDOM.render(
    <HelloWorld/>,
    document.getElementById('root')
);
We are importing our React and ReactDOM modules. We are also importing a component called HelloWorld that we are specifying in our ReactDOM.render call. That component doesn't exist, so we are going to fix that next!
In the same src directory that we are in right now, create a file called HelloWorld.js. Once you've created this file, go ahead and modify it by adding in the following:
import React, { Component } from 'react';

class HelloWorld extends Component {
  render() {
    return (
      <div className="helloContainer">
        <h1>Hello, world!</h1>
      </div>
    );
  }
}

export default HelloWorld;
Take a moment to look through what we've added here. There shouldn't be anything really exciting going on here. We have a boring import statement, we have our HelloWorld component that prints some text to the screen, and (in the last line) we are tagging our HelloWorld component for exporting so that it can be imported by another module...such as our index.js.
With these changes made, let's go and test out our application right now. Make sure all of your changes have been saved. Go back to our command line and type in npm start. If your app was already running behind the scenes, you would automatically see it update with the latest changes. If that did not happen or you app was stopped, press Ctrl + C to stop the session and enter npm start again.
What you should see on your screen will look as follows:
If this is what you see, this is great! We have our example working, but it looks a little too plain. Let's fix that right up by adding some CSS. Create a stylesheet called index.css, and add the following style rule into it:
body {
  display: flex;
  align-items: center;
  justify-content: center;
  min-height: 100vh;
  margin: 0;
}
In this approach for building apps, creating the stylesheet is only one part of what you have to do. The other part requires us to reference our newly created index.css in our index.js file. Open up index.js and add the highlighted import statement for it:
import React from "react";
import ReactDOM from "react-dom";
import HelloWorld from "./HelloWorld";
import "./index.css";

ReactDOM.render(
    <HelloWorld/>,
    document.getElementById("root")
);
If you go back to your browser, you'll notice that our current setup will automatically refresh your page with all of the latest changes. You'll see the worlds Hello, world! centered vertically and horizontally for you. Not bad, but we can do better.
The last thing we want to do is ensure our text appears in a more stylish fashion. We could add the appropriate style rules to index.css itself, but the more appropriate solution would be to create a new CSS file that we reference only in our HelloWorld component. The end result between both approaches would be identical, but we should get into the practice of grouping related files (and their dependencies) together as part of being better developers.
Create a new file called HelloWorld.css inside our src folder. Add the following style rule into it:
h1 {
    font-family: sans-serif;
    font-size: 56px;
    padding: 5px;
    padding-left: 15px;
    padding-right: 15px;
    margin: 0;
    background: linear-gradient(to bottom,
                                white 0%,
                                white 62%,
                                gold 62%,
                                gold 100%);
}
All that is left is to reference this style sheet in our HelloWorld.js file, so open that file up and add the highlighted import statement:
import React, { Component } from 'react';
import './HelloWorld.css';

class HelloWorld extends Component {
  render() {
    return (
      <div className="helloContainer">
        <h1>Hello, world!</h1>
      </div>
    );
  }
}

export default HelloWorld;
If you go back to your browser, everything should have worked out fine when you see something like the following:
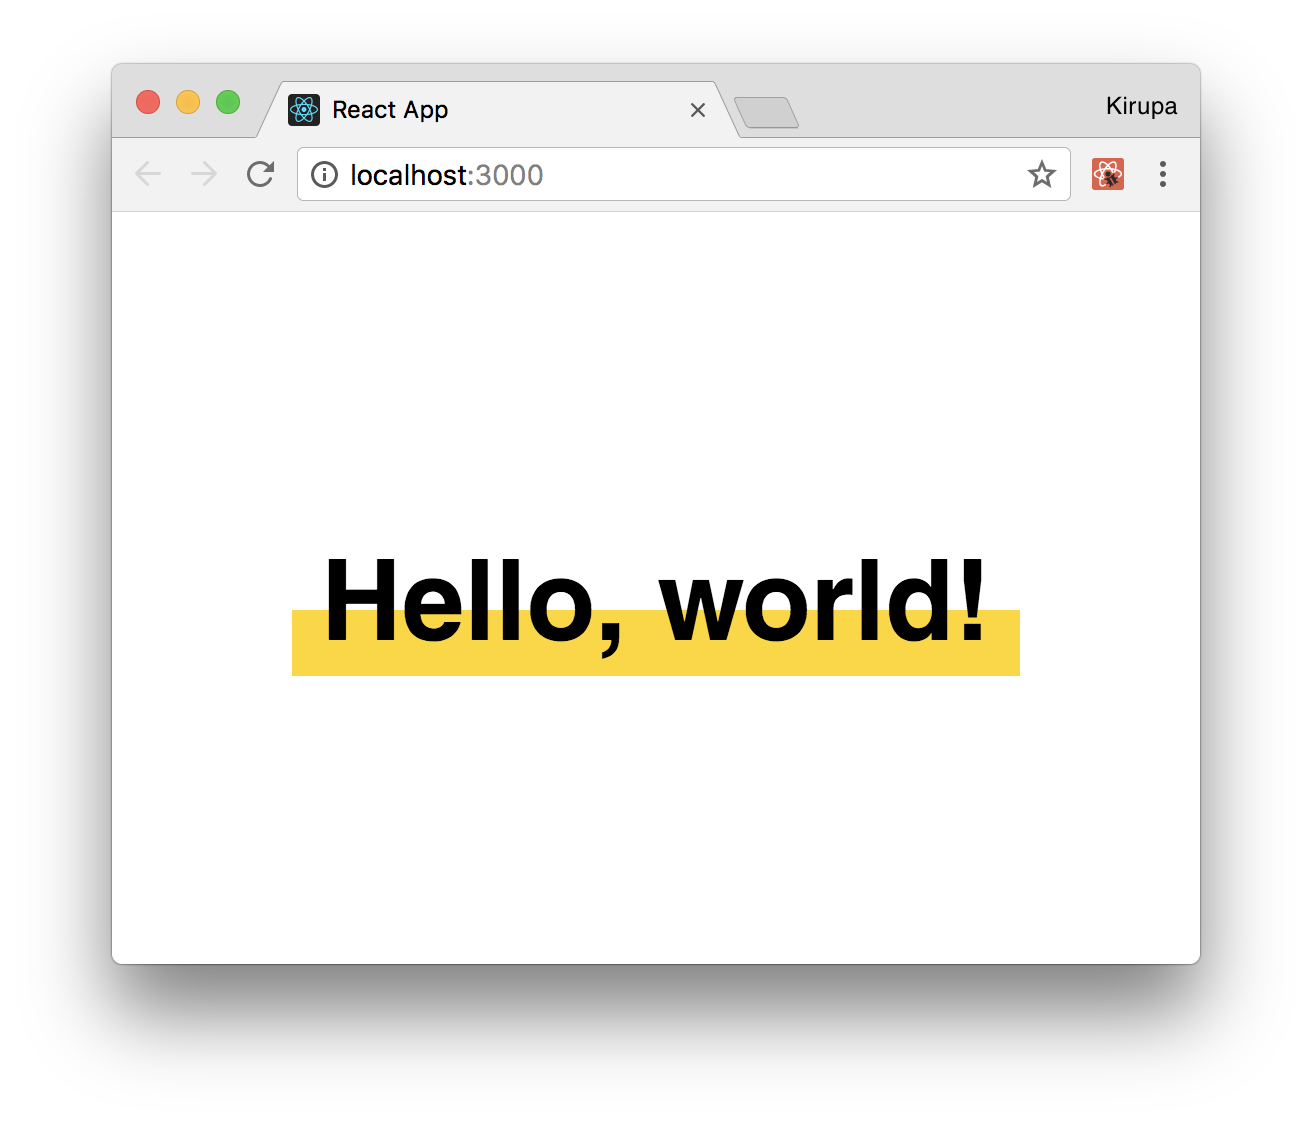
You will see the words Hello, world! displayed, but it will appear with a little more style and pizazz (as the cool kids say these days) than it did a few moments ago.
We are almost done here! There is just one more thing to do. So far, we've been building our app in development mode. This is the mode where our code isn't minified and some of the things run in a slow/verbose setting so that we can debug issues more easily. When it is time to send your app live to our real users, we want the fastest and most compact solution possible. For that, go back to your command line and enter the following (after stopping the build by pressing Ctrl + C):
npm run build
This will take a few moments while the script creates an optimized set of files for you. Once it has run to completion, you'll see some confirmation text that looks as follows:
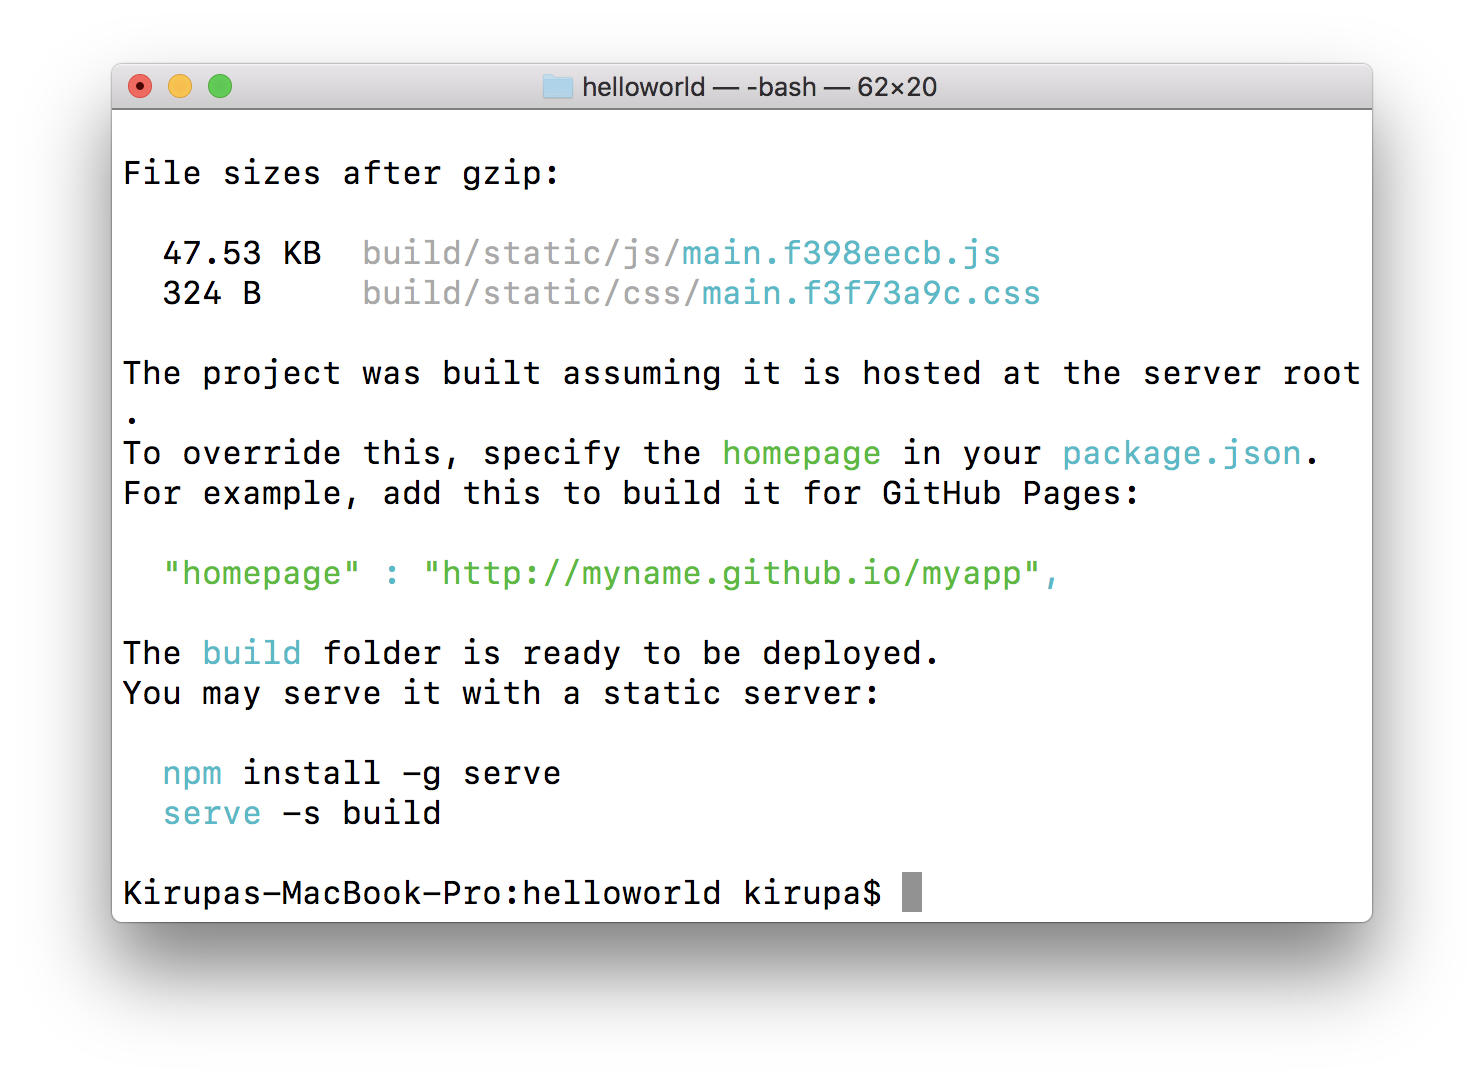
Once it has completed, you can follow the on-screen prompts to deploy it to your server or just test locally using the popular serve node package.
Also, take a moment to browse through all the files that were generated. The end result is just plain HTML, CSS, and JS files. No JSX. No multiple JS files. We just have a single JS file that contains all the logic our app needs to work.
Well...so that just happened! In the preceding many sections, we used the awesome Create React solution for creating our React apps in a modern way. If this is your first time building apps like this, you should learn to get more familiar with this approach. We will be using the create-react-app command for future React examples we will be looking at, for our in-browser approach was just to help us learn the basics without fiddling with all of what you saw here. Under the covers, Create React hides a lot of the complexity that goes with tweaking Node, Babel, webpack, and other components. That hiding is its greatest strength, and it is also its greatest weakness.
If you want to go beyond the happy path that Create React has provided for us, it will require you learning a lot of the complexity hidden underneath. Covering all of that goes beyond what we are going to be looking at here, but as a starting point, take a look at what is specified in the various JS files under the node_modules/react_scripts/scripts path.
Next tutorial: Building a Simple Todo List App
Just a final word before we wrap up. If you have a question and/or want to be part of a friendly, collaborative community of over 220k other developers like yourself, post on the forums for a quick response!
