Table of Contents

Up until this point, the components we've created have been stateless. They have properties (aka props) that are passed in from their parent, but nothing changes about them once the components come alive. Your properties are considered immutable once they have been set. For many interactive scenarios, you don't want that. You want to be able to change aspects of your components as a result of some user interaction (or some data getting returned from a server or a billion other things!)
What we need is another way to store data on a component that goes beyond properties. We need a way to store data that can be changed. What we need is something known as state! In this tutorial we are going to learn all about it and how you can use it to create stateful components.
Onwards!
If you know how to work with properties, you totally know how to work with states...sort of. There are some differences, but they are too subtle to bore you with right now. Instead, let's just jump right in and see states in action by using them in a small example.
What we are going to is create a simple lightning counter example:
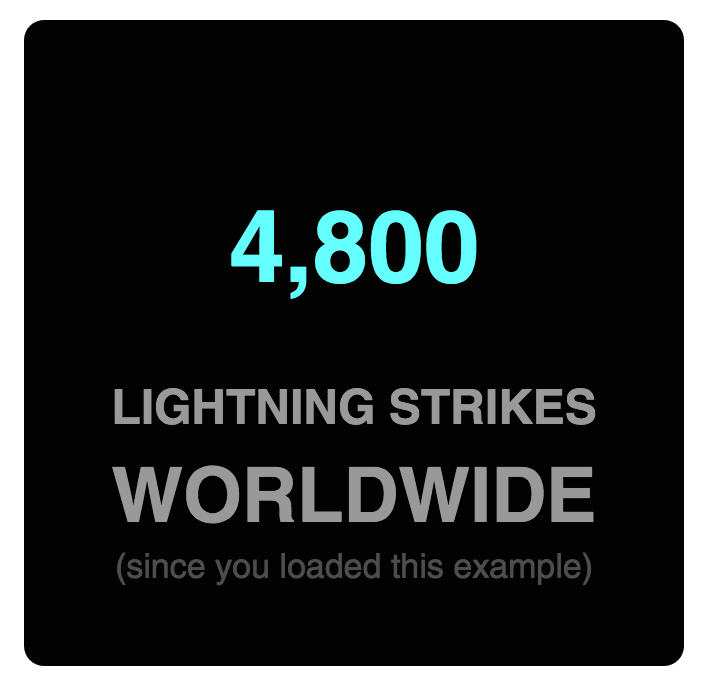
What this example does is nothing crazy. Lightning strikes the earth's surface about 100 times a second. We have a counter that simply increments a number you see by that same amount. Let's create it.
The primary focus of this example is to see how we can work with state. There is no point in us spending a bunch of time creating the example from scratch and retracing paths that we've walked many times already. That's not the best use of anybody's time.
Instead of starting from scratch, modify an existing HTML document or create a new one with the following contents:
<!DOCTYPE html>
<html>

<head>
  <meta charset="utf-8">
  <title>Dealing with State</title>
  <script src="https://unpkg.com/react@16/umd/react.development.js"></script>
  <script src="https://unpkg.com/react-dom@16/umd/react-dom.development.js"></script>
  <script src="https://unpkg.com/[email protected]/babel.min.js"></script>
</head>

<body>
  <div id="container"></div>

  <script type="text/babel">
    class LightningCounter extends React.Component {
      render() {
        return (
          <h1>Hello!</h1>
        );
      }
    }

    class LightningCounterDisplay extends React.Component {
      render() {
        var divStyle = {
          width: 250,
          textAlign: "center",
          backgroundColor: "black",
          padding: 40,
          fontFamily: "sans-serif",
          color: "#999",
          borderRadius: 10
        };

        return (
          <div style={divStyle}>
            <LightningCounter/>
          </div>
        );
      }
    }

    ReactDOM.render(
      <LightningCounterDisplay/>,
      document.querySelector("#container")
    );
  </script>
</body>

</html>
The bulk of this component is the divStyle object that contains the styling information responsible for the cool rounded background. The return function returns a div element that wraps the LightningCounter component.
The LightningCounter component is where all the action is going to be taking place:
class LightningCounter extends React.Component {
  render() {
    return (
      <h1>Hello!</h1>
    );
  }
}
This component, as it is right now, has nothing interesting going for it. It just returns the word Hello! That's OK - we'll fix this component up later.
The last thing to look at is our ReactDOM.render method:
ReactDOM.render(
  <LightningCounterDisplay/>,
  document.querySelector("#container")
);
It just pushes the LightningCounterDisplay component to our container element in our DOM. That's pretty much it. The end result is you see the combination of markup from our ReactDOM.render method and the LightningCounterDisplay and LightningCounter components.
Now that we have an idea of what we are starting with, it's time to make plans for our next steps. The way our counter works is pretty simple. We are going to be using a setInterval function that calls some code every 1000 milliseconds (aka 1 second). That "some code" is going to increment a value by 100 each time it is called. Seems pretty straightforward, right?
To make this all work, we are going to be relying on three APIs that our React Component exposes:
We'll see these APIs in use shortly, but I wanted to give you a preview of them so that you can spot them easily in a lineup!
We need a variable to act as our counter, and let's call this variable strikes. There are a bunch of ways to create this variable. The most obvious one is the following:
var strikes = 0; // :P
We don't want to do that, though. For our example, the strikes variable is part of our component's state. The way to do this is by creating a state object, making our strikes variable be a property of it, and ensure we set all of this up when our component is getting created. The component we want to do all of this to is LightningCounter, so go ahead and add the following highlighted lines:
class LightningCounter extends React.Component {
  constructor(props, context) {
    super(props, context);

    this.state = {
      strikes: 0
    };
  }

  render() {
    return (
      <h1>Hello!</h1>
    );
  }
}
We specify our state object inside our LightningCounter component's constructor. This runs waaaay before your component gets rendered, and what we are doing is telling React to set an object containing our strikes property (initialized to 0).
If we inspect the value of our state object after this code has run, it would look something like the following:
var state = {
  strikes: 0
};
Before we wrap this section up, let's visualize our strikes property. In our render method, make the following highlighted change:
class LightningCounter extends React.Component {
  constructor(props, context) {
    super(props, context);

    this.state = {
      strikes: 0
    };
  }

  render() {
    return (
      <h1>{this.state.strikes}</h1>
    );
  }
}
What we've done is replaced our default Hello! text with an expression that displays the value stored by the this.state.strikes property. If you preview your example in the browser, you will see a value of 0 displayed. That's a start!
Next up is getting our timer going and incrementing our strikes property. Like we mentioned earlier, we will be using the setInterval function to increase the strikes property by 100 every second. We are going to do all of this immediately after our component has been rendered using the built-in componentDidMount method.
The code for kicking off our timer looks as follows:
class LightningCounter extends React.Component {
  constructor(props, context) {
    super(props, context);

    this.state = {
      strikes: 0
    };
  }

  componentDidMount() {
    setInterval(this.timerTick, 1000);
  }

  render() {
    return (
      <h1>{this.state.strikes}</h1>
    );
  }
}
Go ahead and add these highlighted lines to our example. Inside our componentDidMount method that gets called once our component gets rendered, we have our setInterval method that calls a timerTick function every second (or 1000 milliseconds).
We haven't defined our timerTick function, so let's fix that by adding the following highlighted lines to our code:
class LightningCounter extends React.Component {
  constructor(props, context) {
    super(props, context);

    this.state = {
      strikes: 0
    };
  }

  timerTick() {
    this.setState({
      strikes: this.state.strikes + 100
    });
  }

  componentDidMount() {
    setInterval(this.timerTick, 1000);
  }

  render() {
    return (
      <h1>{this.state.strikes}</h1>
    );
  }
}
What our timerTick function does is pretty simple. It just calls setState. The setState method comes in various flavors, but for what we are doing here, it just takes an object as its argument. This object contains all the properties you want to merge into the state object. In our case, we are specifying the strikes property and setting its value to be 100 more than what it is currently.
Just like you've seen here, you will often end up modifying an existing state value with an updated value. The way we are getting the existing state value is by calling this.state.strikes. For performance-related reasons, React may decide to batch state updates in rapid succession. This could lead to the original value stored by this.state to be out-of-sync with reality. To help with this, the setState method gives you access to the previous state object via the prevState argument.
By using that argument, our code could be made to look as follows:
this.setState((prevState) => {
  return {
    strikes: prevState.strikes + 100
  };
});
The end result is similar to what we had originally. Our strikes property is incremented by 100. The only potential change is that the value of the strikes property is guaranteed to be whatever the earlier value stored by our state object would be.
So, should you use this approach for updating your state? There are good arguments on both sides. One side argues for correctness, despite the original approach of using this.state working out fine for most real-world cases. The other side argues for keeping the code simple and not introducing additional complexity. There is no right or wrong answer here. Use whatever approach you prefer. I'm only calling this out for completeness, for you may run into the prevState approach in any React code you encounter in the wild.
There is one more thing you need to do. The timerTick function has been added to our component, but its contents aren't scoped to our component. In other words, the this keyword where we are accessing setState will return a TypeError in the current situation. There are several solutions you can employ here - each a little frustrating in its own way. We'll look at this problem in detail later, but for now, we are going to explicitly bind our timerTick function to our component so that all of the this references resolve properly. Add the following line to our constructor:
constructor(props, context) {
    super(props, context);

    this.state = {
        strikes: 0
    };

    this.timerTick = this.timerTick.bind(this);
}
Once you've done this, our timerTick function is ready to be a useful part of our component!
If you preview your app now, you'll see our strikes value start to increment by 100 every second:

Let's ignore for a moment what happens with our code. That is pretty straightforward. The interesting thing is how everything we've done ends up updating what you see on the screen. That updating has to do with this React behavior: Whenever you call setState and update something in the state object, your component's render method gets automatically called. This kicks of a cascade of render calls for any component whose output is also affected. The end result of all this is that what you see in your screen in the latest representation of your app's UI state. Keeping your data and UI in sync is one of the hardest problems with UI development, so it's nice that React takes care of this for us. It makes all of this pain of learning to use React totally worth it...almost! :P
What we have right now is just a counter that increments by 100 every second. Nothing about it screams Lightning Counter, but it does cover everything about states that I wanted you to learn right now. If you want to optionally flesh out your example to look like my version that you saw at the beginning, below is the full code for what goes inside our script tag:
class LightningCounter extends React.Component {
  constructor(props, context) {
    super(props, context);

    this.state = {
      strikes: 0
    };

    this.timerTick = this.timerTick.bind(this);
  }

  timerTick() {
    this.setState({
      strikes: this.state.strikes + 100
    });
  }

  componentDidMount() {
    setInterval(this.timerTick, 1000);
  }

  render() {
    var counterStyle = {
      color: "#66FFFF",
      fontSize: 50
    };

    var count = this.state.strikes.toLocaleString();

    return (
      <h1 style={counterStyle}>{count}</h1>
    );
  }
}

class LightningCounterDisplay extends React.Component {
  render() {
    var commonStyle = {
      margin: 0,
      padding: 0
    };

    var divStyle = {
      width: 250,
      textAlign: "center",
      backgroundColor: "#020202",
      padding: 40,
      fontFamily: "sans-serif",
      color: "#999999",
      borderRadius: 10
    };

    var textStyles = {
      emphasis: {
        fontSize: 38,
        ...commonStyle
      },
      smallEmphasis: {
        ...commonStyle
      },
      small: {
        fontSize: 17,
        opacity: 0.5,
        ...commonStyle
      }
    };

    return (
      <div style={divStyle}>
        <LightningCounter />
        <h2 style={textStyles.smallEmphasis}>LIGHTNING STRIKES</h2>
        <h2 style={textStyles.emphasis}>WORLDWIDE</h2>
        <p style={textStyles.small}>(since you loaded this example)</p>
      </div>
    );
  }
}

ReactDOM.render(
  <LightningCounterDisplay />,
  document.querySelector("#container")
);
If you make your code look like everything you see above and run the example again, you will see our lightning counter example in all its cyan-colored glory. While you are at it, take a moment to look through the code to ensure you don't see too many surprises.
We just scratched the surface on what we can do to create stateful components. While using a timer to update something in our state object is cool, the real action happens when we start combining user interaction with state. So far, we've shied away from the large amount of mouse, touch, keyboard, and other related things that your components will come into contact with. We'll fix that up in the future. Along the way, you'll see us taking what we've seen about states to a whole new level! If that doesn't excite you, then I don't know what will :P
Next tutorial: Going from Data to UI
Just a final word before we wrap up. If you have a question and/or want to be part of a friendly, collaborative community of over 220k other developers like yourself, post on the forums for a quick response!
