|
by kirupa |
2 June 2007
In the
previous page,
you learned how to apply all of your work from the first two
pages into creating a working animation. In this page, I
will cover some details that, while not relevant to what was
done in this tutorial, will come in handy when you are
creating your own animations.
When providing instructions, there are certain details that
I did not emphasize in the main tutorial. This section
contains some of those details that you may find useful.
In Blend, when modifying your timeline, you are known to be
in the Timeline recording mode. You already know about the
timeline that magically appears in your Timeline and Objects
panel, and you may also have noticed a red box outlining
your Artboard
with the text "Timeline recording is on" surrounding your
Artboard:
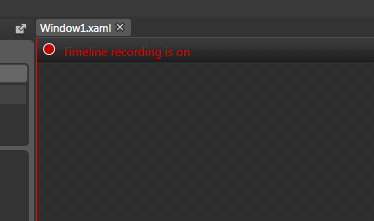
[ the Timeline recording indicator ]
You got into this mode when you decided to create a new
timeline by pressing the plus button representing the action
for creating a new timeline. If you want to leave the
Recording mode, go back to your Objects and Timeline panel
and click on the timeline drop-down menu to select the
Default timeline:
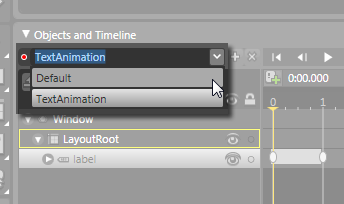
[ selecting the Default timeline exits the Recording mode ]
When you select the Default timeline, you will no longer
be in recording mode, but instead, be back in your default
editing view. Likewise, to go back to the recording mode,
you can either create a new timeline like you did in the
previous page, or you can click on the same timeline
drop-down menu and select the timeline you are interested in
re-visiting.
Earlier, when you were adding the Label control, you drew a
rectangle that set the boundaries of your label. When the
text you were adding was larger than the space afforded by
the Label control, your text would get cut off. I suggested
resizing the control to make the text fully appear, but you
really do not have to that.
You can actually draw a default sized Label control that
automatically adjusts its dimensions based on the size of
the text contained inside it. First, select the Label
control like you did earlier:
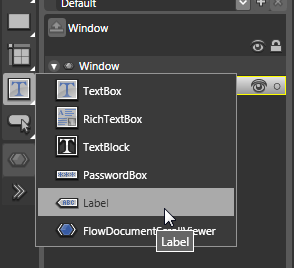
[ select your Label control ]
After you have selected the Label control, your toolbox
will now display the Label as one of the recently selected
controls.
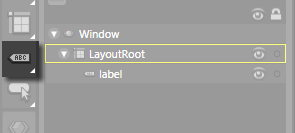
[ double click on the control to add it
to your Artboard at the default size ]
You can double click on the Label control directly from
the Toolbox. This time, the width and height of your control
varies depending on the content inside it. This trick is not
just limited to Labels, so feel free to use this approach on
other controls as you see fit.
This introductory tutorial should provide you with the basic
skills needed to create animations in WPF using Blend. There
is a lot more to animation that was not covered in this
tutorial, but subsequent tutorials will dig deeper into some
more animation techniques that you will need to know.
Just a final word before we wrap up. If you have a question and/or want to be part of a friendly, collaborative community of over 220k other developers like yourself, post on the forums for a quick response!

|


