Table of Contents

Have questions? Discuss this HTML5 tutorial with others on the forums.
If you had to pick some of the most common things you do on a web page, clicking on links to navigate between pages should be at the top of your list. You probably don't even realize how frequently you click on things to go to a different page. In fact, you probably clicked on a link to get to this very page!
The most common way of creating a link is via the anchor (a) tag:
Not all types of page navigation revolve around simple links created in HTML though. Many situations will involve you going beyond a simple anchor (a) tag and using JavaScript to navigate between pages instead.
In this tutorial, you will encounter one such situation where you use JavaScript to navigate to a different page depending on which button was clicked.
Here is an example you can play with:
[ go here to see a live example! ]
When the button was clicked, you executed JavaScript to listen for the click event and navigate you to the appropriate URL. By the end of this tutorial, you will learn how to do all of that.
For this tutorial, you should be familiar with how to set events in JavaScript. If you are not too familiar with them, two tutorials that you should glance through are JavaScript Events and Running Scripts at the "Right" Time. I'll refer to a few other tutorials here and there as needed.
Getting back to this tutorial, I've broken things out into the following bite-sized sections:
And with that, let's get started!
Let's first start with the foundation - the HTML and CSS that gives your example the structure and look. Create a new HTML page and copy/paste the following into it:
Once you have copied and pasted the above HTML and CSS, go ahead and preview it in your browser to make sure everything works well.
Here is an example of what it looks like on Google Chrome:

Now that you have a working example, before moving on to the next step, let me point out some interesting tidbits from the HTML that you will find relevant for future sections.
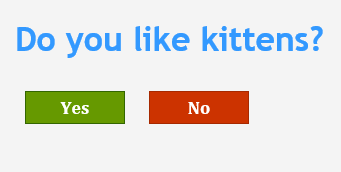
What we want to do is navigate to a different page when either the Yes or No button is clicked. Let's look at the markup for our buttons:
Our buttons are, shockingly, of type button. I won't go into too much details of the button element here, but the main thing to note is the id value of each button. The Yes button has an id of yesButton. The No button has an id of noButton.
When we start adding some code, you will see these id values being used.
Now we get to the fun JavaScript portion of the show. Just above your closing head tag, add a script block made up of an opening and closing script tag:
Inside this script tag, we are going to listen for three events and add three event handlers that correspond to those events.
First, we are going to add an event handler that gets called when our DOM has fully loaded:
We define the setupEvents event handler which will get called when the DOMContentLoaded event is fired. You can learn more about this event and why we use it by reading the Running Scripts at the "Right" Time tutorial.
Inside the setupEvents event handler, we will add the event listeners that will react when our two buttons are clicked. We first need to get a reference to those two buttons:
The way we get a reference to an HTML element is by using the getElementById function. The Referencing HTML Elements by JavaScript tutorial goes into more detail, but just know that by passing in the yesButton and noButton ID values we set in HTML, our JavaScipt yesButton and noButton variables have their claws into those two buttons.
Once have a reference to our buttons, we can listen for the click event on them and call the appropriate event handler:
The event handlers for yesButton and noButton are yesFunction and noFunction respectively:
Depending on which button you click, the appropriate event handler will get called.
When either the Yes or No buttons are clicked, we want to navigate to a different page. Right now, we have everything setup with our events and event handlers except for the code to do the actual page navigation.
To navigate between pages, in JavaScript you have the window.location property. This property can be assigned to the URL you wish to navigate to:
The moment you set the location property, your browser will navigate you to the page you specified.
For our example, we want to take you to the ICanHasCheezburger site if you like kittens or the FailBlog if you don't like them. Our window.open code needs to be added to the yesFunction as well as the noFunction event handlers as shown below:
Once you have added these two lines of code, go ahead and preview your page in your browser. When you click on either the Yes or No button, your browser will navigate to the corresponding page. Yay!
Before calling it a day, let's take a step back and look at why everything works the way it does. If I had to walk through our code and describe what is happening, here is what it would look like:
That's our code, pretty much in a nutshell, explained in English!
Conclusion
There you have it - a
basic tutorial describing how to write some JavaScript that navigates to
a specified page when you click on something. The code is fairly
straightforward, but if you are having some difficulty, check out
my example and compare my code to what you have.
Of coursse, as a distraction, I hope you liked the two websites the Yes and No buttons take you when you click on them. This tutorial took twice as long to write because I couldn't stop browsing through LOLCats.
Just a final word before we wrap up. If you have a question and/or want to be part of a friendly, collaborative community of over 220k other developers like yourself, post on the forums for a quick response!
