|
by
kirupa | 3 December 2008
In the past, the animations you created on the timeline
were tied to the
object or objects you are animating. There was no way to
separate the actual animation from the objects that were
being animated. Your only solution was to re-create the
animation or do some clever keyframe copy/paste magic if you
wanted to make your animation reusable.
In Flash CS4, you no longer have the tight coupling
between the animation and the animated objects. A new
feature known as motion presets gives you the ability to
take just your animation, save it as something that you can
reuse, and apply this saved animation to a different object
fairly easily!
If you are looking to learn more about motion presets,
you have come to the right place. This tutorial will briefly walk you through
creating and using motion presets. To save you some time by
not having to create a new animation just for this tutorial, download an animation that I
have already created for you:
Don't worry - the above animation does not contain
anything outside of a simple motion tween. You will still
have to do all of the interesting stuff yourself.
Once you have downloaded, extracted, and opened the
source file in Flash CS4, you will see a simple animation
that involves an image of a box sliding in from the left,
slowing down, and speeding out of view as it moves to the
right. The implementation of the animation is nothing more
than a simple tween with a custom ease that is responsible
for the slowdown.
What we want to do is save this animation (tween) as a motion preset
so that we can apply the animation to other things besides
our image of the Flash CS4 box. Select your animation by
clicking on it in the timeline:
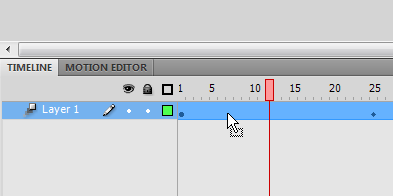
[ click anywhere in the highlighted blue area to select your
tween ]
With your animation now selected, go to Window | Motion
Presets to bring up the Motion Presets panel:
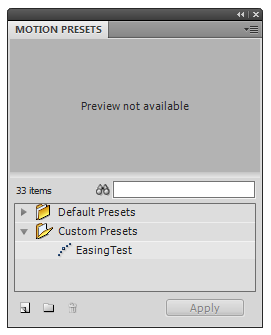
[ your Motion Presets panel contains....motion presets! ]
It is this panel where you can see all of the motion
presets that have been provided for you as well as any
presets that you have created. Towards the bottom left of
that panel, you will see a small button with an image of
what looks like sticky notes being peeled back. This button
will allow you to save your animation as a preset, so go
ahead and click on it:
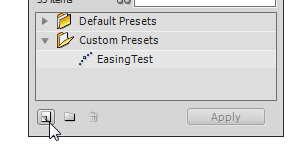
[ click on the Save button to save your tween as a preset ]
Once you have clicked on the save preset button, a dialog
will appear asking you what you want to name your preset as:
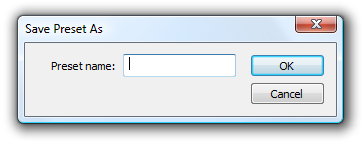
Give your preset the name Ease and Slide
and click OK. Your Save Preset As dialog will disappear, and
you will see your Ease and Slide motion preset appear in the
Motion Presets panel in the Custom Presets folder:
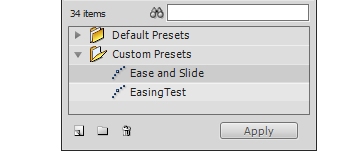
[ your newly saved preset will now appear in the Custom
Presets folder ]
Great. You now have a custom motion preset saved. In the
next page, let's look at how to apply this motion preset to
a new object in an entirely new project.
Onwards to the
next page!
|


