by
Pasquale D'Silva aka darkmotion | 22 May 2007
Vector Illustration is often quite hard to wrap ye
old noggin around sometimes - especially for beginners.
While most Illustrators tend to use the larger more
orthodox illustration applications such as Adobe
Illustrator and Freehand , I choose to use Flash because
of its simple, and animation friendly drawing tools. I
plan to write a few of these, but first I want to lay
down the basics before I even write about shading and
tone, so yeaaaaaaaah!
In this walkthrough, I will explain how to create the
following image:
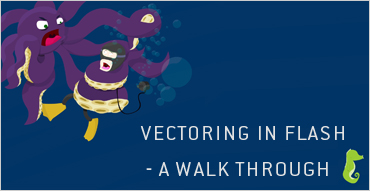
Of course, everything that appears within this tutorial
can easily be accomplished using alternative packages - I
will walk through my general work flow for the sake of the
tutorial, and be covering the process used to create the
illustration above.
Ok enough jibber jabbering. For this tutorial, all you will
need is Flash, and a drawing to work from. I recommend a
scanned rough, or something sketched up in Photoshop or
Alias Sketchbook (what I usually use). I will mention that a
drawing tablet is definitely desirable in order to achieve
accurate line work, and also make the process quicker
(tablets are ninja quick):

Before you even pop open Flash you should always rough out
the concept first. Even if it is simple blocks and elements
to establish the composition. The more messing around you do
at the start determines how much tweaking and tedious
refinements you will need to apply to your final product:
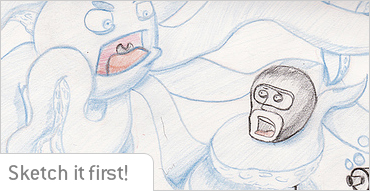
Often, I will really loosely draw elements a few times
until I get the general feel of them, and start layering the
roughs on top of each other until I have a nice and balanced
form. In the octopus sketch above, it is a little more
detailed than I usually would attack a drawing, because it
was being used for a project. Nevertheless, if you detail
your image in the beginning, it means you will not have to
worry about adding and touching your vectored line work when
colouring and shading.
Ok, now you can pop open Flash!
- Create a new document and set it to something nice
and big (1280�1024 pixels is a good start).
- Create a new layer and add your rough sketch to it.
Scale it so it fits the size of the stage fairly well.
Set the layer to guide mode, and lock it.
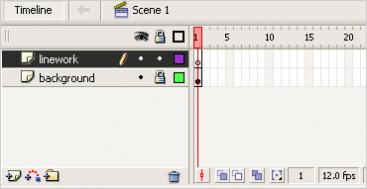
- Again, create a layer, but this time add it above
the first and create a blank keyframe.
You should now have a layer configuration which looks
something like the below picture:
Sweet. Now that you are all setup, grab the line tool (
Shortcut is �N�) and set it to a colour that is completely
different to the original line. I usually sketch in blue
animator�s pencil, so I use red to make it easy to
distinguish the vector lines from the rough. A line stroke
of 1 pixel works great - so stick to that width.
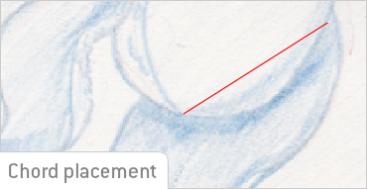
As far as the lining technique goes, it is fairly straight
forward. Grab the line tool, and create a chord across a
small span on the curve (if you aim for something too big
you will miss the contour):
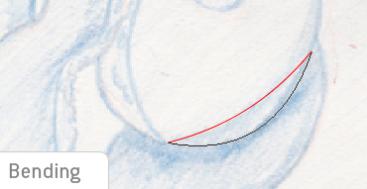
After the chord is established, grab the arrow tool (or
hit �V�), and bend the chord until it matches the shape of
the curve. It takes a lot of practice to get the knack of
it, but once you do, you will be able to vectorize almost
anything:
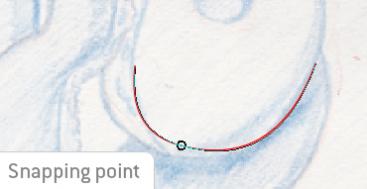
Now that you have a segment of a curve, all you have to
do is keep adding more segments onto the end until you have
a nice sweeping line. You might also notice that if you drag
the vertex of the line around, there will be a snapping
point. That is the point of infliction between two curves,
and in doing so, it removes any sharp connections between
segments:
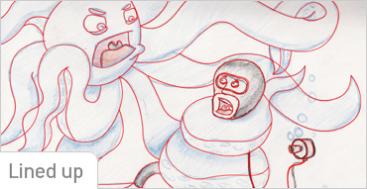
This is what I ended up with after vectoring my original
line work:
This bit is really for you to get experimental with. I often
just choose whatever �feels� right and tweak and adjust from
there:

Fill in your main colours with the fill tool, and work
out something that compliments the group of colours in the
scene. With my vector style, I usually shade on a
layer above and then merge it back down, then erase all line
work.
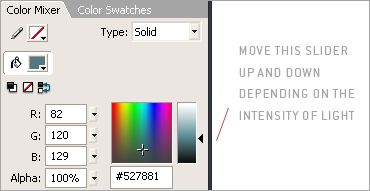
Shading is simply a matter of sampling the base colour
and moving above and below the midtones. The harsher the
lighting, the further the way you should deviate from the
tones. To avoid major stepping, two tone shadowing and
highlighting is a great way to break the harsh tonal
divisions up. Consider the direction of the light source,
and project the shadows in the opposite direction, whilst
keeping the closet face to the source highlighted. The
easiest method to select tonal values is to move the
brightness slider up and down whilst the relevant midtone is
selected. This will prevent any wacky tinting going on with
shading:
After the colouring is sorted out, detail can be added. I
added in suckers to the octopus and a few bubbles and and
things to make the composition more diverse. I added some
foreground and background elements into the composition by
duplicating some bubbles and varying the sizes to balance
the frame.
Everyone has their own unique style, so keep playing around
with ideas until you hit something nice. A vector piece is
only as strong as the concept behind it, and your own
boundaries. Pretty much anything is possible with vector
art, you just have to have the patience and skill (after
practice) to be able to translate thoughts into �art�.
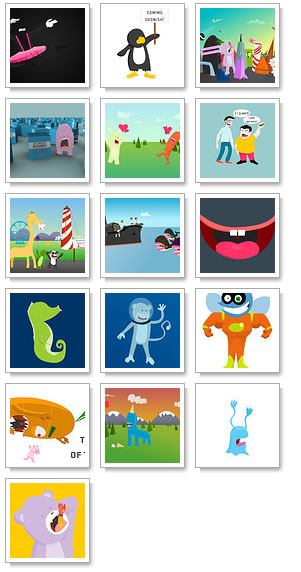
Here is a bunch of illustrations I have done using the
above approach (click on the following image to see them in
detail):
Well I guess that concludes the first of many guides I
guess I will pop out of me from time to time. I hope it
gives you a general insight into the work flow that I
follow.
If you have any questions, feel free to
email me,
post a
comment, or find me on the
kirupa forums.
|


