|
by
kirupa | 22 January 2008
In the
previous page, you further refined what gets
displayed in our listbox by creating a data
template, but what we want to do now is change how the
items inside our listbox display.
Your Create Data Template window should still be
visible. In the previous page, we primarily looked
each node and the checkbox associated with whether
something gets displayed or not.
This time, look to the right of the node name
where you see the control that will be used
to the display the value stored by that node. Let's
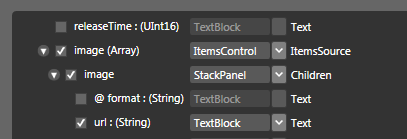
make a change. Currently, our album image's URL is
displayed in a TextBlock control:
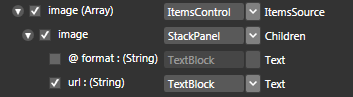
[ our album's image URL is displayed as text in a
TextBlock ]
What we really want is for our image URL, which
is the actual path to the image file, to be
passed in to an Image control. Click on the control drop-down menu next to
your url : (String)
value and select the Image control as shown below:
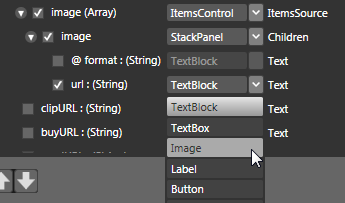
[ select the Image control for your image's URL
value ]
Once you have selected the Image control, notice
that your Preview pane now displays what used to be
URLs with the actual image itself:
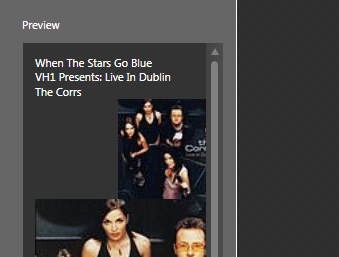
[ success - what used to be text is now an image ]
Press OK to accept this change and to close your
Create Data Template window. You will be
returned to your main artboard, and your listbox will now
look like the following image:
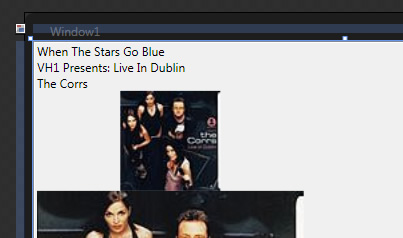
[ what your listbox now displays ]
We've made quite a bit of progress so far. You
went from seeing a large collection of random data
to something more filtered. Beyond that, you also
took a default control Blend assigned to a data
field and changed it to something more specific such
as changing our Textblock to Image.
There is one thing that seems odd about what you
see on the screen though. If you recall, earlier in the
Create Data Template window, you checked one
instance of the image and it's URL:
[ it seems like only one image node has been
selected ]
Yet, what you see on the design surface is
distinctly two images. That seems like an error, but
as you will see on the
next page, that is
actually by design and consistent with what you saw
(but may not have noticed) in the Create Data
Template window.
Onwards to the
next page.
|


